This article was co-authored by wikiHow Staff. Our trained team of editors and researchers validate articles for accuracy and comprehensiveness. wikiHow's Content Management Team carefully monitors the work from our editorial staff to ensure that each article is backed by trusted research and meets our high quality standards.
There are 7 references cited in this article, which can be found at the bottom of the page.
This article has been viewed 34,052 times.
Learn more...
Luggage wheels provide a convenient and easy way to navigate an airport quickly without having to carry your bags around. Unfortunately, because the wheels are exposed they can often take a beating throughout your journey and easily become damaged or break.[1] Luckily, if you take a few precautions and incorporate some best practices, you can protect and extend the life of your luggage wheels for future trips!
Steps
Covering Luggage Wheels
-
1Purchase rubber or plastic wheel covers for your suitcase. While these do not protect the entire wheel, they offer additional support and will protect the wheels from most dings and scrapes.
- Basically, the wheel covers slip on over your existing wheels and screw into the bottom of your luggage. The top portion of the wheel is still exposed, while the back and sides are protected.
- Though these are difficult to find in stores, they are readily available from a number of online retailers.
-
2Buy an effective and stylish bag protector. You can find these at any luggage shop and most department stores. Some of these cover the wheels, while others don’t. Make sure to check before purchasing.[2]
- Many protectors will have prints or vibrant colors to make your luggage stand out and easier to find at baggage claim.
- Protectors also carry the added bonus of keeping your whole bag free from dirt and scuff marks!
Advertisement -
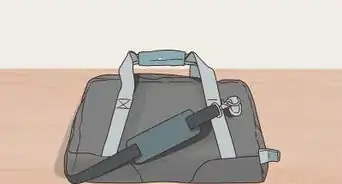
3Make your own luggage protector! If you have a large cloth laundry bag or canvas sack at home, you can use it as a luggage protector on your next trip. Simply place your luggage inside before getting to the check-in desk, close it up, and attach a tag to the outside to make it identifiable at pick-up.
- It may not be as stylish, but it will keep your wheels safe from most damage throughout your flight.


Putting Less Strain on Your Wheels
-
1Pack your luggage lightly and evenly. To keep excess weight off the luggage wheels it is best not to overpack your suitcase and distribute the contents evenly. [3]
- Avoid packing heavy or awkward items in your suitcase. Many places such as gift shops will ship your items to your home so you don’t have to pack them for the journey home!
-
2Ship your bag to your destination when possible. Shipping your bags is not as expensive as you might think (and can be cheaper if you are paying to check your bags with the airline) and items are generally handled with more care.[4]
- Don’t forget to add insurance to your shipment and tell the clerk that the contents are fragile!
-
3Carry your luggage over rough surfaces. Your wheels can take a beating on gravel, dirt, and potholes. If you lift your bag over these surfaces, you can extend the life of your luggage wheels.


Replacing Old or Flimsy Luggage Wheels
-
1Find out if the wheels can be replaced. While replacing wheels on most luggage should be no problem, sometimes the design of the bag will not make removing the wheels possible.[5]
- Take a look at your bag: most wheels will be able to be removed with a screwdriver or an allen wrench.
-
2Determine the kind of replacement wheels you need. The two basic types of wheels are recessed and spinners, each have many options in terms of inexpensive replacements.[6]
- In general, if you have two wheels they are recessed and if you have four wheels they are spinners.[7]
- The best kind of replacement wheels are made of polyurethane, a tough plastic used for skateboard and rollerblade wheels, which allows the wheels to roll over most surfaces without locking up or getting stuck in cracks.
- Be sure to measure your existing wheels and purchase the right size replacements.[8]
-
3Remove the old wheels from your luggage. It is a great idea to have a plastic bag or bowl handy for the screws and washers so they don’t get lost. [9]
-
4Attach the new wheels carefully. Place the new wheel into the wheel slot and put the washers and screws back in place. Tighten the screws well and you are ready to roll!


References
- ↑ https://www.huffingtonpost.com/george-hobica/why-you-should-buy-a-four_b_1115011.html
- ↑ https://www.independent.co.uk/travel/news-and-advice/suitcase-indestructible-airline-baggage-expert-luggage-wheels-damage-a7863681.html
- ↑ https://www.wisebread.com/9-ways-to-protect-your-luggage-on-your-next-trip
- ↑ https://www.smartertravel.com/2013/01/27/7-ways-to-protect-your-luggage/
- ↑ http://www.dropinskate.com/luggage-wheels/
- ↑ https://www.independent.co.uk/travel/news-and-advice/suitcase-indestructible-airline-baggage-expert-luggage-wheels-damage-a7863681.html
- ↑ http://www.top-travel-tips.com/luggage-wheels.html
- ↑ http://www.top-travel-tips.com/luggage-wheels.html
- ↑ https://www.inlineskates.com/Using-Inline-Skate-Wheels-for-Luggage-Wheel-Replacement/blog-5-23-14,default,pg.html
About This Article