This article was co-authored by wikiHow staff writer, Nicole Levine, MFA. Nicole Levine is a Technology Writer and Editor for wikiHow. She has more than 20 years of experience creating technical documentation and leading support teams at major web hosting and software companies. Nicole also holds an MFA in Creative Writing from Portland State University and teaches composition, fiction-writing, and zine-making at various institutions.
This article has been viewed 3,894 times.
Learn more...
Cross-listing your Poshmark items to Facebook Marketplace is a great way to give your items more exposure. When you use a cross-listing service, you can painlessly list items from your Poshmark closet without copying and pasting details into new Marketplace listings. You also won't have to worry about duplicate sales, as cross-listing services automatically delist sold items from other platforms. This wikiHow article will teach you how to cross-list Poshmark items to Facebook Marketplace using ResellKit and Vendoo—two simple services with free options that support multiple marketplaces.
Steps
Using ResellKit
-
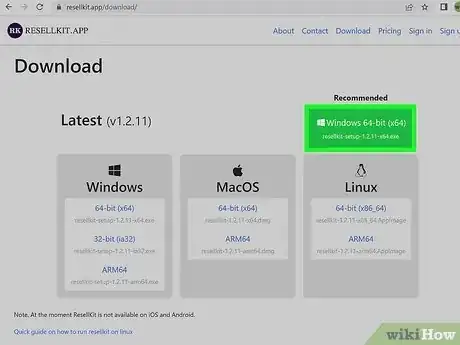
1Install ResellKit on your PC or Mac. ResellKit is a free cross-listing app for Windows, macOS, and Linux that lets you cross-list your Poshmark items to Facebook Marketplace, Mercari, eBay, and Depop. Download ResellKit from https://resellkit.app/download.
- ResellKit gives you 50 free cross-listings per month, with the option to purchase credits for additional listings as needed.[1] While ResellKit doesn't have as many features as paid providers, the 50 free credits are great for the casual seller.
- ResellKit's Autopilot feature helps you avoid duplicate sales. This feature is free, but requires you to leave the ResellKit app running on your computer. If you aren't able to keep your computer running at all times, you can manually delist sold items on the non-selling platform, or try Vendoo, which has a paid automatic delist option.
-
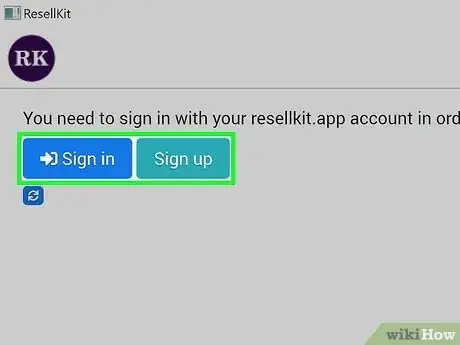
2Sign in to the ResellKit app. Now that the app is installed, you can launch it and click Register to create an account. Once your account is ready, log in to ResellKit with your new username and password.Advertisement
-
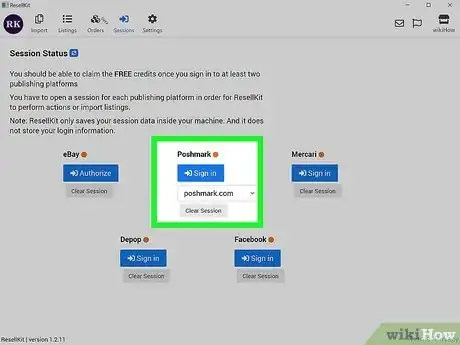
3Connect Poshmark to ResellKit. Click the blue Login button under "Poshmark," then log in with your Poshmark username and password. Once you're signed in, you'll return to the ResellKit home screen and see "Logged in with (your Poshmark username)."
-
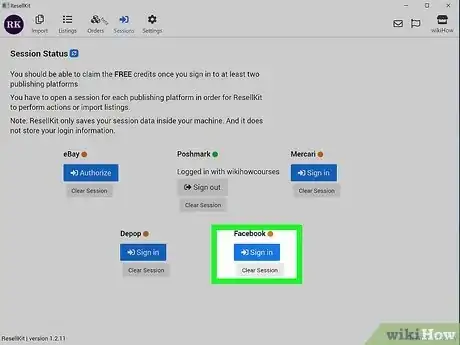
4Connect Facebook to ResellKit. Just as you did with Poshmark, click Login and sign in with your Facebook account.
-
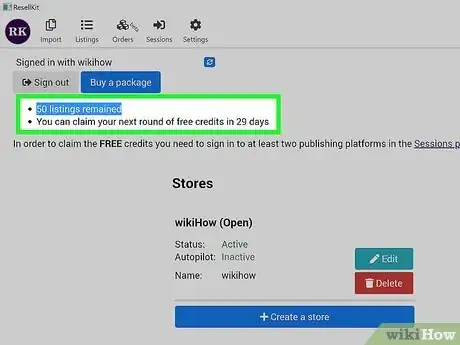
5Click the Claim Credits button. It's in the upper-left area of the app. This gives you 50 credits, which translates to 50 listings you can cross-list from Poshmark to Facebook Marketplace.
- If you need to cross-list more items, you can click the Buy a package button at the top-left to select from one of the credit options. Each credit you purchase gives you one cross-listing, and your credits will never expire.
- There are no subscription fees for ResellKit—if you choose to spend money, you'll only need to buy credits as needed.
-
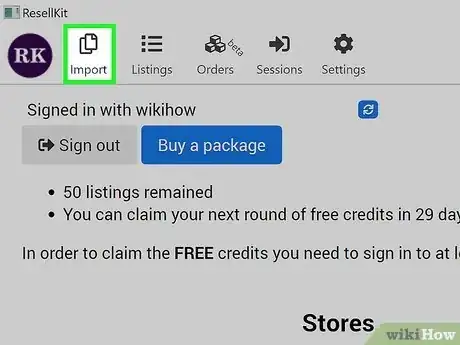
6Click the Import icon. You'll see it at the top-left corner of the app.
-
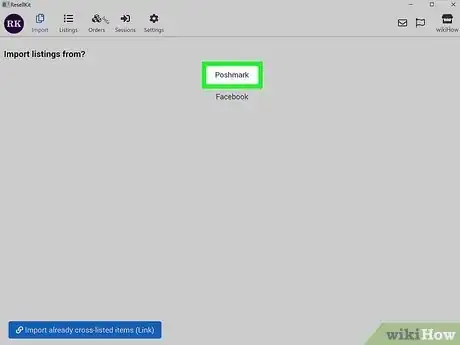
7Click Poshmark under "Import listings from?" This sets Poshmark as the destination and displays options for places you can cross-list your items.
- Any services you've signed in to will appear on these lists.
-
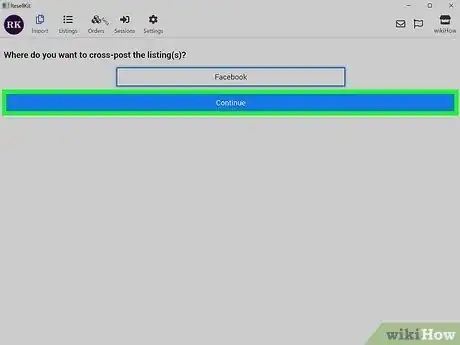
8Select Facebook and click Continue. This imports all of your active Poshmark listings into ResellKit. After a few moments, your listings will appear.
-
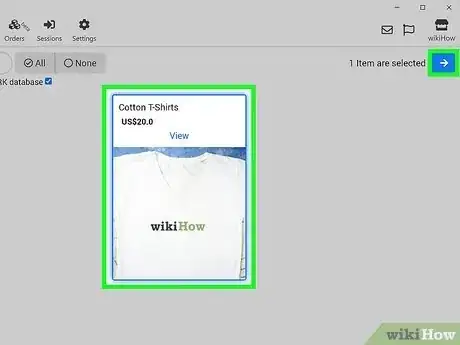
9Select your listings and click the blue arrow to continue. You can cross-list up to 50 listings now for free. Once you've selected the items you want to list on Marketplace, click the blue arrow at the top-right to import your listings and create your first Marketplace post.
-
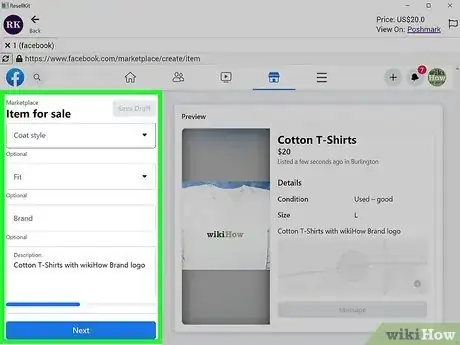
10Fill out the details of your listing. ResellKit tries to fill in as many of the fields as possible based on the information in your Poshmark listing, including the photos and title. Go through all of the fields and make sure everything is filled out to your liking.
- You can click Settings at the top of the screen to customize some aspects of cross-listing, such as including the remainder of the title at the beginning of the description if it's too long.
-
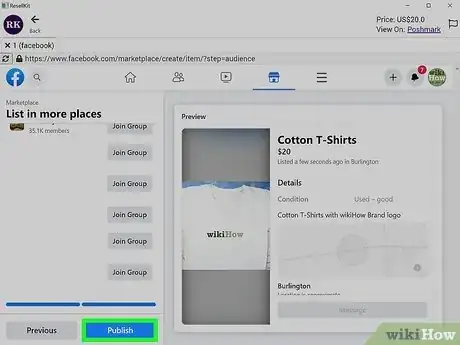
11Click Publish to create your Facebook Marketplace listing. This adds the first Poshmark item you selected to Facebook Marketplace.[2] If you selected more than one item from Poshmark, you'll be taken to another new Facebook Marketplace post with the details from the next Poshmark item already filled in.
- Repeat these steps until you've listed all of the items you want to list on Facebook.
- Click the Listings tab at the top of the window, then select Published to see all of your active cross-posted listings.
-
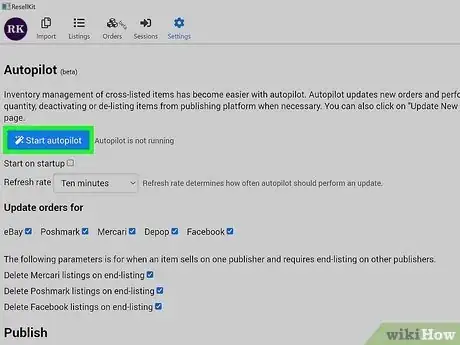
12Use Autopilot to monitor your listings for sales. Now that you have at least one cross-posted item, you can activate Autopilot to monitor your sales. If Autopilot finds that your product sells on either Poshmark or Facebook Marketplace, it will instantly delist the item from the other platform.
- Click Settings at the top.
- Click Start autopilot.
- By default, Autopilot will check every 10 minutes to see if the product sells on either platform. You can change the frequency to 15 minutes, 20 minutes, or 1 hour if you'd like.
- To make Autopilot launch automatically each time you run ResellKit, check the box next to "Start on startup."
- Make sure to leave your computer on while Autopilot is running, and don't disconnect from the internet. If your computer goes to sleep automatically after being idle for some time, you'll want to disable sleep mode.
Using Vendoo
-
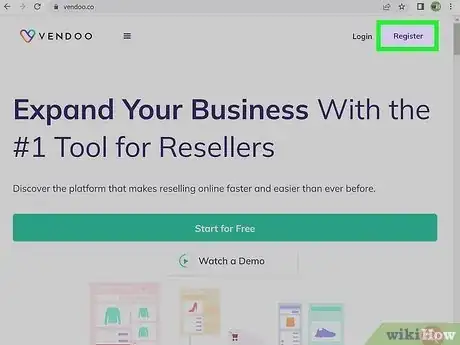
1Go to https://www.vendoo.co and create an account. Vendoo is a cross-listing platform that makes it easy to list your Poshmark items on 9 other marketplaces, including Facebook Marketplace.[3] Vendoo requires a Chromium-based browser like Google Chrome or Microsoft Edge, as you'll need to install their Chrome extension. To create an account, click Start for Free, and then fill out the form.
- The free plan lets you cross-list 5 items for free each month, and you can sign up for a subscription if you'd like to list more.
- While Vendoo doesn't have as many free features as ResellKit, a paid upgrade could be worth the cost if you want sold items to automatically delist from the other platform. For example, if your product sells on Poshmark, Vendoo's Relist & Delist add-on will automatically delist the sold item from Marketplace (without requiring you to leave your computer on).[4]
-
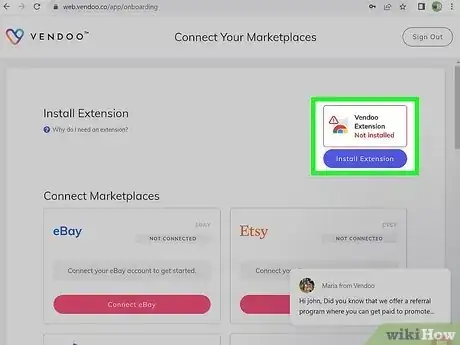
2Install the Chrome extension. After creating an account, click Install Extension on the upper-right corner of the page to install Vendoo's extension. The extension makes it possible for Vendoo to manage your listings without you having to provide Vendoo your Poshmark or Facebook passwords.
-
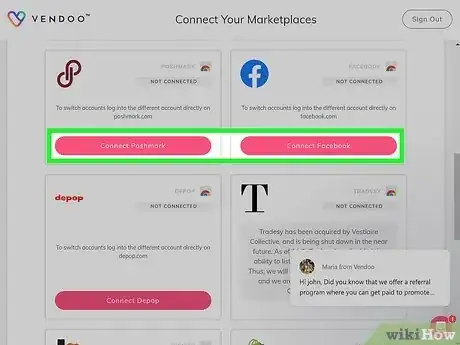
3Connect your marketplaces. Click Connect Poshmark to log in to your Poshmark account, then click Connect Facebook to log in to Facebook. Once the two platforms are connected, you'll be able to cross-post listings between the two.
-
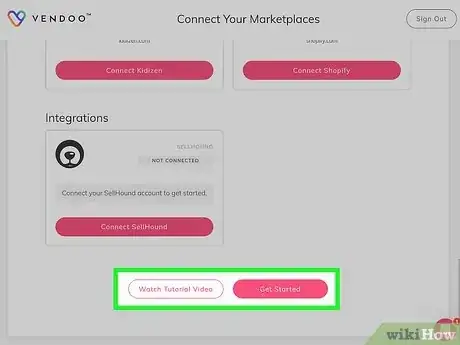
4Click Next at the bottom. You'll have to scroll down to find it.
- After clicking next, you'll see an optional questionnaire. Fill out the questionnaire or click Skip to continue.
-
5Check out the tutorials. To continue, you'll need to click at least one of Vendoo's tutorials. After you review at least one tutorial, you can check out the others in the left panel, and then click Start Using Vendoo when you're finished.
-
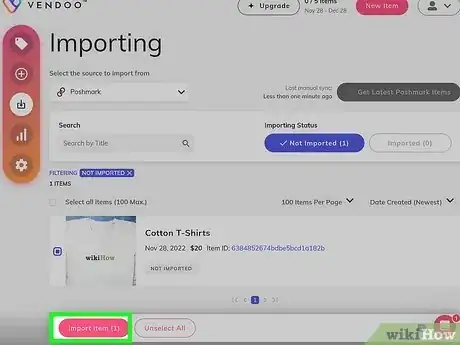
6Import your Poshmark item(s). Once you're at your inventory screen, click the icon of a downward-pointing arrow on a square in the left panel to open the import tool, then follow these steps:
- Review the tutorial screens and click Next on each.
- Click Get Latest Poshmark Items to display your active Poshmark listings.
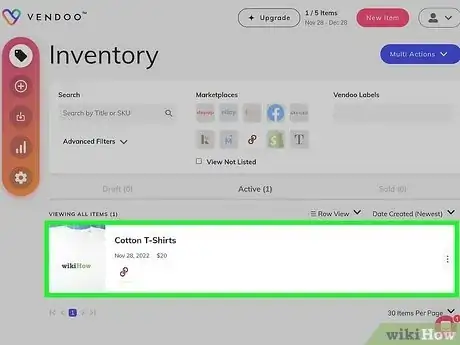
- Check the boxes next to the items you want to cross-list, and they'll instantly import you’re your Vendoo inventory.[5]
-
7Select an item from your inventory. This takes you to the Vendoo form.
-
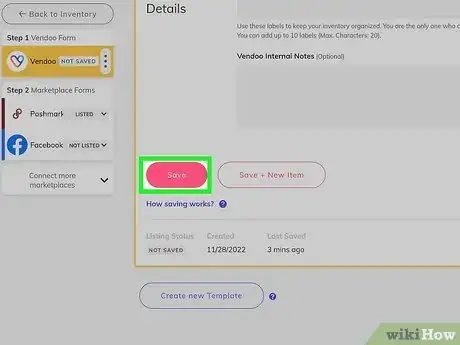
8Look over your listing details and click Save. Double-check everything in your listing to make sure it matches what you've entered for that listing in Poshmark. Vendoo will attempt to collect as much information as possible from your Poshmark listing, but you might have to make additions or corrections.
-
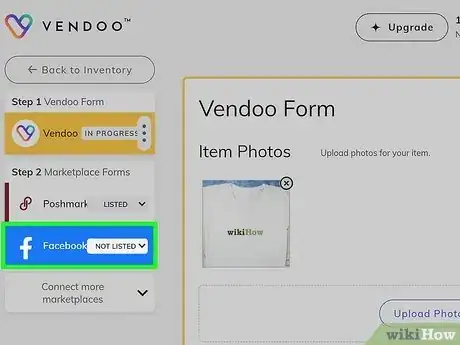
9Click the Facebook form. You'll see it in the left panel of the Vendoo form.
-
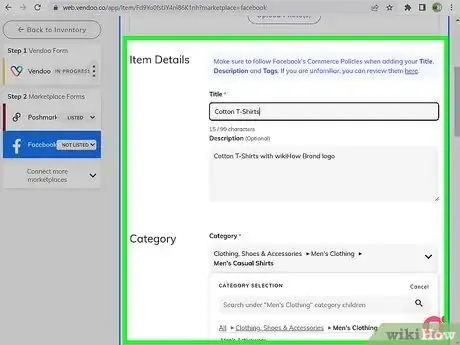
10Fill out the Facebook form. Vendoo will import as much information from your Poshmark listing as possible, including the photos, but you'll still have to enter a few additional details that are required by Facebook Marketplace, such as whether you want to allow offers.[6]
-
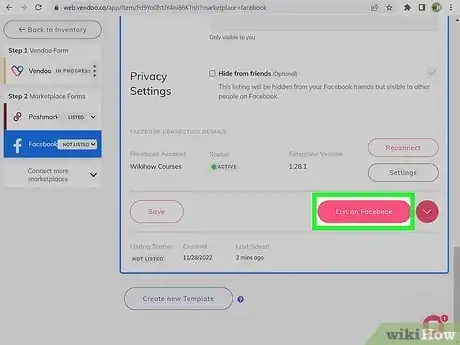
11Click List on Facebook. Vendoo then creates your listing and displays a preview before posting it to Facebook.
- If you want to post the items to any buy/sell groups you participate in, you can select those groups on the left panel.
-
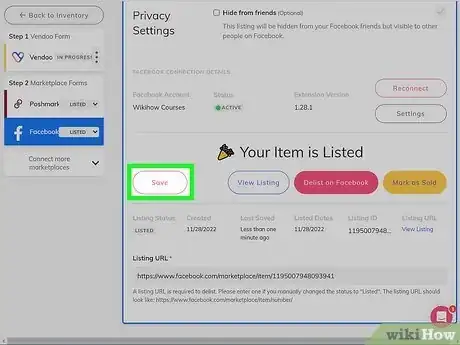
12Click Publish. Your sale is now live on Facebook Marketplace.
- If you want Vendoo to automatically delist sold items from either platform, you'll need to subscribe to their Relist & Delist add-on subscription. Just click Upgrade at the top of Vendoo to choose this add-on, as well as any other paid features you want to add.
References
About This Article
1. To cross-list items from Poshmark to Facebook Marketplace, you'll need to use a cross-listing service.
2. Many cross-listing services exist, but few have free options.
3. ResellKit gives you 50 free listings per month, while Vendoo give you 5 free listings per month.
4. ResellKit automatically delists sold items from the other platform as long as you leave the app running at all times.
5. Vendoo's paid upgrade automatically delists sold items automatically and requires no app to be running.
6. ResellKit doesn't have a subscription option, but you can purchase additional credits for more listings.
7. Vendoo offers paid subscription options that vary depending on how many items you want to cross-list.
