wikiHow is a “wiki,” similar to Wikipedia, which means that many of our articles are co-written by multiple authors. To create this article, 82 people, some anonymous, worked to edit and improve it over time.
This article has been viewed 472,872 times.
Learn more...
Spies; the French agents of Team Fortress 2. Spies play the role of support by whisking away and gathering background information. Not only serving as the men of espionage, they can quietly vanish and disguise as one of the enemies, trick them, then backstab them for an instant kill. If compromised, he can take out his deadly accurate Revolver and shoot them down. And to top it off, Spies can disable Engineer buildables using sappers, lure the original Engineer, and kill him.
Steps
-
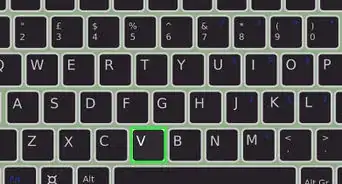
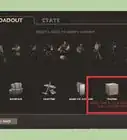
1Look at your equipment: Every Spy has a deadly and accurate 6/24 Revolver (Primary), the class based Sapper (Secondary) and a deadly Knife (Melee). He doesn't skimp on utility either, possessing the Invisibility Watch to cloak himself, (Secondary Fire on any weapon) and the Disguise Kit, which allows yourself to pretend to be on the opposite team (4).
-
2Understand the nature of disguising: There are several points to consider when attempting to disguise.
- One of the major improvements for Spies in TF2 is the effect of movement speed on the Spy, depending on your current disguise. For example, you will slow down to a Heavy's movement speed while disguised as a Heavy.
- Keep in mind that you will not speed up to a Scout's or Medic's speed (although the Medic's speed is not much different from your speed.)
- Make sure that your disguise makes some sense. You probably wouldn't find a Scout running down to your own intelligence room, just as you wouldn't find a Pyro defending in the water, or a Sniper charging the front lines. The general idea here is that you want to blend in with the other team as much as possible, so don't do things that they wouldn't do otherwise. Also try not to disguise as an enemy Spy because most enemies go crazy when they see a Spy, theirs or the enemy's, and instantly attack them. Also, try to stay away from your team mates; when the enemy sees you close to your team mates without you shooting at them or vice versa, they will get suspicious.
- Remember that enemy Medics can heal you when you are disguised. Your health will match that of the person you're disguising as, so you will often appear to need a heal. Calling for a Medic while disguised can often give you an excuse to retreat into the enemy base, which is particularly useful with the Dead Ringer.
- Enemy Engineer dispensers will also heal you while disguised or cloaked. Level 3 dispensers restore cloak in the Invisibility Watch more quickly than cloak is used, so you can stay invisible near a Level 3 dispenser indefinitely.
- Back in Team Fortress Classic (TFC), a disguised Spy would resemble an enemy player to your teammates, which proved to be very confusing: When disguised in TF2, you will resemble a Spy wearing a "cardboard-cutout mask" of your chosen class, to your teammates. This will help to distinguish you from an actual enemy player.
- Before the Sniper vs. Spy update, the enemy Spy disguise was useless, as it didn't wear a disguise mask. Disguising as a friendly player was the preferred way to approach the front lines. Now, with the update, you will disguise as a disguised Spy, making an enemy Spy disguise much more effective.
Advertisement -
3Don't fall into the trap of "Spy time." The cloak and dagger allows Spies to remain cloaked indefinitely while still, but a bad Spy will use this ability to be invisible the whole game. Use your Invisibility Watch for quick escapes and going through chokepoints, not as your primary method of avoiding detection.
-
4Be deceptive and unpredictable: Players are humans, and will be more careful as you become more successful. Hide somewhere different every time, don't always camp the same place. When you are disguised and an enemy becomes suspicious and starts shooting you, the best thing to do would be to cloak and hide. This is because the Spy's revolver and knife will not do a remarkable amount of damage in direct combat. When safe, disguise as a different class and return to enemy lines.
-
5Understand the nature of your cloak: The cloak, as expected, will render you invisible. It's very useful, yes, but it doesn't make you invincible. Keep these tips in mind when using the cloak.
- You will be partially revealed if you take damage using the cloak and dagger or the vanilla watch. As such, don't run into oncoming fire while cloaked, such as toward a Heavy's minigun. The Dead Ringer will not shimmer when you take damage, and damage will be greatly reduced.
- When you uncloak, you will glow your team's color. That is, if you are on the RED team, you will glow red before fading back into visibility. This happens regardless of whether you are disguised as a red or a blue player, so this will quickly give you away if you are seen removing your cloak.
- Note that you cannot use any of your weapons or reload your revolver when cloaked or uncloaking. You will need to wait a few seconds to uncloak before being able to attack again.
- Remember that you can still bump into enemies while cloaked. This makes running around corners tricky, as you'll probably end up bumping into a player by accident. If you bump into an enemy with the Cloak and Dagger or default watch, your cloak will flicker and briefly reveal you, which has the potential to blow your cover completely. You will still block and be blocked by enemies with the Dead Ringer, but you will not flicker.
- Keep in mind that you will only bump into enemies. You can easily pass through your teammates.
- Uncloaking right behind enemy players is generally a bad idea. Becoming visible takes about two seconds, and in that time someone can easily see you. Furthermore, uncloaking makes a distinct sound, especially with the Dead Ringer, which an aware enemy will notice. Keep in mind decloaking around a corner from your target where you will not be heard.
- Use the Cloak and Dagger for infiltration. The cloak and dagger allows you to regenerate your cloak while you are cloaked and standing still. If you are moving, the cloak will be reduced more quickly than your normal cloak, but when you run out you stay partially cloaked. This makes it much easier to hide in an enemy base and disguise yourself without any trouble. The cloak and dagger makes cloaking a much more powerful weapon because you no longer need to be visible at any point in time during the round. Just be careful that when recharging you stand in a place that you won't get bumped into.
- If you run while you're out of cloak, you will glow your team's color as if you were bumped or uncloaking. However, crouch-walking will allow you to remain fully invisible.
- Use The Dead Ringer when under enemy fire. The Dead Ringer cloaks you when you are dealt damage and shows a death animation to your killer. As such, it is most effective when your team is charging the front line, or you're getting Spy-checked. Even after the fact, you may not be revealed to have the Dead Ringer if you have another Spy on your team. Try not to use it too much though, or you may find yourself still getting Spy-checked after you cloak. Just be warned, when you have the Dead Ringer out and you're not cloaked, it acts as if you are cloaked, so you cannot fire your weapon.
- Find a safe place to uncloak with the Dead Ringer. The Dead Ringer makes a loud crackling sound upon uncloaking, which will instantly reveal you as a Dead Ringer spy. Find a place far away from enemies to uncloak.
- Be particularly careful of Pyros. The Dead Ringer can extinguish flames, but if you use it while under fire from the flamethrower, you will be lit up again.
-
6Stay out of the way of enemy Pyros: In general, Pyros are one of your arch nemesis, since they can burn you and render your cloaking ability completely useless. If you are spotted by a Pyro, it may be in your best interest to cloak and get some cover. Be sure to stay out of the range of his flamethrower.
-
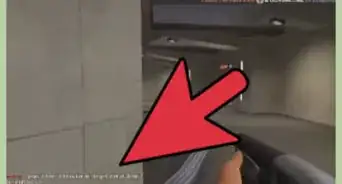
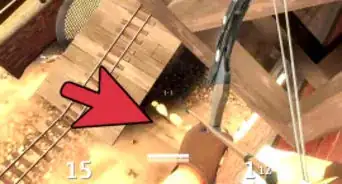
7Backstab your enemies: One of the primary associations made with the Spy is his ability to kill any enemy with one knife strike from behind. When disguised, try to sneak up on an unsuspecting player and stab them in the back.
- Always attack the farthest player in a group. If you manage to sneak behind a group of five players, start from the back and slowly start backstabbing forward, making sure that no one spots you in doing so. This works well when playing a Payload game since all of your enemies should be focused on pushing the payload and killing enemies ahead of it.
- Avoid using the knife as a melee weapon. TF2 has made melee weapons pack a greater punch than the old knife/crowbar from TFC. The knife is excellent at backstabbing, but it comes at a cost. It is the weakest melee weapon in the game when not backstabbing, on par with the Scout's bat, but much slower, and does not deal critical damage. It is generally a good idea to switch to your revolver if you have given up on backstabbing your target. The Spy is not suited to close quarters combat. If you are discovered, cloak, get out of the area, and try again.
- The Sniper class can unlock a secondary item named the Razorback. a wooden shield attached to their back, which makes them immune to one backstab, and a Spy breaking it with his knife will become unable to attack for a few seconds. If you bump into a Razorback-wielding enemy Sniper, simply shoot him in the head instead of using your knife.
-
8Set your target priority: Going for "Personal Glory" and landing four backstabs in a row feels great, but may not be the most beneficial way to help your team. Get behind enemy lines and observe the other team. Do you see well-positioned sentries or teleporters? Does their Heavy wreak havoc to your team, and is he being healed by a Medic about to Ubercharge him? You constantly have to make the decision as to which target you attack first.
-
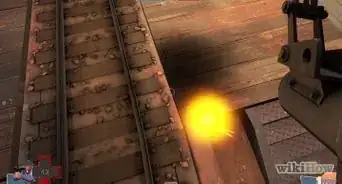
9Understand how your sapper works: Sappers slowly damage an Engineer's buildings (sentry guns, teleporters, and dispensers) and disable them, making them useless unless the Engineer removes the sapper in time.
- Since sappers disable sentry guns. It can help to shoot a sapped sentry with your revolver or stab it with your knife a few times to help destroy it quickly. It will not shoot at you so long as the sapper stays in place. Be careful when doing this with an Engineer attempting to repair it, as you may get killed in doing so.
- With your sapper out and trained on your target object, a white outline of the sapper is displayed on the object. Bear in mind that this is visible not only to you, but to everyone present. Place your sapper and put it away quickly to avoid attention.
- Don't forget that using a sapper will not remove your disguise.
- Like for the other 'weapons', you will need to remove your cloak in order to be able to activate your sapper.
- Enemy sentries are usually target priority, because they tend to cause a lot of destruction on your team.
- Don't sap a dispenser immediately. Sap the sentry in an engineer camp and then let the dispenser refuel your ammo and health supplies. Then, when ready, sap the dispenser.
-
10What to do if discovered: Most of the time, if you are discovered, you are easily killed; however, in some situations you can spy yourself to safety.
- If you are close to your team, or there are not a lot of enemies covering the route to your team, you can just walk backwards while shooting your revolver to safety.
- If you are not on fire, you can attempt to fool your pursuers by running in one direction, cloaking (it doesn't matter if you take a few hits) then running back in the other direction. It is also smart to take on another disguise while cloaked. Usually your pursuers will keep running in the first direction and checking everywhere for the cloaked Spy. This also leaves their backs wide open for a backstab if you are bold enough.
- If you are near an Engineer and his buildings, do not simply sap everything. Typically, an Engineer would have no trouble removing all of these sappers and you will have lost time you could have spent killing the Engineer. It is best to sap a sentry first, kill the Engineer and proceed to sap the rest of his buildings. In rare cases the Engineer can be stabbed first, but the sentry must be sapped quickly after.
-
11Remember your revolver: While it can be tricky to aim, the revolver is still very powerful, and can be devastating if you get a critical hit. Use the revolver as a cleanup weapon in case you see an enemy with low health escaping from a teammate or if you whiff a backstab.
- The Ambassador is the more effective pistol over long range, due to the initial shot being almost perfectly accurate, and able to deal crit damage when you hit headshots; this strength is balanced against poorer body-shot damage, slightly lower accuracy, and a slower fire rate. Choose your pistol according to your play style and map design.
-
12Distract.
- A spy can let the opposing team "accidentally" discover him and lead them away from a battle or into a trap. A quick cloak and the enemy has been led on a wild goose chase. This won't work on all classes like Pyros or Scouts though, so be careful.
- Conversely, enemies in combat don't have opportunities to check their backs. It is often easier to kill enemies in the middle of a fight than to kill them on their way to one.
- Sapping teleporter entrances near the enemy's spawn will slow down their advances and sometimes distract Engineers into leaving their buildings to run back to spawn to build them up.
-
13Sabotage and Thievery.
- With the Dec. 10, '08 patch, a spy can now recharge their cloak with ammo boxes and dropped weapons. Use this to your advantage in enemy territory and strip enemy Engineers of respawning ammo boxes. This will not only slow down their construction but hopefully lead them further away from their buildings and teammates to find more metal. You can take this opportunity to sap or stab accordingly.
- Also with this update a Spy can stay cloaked next to an enemy dispenser and drain its metal slowly.
- Similarly to ammo boxes, stealing health packs in enemy territory can hamper them. This means less health for the enemy team and can lead to people dying sooner, Medics burning to death, etc.
-
14Know how sentry guns work.
- Sentry guns cannot shoot through their own team's dispensers. If an Engineer is positioned in a way that won't allow a Spy to stab and sap quickly, consider stabbing the Engineer, hiding behind his dispenser, disguise, then sap the gun. This is risky as the enemy can see you without a disguise, or their gun can kill you, but this is still an option.
- Sentry guns also spin to target players faster with lower levels. If you backstab an Engineer while he is behind his gun, you can sap lower level sentry guns easier without being shot because they spin to shoot you slower. Level 3 sentry guns are harder to sap in this case because they spin very fast and will push you back with a barrage of their bullets. A Spy can still sap a Level 3 sentry gun, but it must be done with proper positioning and fast weapon switching. Make sure you enable fast weapon switch in the game options to do this, or alternatively use the 'last weapon' button (default: Q) to instantly switch to the last weapon you were holding. You should briefly switch to your sapper before engaging the sentry in order for the 'last weapon' button technique to work.
-
15One way is to crouch jump on top of the sentry without a disguise (using your Eternal Reward) and uncloak: the sentry takes a while to look up at you and shoot.
- The Spy Update has given the spy more options for tackling sentries. Due to the greater accuracy and firepower of the Ambassador over a long distance when aiming at an enemy's head, the weapon can effectively disable a turtling engineer outside of a sentry's range of fire, or from behind cover.
- You can do a similar strategy with this using walls, boxes, posts, ramps, etc. Out of sight of the sentry gun generally means safety.
-
16Know where to hide. Players tend to take the shortest routes and generally don't stray from this path, especially if their destination is far away.
- For example, players will take the inside corner of a hallway. As a spy you can travel or hide on the outside corners of these hallways and see enemy traffic and pick your targets accordingly.
- Hiding on boxes, on top of objects on the wall, etc. makes it much less likely to be bumped into while cloaked or shown with enemy fire, explosions, etc.
- Hide behind boxes, walls, around corners or places with respawning ammo boxes to keep your cloak up. Players don't usually check all corners so you can be relatively safe if you weren't spotted or suspected of being there.
-
17Know your watches: The Spy will start with his basic Invisibility Watch, rendering him completely cloaked. This watch can be used to run the length of the 2fort bridge, without stopping. The cloak and dagger allows you to cloak for an infinite amount of time as the cloak with regenerate while stationary. The Dead Ringer does not allow you to cloak until you get hit with it selected (MOUSE2), thus creating a fake "corpse" and cloaking you for a limited time. When the timer runs out or you uncloak, the watch will emit a loud noise, possibly alerting people near by.


Community Q&A
-
QuestionHow do I avoid spycheck?
 Community AnswerTry to remain cloacked and far away from any person who is likely to spycheck you.
 -
QuestionHow do I get behind the enemy team without being discovered?
 Banana HeadTop AnswererEither use a cloak or disguise. If you use the cloak, try not to bump into anyone, and keep an eye on your cloak meter. If you want to try to disguise yourself as an enemy member, make it look realistic. Try to disguise yourself as an engineer heading towards another engineer's buildings, or a medic heading for a heavy. The enemy team won't question situations they see often, but be careful just in case.
 -
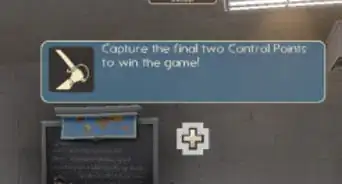
QuestionHow do I change your play style according to game mode, specifically KotH and CP?Banana HeadTop AnswererCertain classes are good for certain modes. A scout would be good for Capture Points and King of the Hill, whereas a medic heavy combo would be better for CTF and destroying sentry nests. Experiment with different play styles and see which one matches you. Snipers are good on KotH and CP maps, since they can camp the control point knowing people will clump there.
Warnings
- Usually the enemy team will do a lot of 'Spy checking'. You should keep cloaked or disguised and out of sight until you go in for the kill. Distracted enemies will not spy-check as much, which will make your job as a Spy a lot easier.⧼thumbs_response⧽
- Use your revolver. Many Spies tend to only backstab their opponents. Remember that as a Spy, you can see enemy health. If they have low health, simply shooting them down works better than chasing them for long distances.⧼thumbs_response⧽
- A backstab might not always work. In some cases, even with perfect opportunities, a backstab will simply not register, but do not let it deter you. Keep trying.⧼thumbs_response⧽
- Experienced players will know to aim a bit lower or higher to get that instant kill shot.⧼thumbs_response⧽
- Expect to die often as a Spy. The Spy is one of the more difficult, if not the most difficult class to master in TF2. You need to be able to analyze and measure the enemy's movement and reception to Spies, which may take a handful of deaths to discern.⧼thumbs_response⧽