X
This article was co-authored by wikiHow Staff. Our trained team of editors and researchers validate articles for accuracy and comprehensiveness. wikiHow's Content Management Team carefully monitors the work from our editorial staff to ensure that each article is backed by trusted research and meets our high quality standards.
This article has been viewed 12,341 times.
Learn more...
Painting your piano can be an easy, cheap way to refresh and restyle your home. With a little patience and some basic tools, you can transform your piano into a stunning, colorful statement piece that can last generations!
Steps
Part 1
Part 1 of 3:
Cleaning and Priming Your Piano
-
1Clean your piano with soap, water, and rags. Even if your piano looks neat, you should take the time and care to clean it.[1] Otherwise, your paint job will trap the grime. Fill a small bowl with soapy water and use a wet rag to gently rub your soapy solution along the surface of the piano. After you finish, wipe the piano with a dry rag. Be sure to clean neglected nooks and crannies.
-
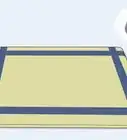
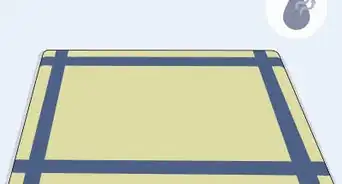
2Protect your piano keys with strips of painter’s tape. Lay strips of painter’s tape horizontally across the piano keys until the keys are completely covered. You can also tape a rectangular sheet of plastic onto the keys to protect them from stray drops of paint. You can also tape plastic around the piano pedals if you cannot remove them.
- Most importantly, the piano keys should be securely and totally covered.
Advertisement -
3Place drop cloths around the piano and above its inner workings. Open the piano and place a drop cloth around and above the inner workings. You want to make sure that the entire inside is covered in plastic. Use strips of painter’s tape to secure the drop cloth.
-
4Place drop cloths on the floor beneath and surrounding the piano. If you're painting the piano indoors, you can also tape tarps to any nearby walls. If you can, move your piano to a garage space to minimize the chance of accidentally painting your walls or floors.
- You can also move the piano outdoors if you have an awning or another structure to protect the piano from rain.
-
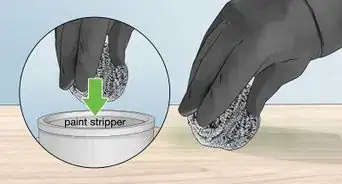
5Use fine grit sandpaper to remove high gloss finish on your piano. If there is leftover high gloss finish on the piano, lightly rub a piece of sandpaper on the piano. Try to use a fine grit sandpaper, like 100 grit medium grade sandpaper. Wipe off the surface with a dry cloth after sanding to thoroughly remove all of the sanding dust.
- Not every piano will need to be sanded. If your piano does not have any high gloss finish left on it, you don't need to sand it down unless you want to alter the finish of the piano. Applying sandpaper can help create a rougher, more rustic finish.[2]
-
6Apply a coat of primer to your piano. Grab one large can of primer. Use your wide paint brush to apply an even coat of the primer to the surface of the piano.[3] If you have any helping hands, grab another brush or two so that multiple people can quickly paint the piano by each tackling several sections. Wait for the primer to dry—it will take at least an hour. In the meantime, put the primer away and wash your brushes.
- Some specialty paints do not require primer. Talk to your hardware store about whether or not you need primer for this project.


Advertisement
Part 2
Part 2 of 3:
Applying Coats of Paint
-
1Choose about two large cans of your preferred paint. For a matte piano, choose a matte or eggshell paint.[4] If you want your piano to be glossier and shiny, use a gloss paint. If you want your piano at a happy medium that's not too shiny and not too matte, go for a semi gloss.
- Glossy paints tend to make imperfections in your piano more obvious. If your piano has sustained any unsightly damage over the years, you can stick to a matte paint to minimize those imperfections.[5]
- For an extra creative project, use chalkboard paint. The chalkboard paint will give your piano a neat, matte look while also enabling you to draw on its surface.[6]
-
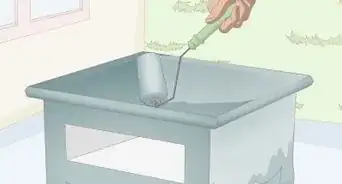
2Use your wide brush to apply even brushstrokes to your piano. This is another step that a small team can tackle: if you have multiple people and brushes, assign everyone a section to paint. If you reach small nooks and crannies that are difficult to paint with a larger brush, use your small brush for this fine detail work. After you're done with the first coat, wait for it to dry.
- If you want to minimize the texture of brushstrokes on your piano, you can purchase a paint sprayer. Using a paint sprayer will ensure that your piano has an even, smooth texture.[7]
-
3Continue to apply coats of paint until you're happy with the results. Depending on the paint you choose, the number of coats you'll need may vary. Plan on applying at least two coats.[8]
- If you decide you want to alter the color a bit, go back to the hardware store and ask them to mix new paint. For instance, if your shade of purple is too blue, you can ask the hardware store to mix more red into your paint.
-
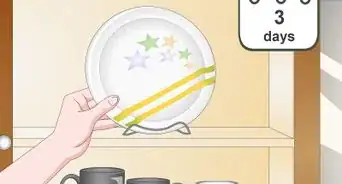
4Wait for your piano to dry. Before waxing, your piano must be dry. If you can, let it dry overnight. If your piano is outside, move it indoors or ensure that it is protected from the weather.


Advertisement
Part 3
Part 3 of 3:
Waxing and Drying Your Piano
-
1Apply wax to your piano with a firm, buffing motion. Use a wax brush or a clean, lint free rag.[9] Dip your brush or rag into your can of wax and apply the wax to the piano in circular, "buffing" motions. Press firmly onto the surface as you apply the wax. Don't be afraid to use some elbow grease!
- Wax also comes in different shades. If you want your piano to be a bit darker, for instance, you can purchase a dark wax to subtly change the color.
-
2Wipe off excess wax to avoid clumping. Using a lint free rag, go back over your waxed piano and wipe off the excess to prevent clumps from forming.[10] Be sure to work quickly so that wax clumps won't harden before you have time to smooth them out! Once your piano is waxed, you're almost done.
-
3Wait for the piano to dry. As your piano dries, you can wash your brushes and store your cans of excess paint and wax.
-
4Break down the work space and enjoy your piano. Remove all of the painter’s tape and plastic from your piano. Now you can show off your new, improved, D-I-Y painted piano!


Advertisement
Things You’ll Need
- Cans of paint
- Can of primer
- Wide brush
- Small, flat brush
- Lint free rags
- Painter's tape
- Plastic drop cloths or tarps
- Wax
- Wax brush
- Sandpaper (optional)


References
- ↑ https://studiodevices.com/how-to-paint-piano/
- ↑ https://jonesdesigncompany.com/decorate/paint-piano/
- ↑ https://www.designmom.com/painted-piano/
- ↑ https://www.westlakehardware.com/frequently-asked-questions/whats-the-difference-between-gloss-semi-gloss-satin-and-flat-what-are-the-best-uses-for-each/
- ↑ https://www.westlakehardware.com/frequently-asked-questions/whats-the-difference-between-gloss-semi-gloss-satin-and-flat-what-are-the-best-uses-for-each/
- ↑ https://www.homestead128.com/paint-piano-4-steps-chalk-paint/
- ↑ https://www.itsalwaysautumn.com/how-to-paint-your-piano-the-easy-way.html
- ↑ https://www.homestead128.com/paint-piano-4-steps-chalk-paint/
- ↑ https://studiodevices.com/how-to-paint-piano/
About This Article

wikiHow Staff
wikiHow Staff Writer
This article was co-authored by wikiHow Staff. Our trained team of editors and researchers validate articles for accuracy and comprehensiveness. wikiHow's Content Management Team carefully monitors the work from our editorial staff to ensure that each article is backed by trusted research and meets our high quality standards. This article has been viewed 12,341 times.
Co-authors: 4
Updated: September 16, 2021
Views: 12,341
Categories: Painting Furniture | Piano
Advertisement