wikiHow is a “wiki,” similar to Wikipedia, which means that many of our articles are co-written by multiple authors. To create this article, 14 people, some anonymous, worked to edit and improve it over time.
This article has been viewed 44,270 times.
Learn more...
It is one thing to learn how to hand milk a cow, it's another to milk a cow using a milking machine. One thing for sure is that it requires less labour to actually milk the cow, but more labour will be involved with ensuring the machine is clean and well-maintained before and after use.
Large dairies use a large, more complex machine that has extensive piping that goes from the milking parlour to a large milk tank. Milking parlours vary in size and shape, ranging from having 8 cows per stanchion to as many as 40 or more. This all depends on the size of the dairy herd; The larger the herd, the bigger the milking parlour.
The smaller dairies, or farms with only one or two milking cows, may use individual milking machines, especially if a herd size is less than 5 or 10 cows. These machines have a tank attached to it with four suckers to attach to the teats. The machine acts almost like a vacuum cleaner because it creates a vacuum on the teats that actively collect the milk.
Basically the method of milking a cow with a milking machine, though, is standard no matter the size of the machine or how many cows it helps you to collect milk from. This is shown in the steps below.
Steps
-
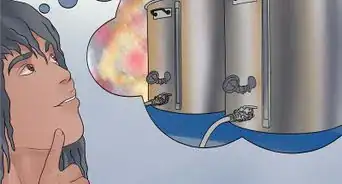
1Check the machine over before use. Regular maintenance and cleaning will keep the machine in good order for a long time. It's very important to make sure the machine is cleaned regularly because raw milk tends to dry and stick to parts and invite dirt and other foreign objects into the different parts of the machine that may end up contaminating the milk.[1]
- Cleaning the machine should be daily or after every use. Maintenance on the machine should be made once a month or less to make sure parts are well oiled or greased, and any repairs that may need to be made are done before things get worse.[2]
- Regular disinfection of the hoses (especially inside), tank, and suction cups is very important. The cups should be covered or placed in a bag where they will not become contaminated or dirty during storage.[3]
-
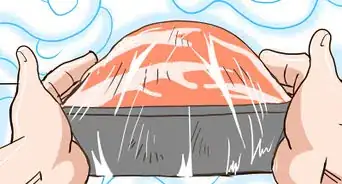
2Attach all tubes and caps to the machine. Make sure all tubes are connected properly; any that are not properly connected (or not connected at all) will not create a vacuum seal. Make sure also the O-ring for the lid is properly in place before attaching the lid. The lid should also be in place properly to create a good seal.Advertisement
-
3Have the cow standing in her stanchion with some feed. If you keep to a regular milking schedule, she will know where to go and how to get in. Just make sure she's happy munching on a flake of hay (or part of a square bale) while being milked.
-
4Clean the udder thoroughly. Using a clean rag or paper towels, clean the teats and lower part of the udder of dirt and debris. As you do so, gently yet firmly, just like if you were hand-milking, squeeze each teat in a downward motion to initiate milk let-down and to dislodge any plugs that may be accumulated at the end of each teat. This may not be necessary if the udder is already so full that the teats are leaking milk. Discard the rag or towel.[4]
-
5Dip the teats with a 70% Iodine solution. Wait for a couple minutes for the solution to dry, then gently dab any excess iodine off from the end of the teat with a clean rag or paper towel. Do not touch the teats afterwards.
-
6Hook up the vacuum line to the vacuum port on the milker and turn on the vacuum pump. If you have a DIY milker (those you can make yourself with proper parts to create a good vacuum pump) that operates from an electrical outlet, plug the pump in then turn it on. If you're running the pump from a little motor then the similar applies as above, to attach the line to the port on the milker before turning on the motor to the pump. Some milkers may need some time to build up the negative pressure needed to begin milking, and to get the pulsator going in the inflations (or suction/teat cups). The pressure should reach around 0.04 kPa before putting the cups on.
- Remember to make sure all connections are secure and attached before turning anything on.
-
7Move the bucket or bucket-milker unit beside the cow next to her rib cage. The bucket, especially if you have one that you are not moving around on the trolley, should be placed on the ground next to the cow. This leaves you room to access the cow's udder more easily.
-
8Grab the claw and hold it under the udder with the milk hose pointed to the front of the claw. This claw is actually a holding unit that collects milk from all four teats (via the suction cups or teat cups) before moving it down a tube into the sealed bucket or container. When you hold the claw under the udder you are ensuring that the cups are going to be put on properly, avoiding it being twisted up during milking.
-
9Open the vacuum to the claw and listen to make sure the pulsator is clicking properly. It should be ticking once every half to three-quarter of a second. Don't listen for too long because you need to maintain pressure to be able to add the teat cups to the cow without them falling off.[5]
-
10Add the teat cups to the teats one at a time. Start from the back, from right to left (if you're on the left side of the cow) then continue in the same manner with the front. Put them on as quickly and smoothly as possible so that the cups won't lose suction. Guide the cups onto the teat with your hand rather than trying to look under the cow to see where they are going to be attached. This will make things quicker and safer for you.
-
11Check to see how and if the milk is flowing into the bucket. If everything is flowing well, then sit back and relax and let the machine do the rest of the work.
-
12Remove the cups when the milk going into the bucket slows to a stop. The easiest way to do this is by kinking the hose to the claw and cups which will allow the cups to fall off immediately.
- With large milk operations machines have automatic systems where each cup will fall off as soon as one quarter of the udder is out of milk. But with single milker units this is not so much of a luxury, so kinking of the hose is one of the easiest ways to remove the cups from the teats.
-
13Turn off the machine and remove the lid from the bucket. Pour the milk into clean buckets or a milk container for storage and later use.
-
14Repeat for other cows.
-
15Clean the machine afterwards. Get a pail of water with a couple cups of cleaning solution (cold water is best), and put the suction cups open end down into the pail, then turn on the machine. The machine will actively suck the water and cleaning solution through the hoses into the bucket, until the pail is empty. Repeat with plain clean water afterwards to wash out any residue chemical.
-
16Store the machine in a warm dry place until next use.


Warnings
- A cow can and will kick without warning when trying to milk, so be careful around them.⧼thumbs_response⧽


References
- ↑ http://www.fao.org/3/T0218E/T0218E02.htm
- ↑ http://www.fao.org/3/T0218E/T0218E02.htm
- ↑ http://www.fao.org/3/T0218E/T0218E03.htm
- ↑ http://www.milkproduction.com/Library/Scientific-articles/Milk--milking/Milking-machine-use-and-maintenance/
- ↑ https://www.youtube.com/watch?v=-2LiVPczCr8
- http://smallholderhollow.com/projects/diy-milking-machine/
- http://www.motherearthnews.com/homesteading-and-livestock/how-to-use-a-bucket-milker-zbcz1408