wikiHow is a “wiki,” similar to Wikipedia, which means that many of our articles are co-written by multiple authors. To create this article, 10 people, some anonymous, worked to edit and improve it over time.
This article has been viewed 37,762 times.
Learn more...
With home heating and cooling costs rising, it is important to make sure that your home is as energy efficient as possible. Drafty doors and windows are a major source of energy loss, creating a need for increased use of home heating and cooling units. However, installing weather stripping around all types of drafty windows and doors is an easy way to help make these areas more energy efficient. Weather stripping can be bought by measured increments or in a kit, and there are many types available to fit every type of crack and crevice. However, measuring it for specific areas is the first step to ensure a perfect fit. Learning how to measure for weather stripping is easy and will save time when you are ready to install it.
Steps
-
1Use a tape measure to measure the door jam, window sash or other area where you plan to install weather stripping.
-
2Take the measurements from corner to corner and around any areas that you want to place the weather stripping. Measure the depth of the crack or crevice, too.Advertisement
-
3Measure the area twice to make sure that you are accurate and write the measurements down for when you shop for weather stripping.
-
4Visit your local home improvement store to purchase weather stripping.
- Determine which type of weather stripping will work best for your specific needs.
-
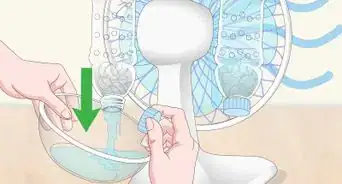
5Weather stripping is made in a variety of materials including vinyl, plastic, rubber and aluminum. It comes in strips, sheets and tubing. The best type to use depends on the location, the condition of the window or door and the size of the crack or crevice.
-
6Choose the weather stripping for your project in a kit or by measured increments.
-
7Purchase sections that are longer than necessary so you have plenty if you need to trim it.
-
8Measure the weather stripping to match the area where you will be installing it.
- Test the weather stripping to see if it fits in the area around the door or window.
-
9Cut the weather stripping using scissors or metal snips to fit once you are positive your measurements are accurate.
-
10Install it, trimming off any excess pieces of weather stripping if any areas are too long to fit properly.


Expert Q&A
-
QuestionHow can you remove old weatherstripping?
 Jacob PischerJacob Pischer is a Home Improvement Specialist and the Owner of Helpful Badger, a home repair service in Portland, OR. With over four years of experience, Jacob specializes in a variety of handyman services including pressure washing, cleaning gutters, repairing drywall, fixing leaky plumbing fixtures, and repairing broken doors. Jacob studied at Madison Area Technical College and has a background in real estate investment.
Home Improvement SpecialistI like to use a putty knife in order to take off the old weatherstripping and make sure that I get all of the tape and all the little pieces because sometimes they were glued in.
Warnings
- If you cut a piece of weather stripping too short to fit the area of installation, start over with a new piece. If you try to put several pieces together, they will not be as efficient as properly measured weather stripping.⧼thumbs_response⧽
- Do not cut your weather stripping to fit until you have checked the accuracy of your measurements. This will help you avoid cutting it too short.⧼thumbs_response⧽
Things You'll Need
- Weather stripping
- Tape measure
- Scissors or metal snips