This article was co-authored by wikiHow staff writer, Eric McClure. Eric McClure is an editing fellow at wikiHow where he has been editing, researching, and creating content since 2019. A former educator and poet, his work has appeared in Carcinogenic Poetry, Shot Glass Journal, Prairie Margins, and The Rusty Nail. His digital chapbook, The Internet, was also published in TL;DR Magazine. He was the winner of the Paul Carroll award for outstanding achievement in creative writing in 2014, and he was a featured reader at the Poetry Foundation’s Open Door Reading Series in 2015. Eric holds a BA in English from the University of Illinois at Chicago, and an MEd in secondary education from DePaul University.
There are 11 references cited in this article, which can be found at the bottom of the page.
This article has been viewed 75,285 times.
Learn more...
A bottom bracket refers to the cylindrical axle assembly that connects your pedal’s crank arms to your bike. Bottom brackets connect to the bike using cups that attach to the threading in the bracket’s shell, which holds the crank arms against the frame of the bike while allowing them to turn smoothly and safely. Bottom brackets are designed to not be tinkered with, and you should only attempt to replace your bottom bracket if you have a strong understanding of how a crankshaft and bracket connect to the bike. If you’re measuring the bracket on your bike, remove the crankshaft and pedal assembly to access this piece, since it’s hidden underneath the crankshaft. If you’re measuring a new bracket, use your calipers to measure the bracket and the shell on the bike to determine what size you have.
Steps
Removing the Crankshaft
-
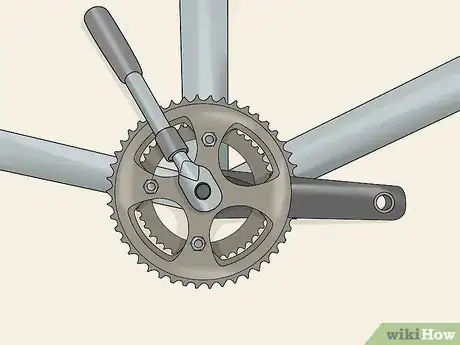
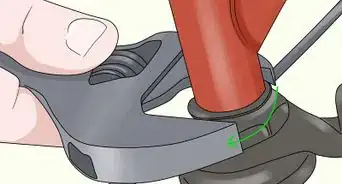
1Unscrew the bolt or nut in the middle of the crankshaft. Flip your bike upside down or put it on a bike stand. Inspect the crankshaft, which is the big gear on one side of your pedals, to find how the pedal is connected to the crank. Get a socket wrench or screwdriver that fits the nut or bolt. Unscrew this piece by turning your tool counterclockwise and set it aside.[1]
- You cannot access or measure a bottom bracket without moving the crankshaft. If you’re measuring a bracket that is not installed on a bike, feel free to skip this section.
- If there is a piece of plastic sitting on top of this nut or bolt, pop it off with a flathead screwdriver. This is the dust cap.
- Hold the pedal arm in place while doing this to keep it from turning.
Tip: If the nut or bolt is embedded in the crank wheel, use a crank extractor tool to reach the nut or bolt. Insert it into the opening and wrap it around the nut or bolt. Then, use a wrench to turn the tool counterclockwise.
-
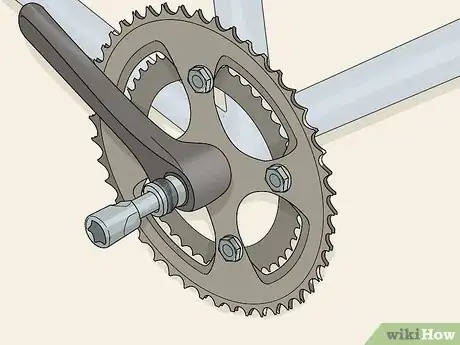
2Screw the crank extractor tool into the bolt in the middle of the crankshaft. Under the first nut or bolt, there will be a bolt locking the crankshaft in place. Using the threaded side of your crank extractor tool, slide your crank extractor into the opening in the crankshaft and turn it clockwise to tighten it in the threading, if necessary.[2]
- On some bikes, the crankshaft won’t have any threading for a crank extractor tool. On these bikes, you can simply push the crank extractor tool into the opening and wrap it around the bolt.
Advertisement -
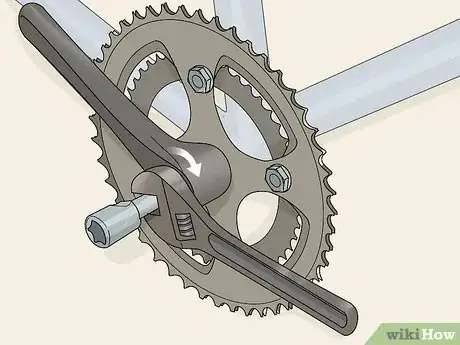
3Tighten the socket on the open end of the crank extractor tool. With the tool attached to the nut inside of the crankshaft, turn the socket at the end of the tool clockwise by hand. Once it won’t move any further, use a wrench to turn it. Hold the pedal in place to keep the crankshaft in place. Continue turning the socket until it won’t move any further.[3]
- The socket should move closer towards the crankshaft as you turn it. If it doesn’t, you’re turning the socket the wrong way.
- Turning this socket effectively pulls the side of the crankshaft off of the axle.
-
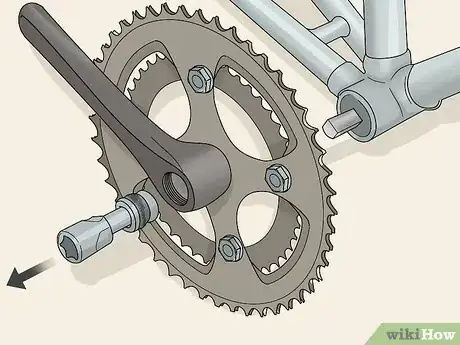
4Slide the crankshaft off of the bottom bracket. Once the pedal in your hand feels loose, simply slide the crank wheel off of the bottom bracket. The crank extractor tool will still be attached to the crankshaft, so turn the socket counterclockwise to remove it. With the crankshaft off, repeat this process on the other side to remove the remaining pedal. [4]
- If the shaft doesn’t slide off immediately, jiggle the crankshaft a little while pulling it out. Crankshafts can stick a little if they haven’t been removed in a long time.
Measuring the Bracket
-
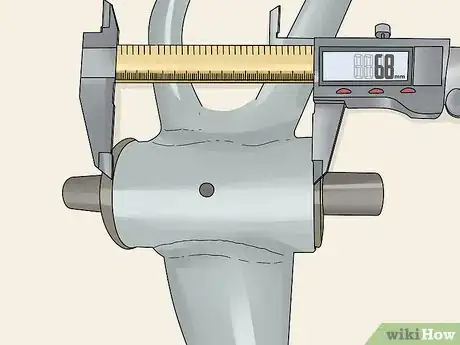
1Measure the width of the bracket’s shell using calipers. Flip the bike over or set it on a bike stand if it isn’t already. Inspect the area near your bike’s crankshaft for a horizontal cylinder that connects to your pedals. This is the shell for your bottom bracket. Spread the jaws on your calipers out and slide them around the openings on each side of the shell. Slide the movable jaw on the calipers so that they’re flush against the 2 openings of the shell. Measure your width and write down.[5]
- Bottom bracket measurements are always taken in millimeters. The most common sizes for the width of the shell are 68 mm and 73 mm.
- You can use a ruler instead of calipers if you prefer. It’s easier to get a precise measurement with calipers, though. To use your calipers, slide the jaws sticking out of the ruler until they’re flush against 2 surfaces. The number above the hash mark on the movable jaw is your measurement.
- You can do this with the bracket installed on the bike or measure the bracket separately. You still need to measure a bracket’s bike shell though—not the bracket itself—to determine whether a bracket will fit or not.
Tip: Bottom bracket measurements are kind of confusing. For bracket dimensions, the first number is always the width of the shell. The second number is always the length of the bracket itself from spindle to spindle.
-
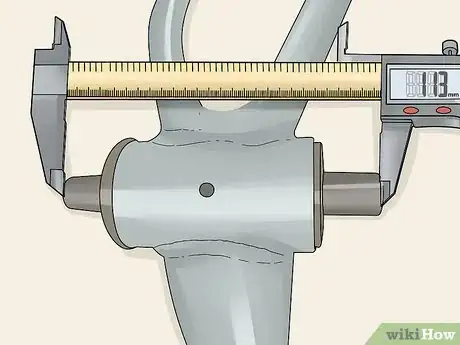
2Calculate the length of the bracket from spindle to spindle. Spread the jaws of your calipers out. Wrap them around the pegs that stick out of the middle of the bracket. Close the jaws so that they’re flush with each exterior edge on your pegs. Write this measurement down after the width. This is the overall length of your bottom bracket.[6]
- The length typically ranges from 113-122 mm.
- If you’re replacing a bottom bracket, the length of your new bracket must match the length of your old bracket. If you’re replacing the bracket and the pedals though, your bottom bracket’s length must match the required bracket length of your new pedals.
- The spindles are the little pegs that stick out of the bottom bracket on both sides. You can do this with the bracket installed on the bike, or measure it separately.
- If your spindles aren’t circular and have flat sides on them, you have a square-tapered bracket. This is the most common fitting type for bottom brackets and is found on basically every bicycle that isn’t vintage or custom-made.
-
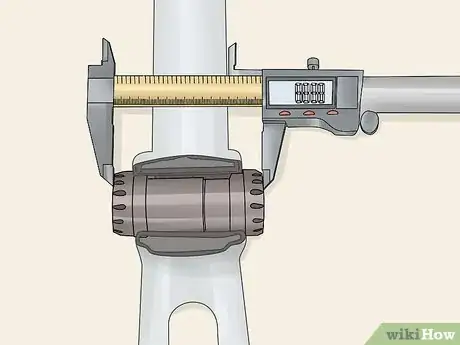
3Check the length from edge to edge if you don’t have spindles. Some bottom brackets don’t have spindles. These brackets are called thread-through brackets. For these brackets, use your calipers to measure from the exterior edge to exterior edge. These brackets are commonly found on custom bikes and newer models.[7]
-
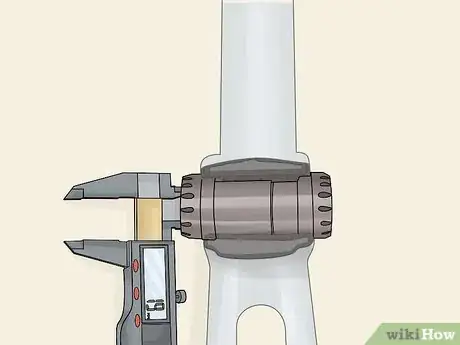
4Measure the inner diameter on the side of the bracket’s shell. Spread the jaws on your calipers and wrap them around the side of the shell where the bracket is exposed on either side. Tighten the calipers around the opening to measure the diameter. Write this number down and label it.[8]
- If the inner shell diameter is 1.37 inches (35 mm), you have an English bracket. This is the most common type of bottom bracket.
- On a BMX bike, this measurement will typically be either 19 mm or 22 mm.
- This measurement will be the same on both sides; don’t bother checking the width on each side.
- The diameter of the bottom bracket itself is irrelevant since some bottom brackets don’t sit flush on the shell. If your shell is not on the bike, you cannot determine this size without reading the instructions for the bracket.
-
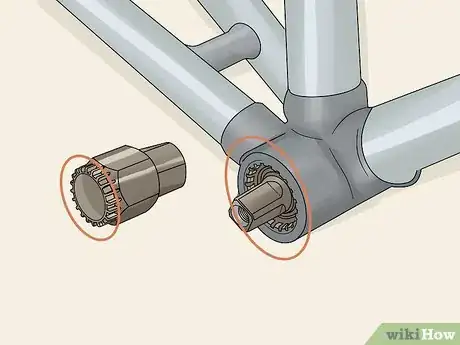
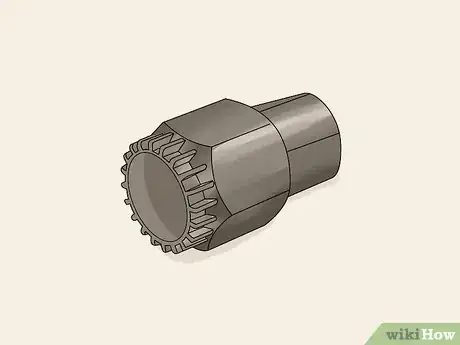
5Determine what kind of bracket tool you need to check the threading. To check the threading type, you’ll need to remove the bracket from the bike. Bottom bracket tools come in different sizes based on the cup holding it in place. To determine what size bottom bracket removal tool you need, count the number of notches on the outside rim of the bracket where the cup rests. The number of notches on the bracket will match the number of notches on your bottom bracket.[9]
-
6Remove the bottom bracket using a removal tool or wrench, if necessary. Start on the bracket on the right. Slide the bottom bracket tool over the spindle and wrap a wrench around it. Turn the bracket tool counterclockwise until the cup holding the bracket in place comes out. Repeat this process by turning the bracket tool clockwise on the left. The bottom bracket will slide right out with the cups off.[10]
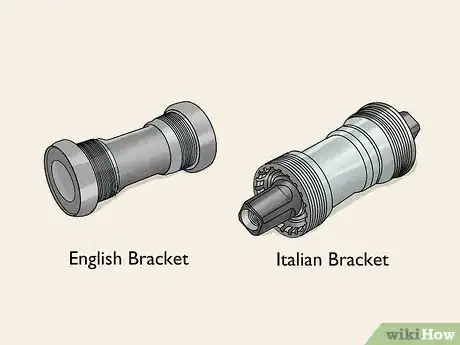
- If the right side won’t loosen when you turn counterclockwise, you probably have an Italian bracket. Try turning clockwise instead.
- If there are no threading whatsoever, you have a press-fit bottom bracket. To remove these brackets, use an old crankshaft or the head of a hammer to gently push the bracket out of the shell.
- Always start on the drive side of the bracket. The drive side is always on the right of the bike when you’re sitting on it.
-
7Check the threading on the bracket to see what type you have. Some shells have threading for the bottom bracket while others do not. This means that the threading on your bottom bracket must match the threading on the shell. Inspect the direction of the threading on each end of the bracket. If both sides are installed by turning counterclockwise, you have an Italian bottom bracket. If the right-hand side is installed clockwise and the left-hand side is installed counterclockwise, you have an English bracket.[11]
- If there is no threading in the shell, you have a thread-together bottom bracket and you do not need to worry about threading.
- The English and Italian brackets are found on the vast majority of bikes.
- A French bracket refers to an English bracket with smaller threading.
Warnings
- Bottom brackets are generally built to be hard to remove and install without the use of specialized equipment. Do not attempt to remove or replace a bottom bracket unless you have experience. If the bottom bracket is installed incorrectly, your crankshaft can break when you’re riding, which can be extremely dangerous.[12]⧼thumbs_response⧽
Things You’ll Need
Removing the Crankshaft
- Socket wrench
- Screwdriver
- Crank extractor tool
- Wrench
Measuring the Bracket
- Calipers
- Bottom bracket removal tool
- Wrench
References
- ↑ https://youtu.be/KpDkTpYtRn4?t=71
- ↑ https://youtu.be/KpDkTpYtRn4?t=107
- ↑ https://youtu.be/KpDkTpYtRn4?t=188
- ↑ https://youtu.be/KpDkTpYtRn4?t=203
- ↑ https://youtu.be/G9a8Ew7v3Sw?t=10
- ↑ https://youtu.be/G9a8Ew7v3Sw?t=31
- ↑ https://youtu.be/xUtOeFJJycg?list=TLPQMTkxMjIwMTnZR2cPWZn0jg&t=62
- ↑ https://www.bikeradar.com/advice/buyers-guides/the-complete-guide-to-bottom-bracket-standards/
- ↑ https://youtu.be/in0eWKepZ2c?t=61
