This article was co-authored by wikiHow Staff. Our trained team of editors and researchers validate articles for accuracy and comprehensiveness. wikiHow's Content Management Team carefully monitors the work from our editorial staff to ensure that each article is backed by trusted research and meets our high quality standards.
There are 15 references cited in this article, which can be found at the bottom of the page.
This article has been viewed 59,377 times.
Learn more...
The term “bore” refers to the diameter of a cylinder in a piston engine. If you’re assembling or rebuilding an engine, knowing the bore of each cylinder will allow you to install pistons of an appropriate size to ensure adequate clearance during firing and prevent excess wear or other, more dangerous issues. Measuring cylinder bore will require you to use a dial bore gauge to find the diameter of the cylinder at various points along its height. The process may seem complex, but it really isn’t all that difficult once you understand the logic behind it.
Steps
Calibrating Your Tools
-
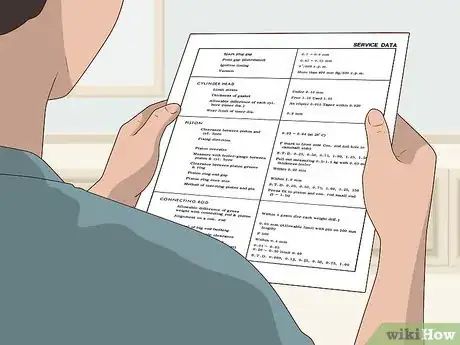
1Check the clearance specifications for the engine you’re working with. In order to get a precise measurement of an engine’s cylinders, you first need to know how big they’re supposed to be. Refer to the technical specifications page of the engine’s service manual. There, you’ll see a chart containing the engine’s exact specs, including the minimum and maximum clearance for the pistons.[1]
- The engine’s service manual will also list the exact dimensions of the pistons. If you’re measuring to figure out what size pistons you need, simply jot down this number and call it a day.
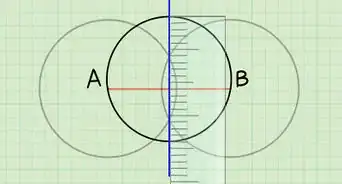
- If you’re unable to get a hold of the original service manual and don’t have any luck finding the information online, you can also stretch a ruler across the top of the cylinder to get a rough idea of its diameter.[2]
-
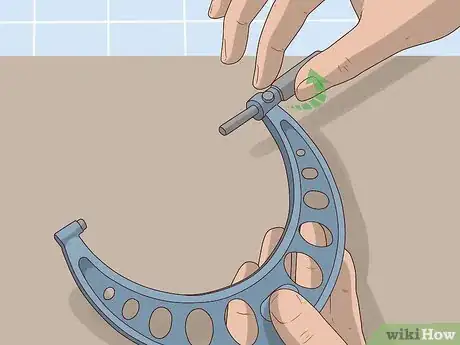
2Set a micrometer to the estimated diameter of your engine’s cylinders. Turn the rotating thimble and ratchet on the handle portion of the tool until the number indicated by the intersecting lines corresponds to the cylinder’s minimum clearance. Once you’ve got the correct measurement, flip the locking lever beside the spindle to lock the rods in place.[3]
- A standard outside micrometer has 4 main components—the anvil, or the stationary end of the clamp; the spindle, or the moving end of the clamp, which changes as the measurement increases or decreases; and the measuring handle, which is made up of a fixed sleeve and the thimble and ratchet.
- The numbers listed along the horizontal line on the sleeve represent millimeters, while the numbers running up and down the tapered edge of the thimble represent hundredths of millimeters. Adding the 2 numbers together will help you position the spindle at the exact distance you need.[4]
Advertisement -
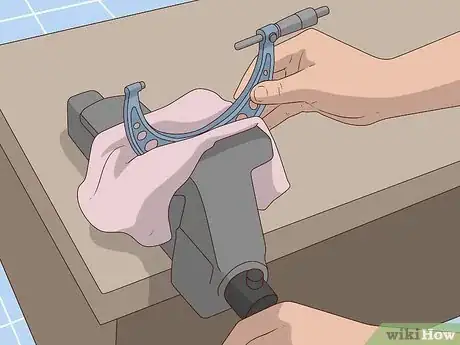
3Clamp the micrometer into a vice lightly. After adjusting the spindle to reflect your engine’s cylinder size, place the curved frame of the tool inside the jaws of table vice. Tighten the vice just enough to hold the micrometer still. You’ll be using the micrometer to compare the measurements you take with your dial bore gauge.[5]
- Drape a cloth or towel over the jaws of the vice to prevent your micrometer from getting scratched up.
- Be careful not to overtighten the vice. Doing so is likely to throw off your carefully measurement, and could even damage your micrometer.
-
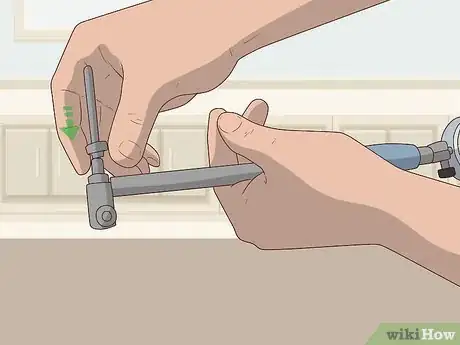
4Fit a dial bore gauge with a head that matches the size of the cylinder. Unscrew the tightening nut from around the open “mouth” at the bottom of the gauge. Slide one of the ring-shaped spacers included with the instrument over the end of the head with the small metal lip, then insert the head into the gauge before securing the tightening nut.[6]
- A dial bore gauge is a precision measuring instrument designed for taking measurements as fine as thousandths of an inch.
- Dial bore gauge heads come in graduated sizes. In the U.S., these sizes are typically expressed in inches: 4.0”, 3.8”, 3.6”, 3.4”, 3.2”, and so on.
- The dial bore gauge kit that you buy or rent should come with everything you need to operate the device, including multiple heads and spacers and tightening nuts of various sizes.
Tip: You can purchase a complete dial bore gauge kit from any specialty automotive supplier for around $100. Some stores may also have kits available for rent.
-
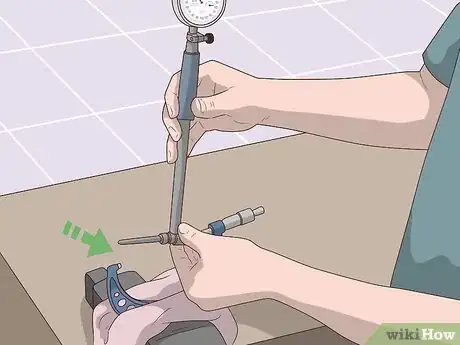
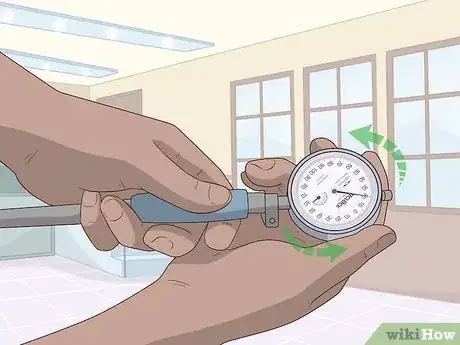
5Zero your dial bore gauge to the micrometer. Position the gauge inside the micrometer, with the head resting against the anvil. There should be just enough room to rock the instrument back and forth slightly. As you do, the indicator needle will spin until it reaches a point where it begins to reverse directions. When you’ve identified this point, turn the face of the dial so that the needle is resting on the “0.”[7]
- This step can be a little tricky, but it’s essential for ensuring accurate measurements. Take your time and continue rocking the gauge with smaller and smaller movements until you find the exact spot where the needle starts to fluctuate.
Taking Your Measurements
-
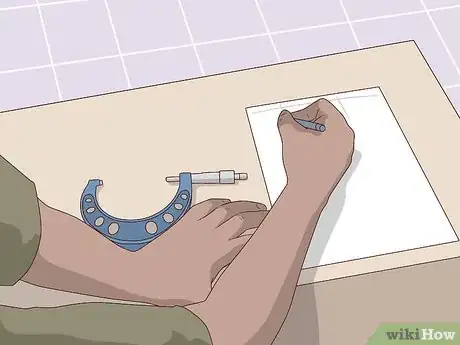
1Be prepared to pause and record your measurements as you take them. To arrive at an accurate sense of each cylinder’s overall bore, you’ll be taking a total of 8 separate measurements—2 apiece at intervals of about 1 in (2.5 cm) down the length of the cylinder. Drawing up a simple chart will help you keep track of your individual measurements. Outline and label 4 columns representing 4 separate points along the depth of the cylinder, then make 2 rows underneath where you can write in the dimensions of each axis you’ll be measuring.[8]
- If you just want a rough estimate of the cylinder’s bore, you can get away with making only 6 measurements, 3 at the top and 3 at the bottom. If you also need to calculate its taper and “out-of-round” (the amount by which it exceeds its maximum clearance specification), however, it will be necessary to make all 8.[9]
- Keep in mind that you'll need to create a new chart for each cylinder you measure.
- There might also be certain cases where you only want to measure a single cylinder, like when you're trying to determine the pneumatic force or compression ratio of that cylinder.[10]
-
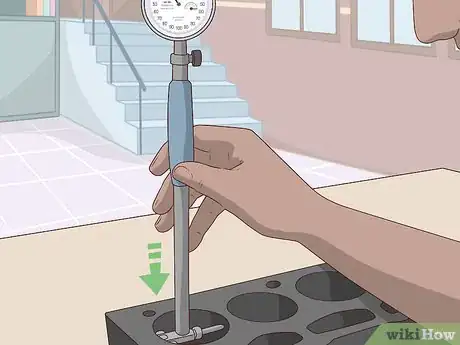
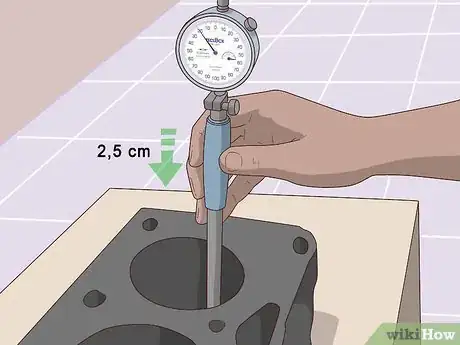
2Insert the dial bore gauge into the first cylinder in the block. Arrange the instrument so that the head points straight across the cylinder from front to back (perpendicular with the cylinder block). Lower it into the opening until it’s sitting about 1⁄2–1 inch (1.3–2.5 cm) below the rim. This will be the starting position for your first measurement.[11]
- Double-check that the head of the instrument is more or less level before you begin measuring.
- The measurement you take with the head of the gauge running perpendicularly to the cylinder block will be known as the “vertical” measurement; the one you take with the head configured parallel with the block will be known as the “horizontal” measurement.
-
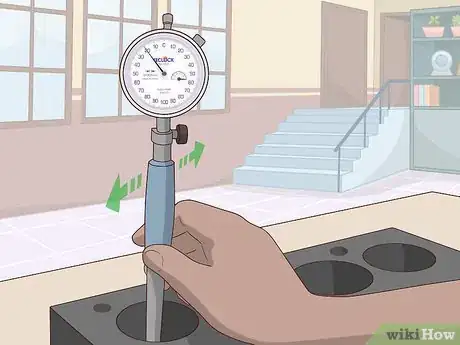
3Rock the gauge back and forth until the indicator needle reverses its direction. Just like when you calibrated the dial bore gauge to the micrometer, the position at which the needle begins to fluctuate will serve as your measuring point. This occurs when the head is perfectly level inside the cylinder. Hold the gauge still at this “sticking” point and make a note of where the indicator needle falls on the dial.[12]
- If your discover that the head you’re using doesn’t fit inside the cylinder, take it off and fit the instrument with the next smallest size in the kit.[13]
- If the needle stops somewhere to the left of the “0,” the measurement is in the negative range, which means that the cylinder’s bore is greater than its clearance specification. No cylinder should ever have a diameter smaller than its listed dimensions, which would cause the needle to fall to the right of the "0."
-
4Translate and record the measurement you get in the first position. Each whole number on the dial represents 1 one-thousandth of an inch, while each of the tiny notches in between is 1 ten-thousandth of an inch. Write down this measurement on your chart as “Top 1,” “1-A,” or something similar.[14]
- If the needle stops between the 7 and 8 positions on the dial, for example, it means that the inside of the cylinder is 2.5 thousandths of an inch larger than its clearance specification at your measuring point.[15]
- Always convert your measurements into decimal form to maintain consistency between the values on your chart and those printed in the engine’s service manual. Using the example above, you would record “2.5 thousandths of an inch” as “0.0025.”
-
5Turn the head of the gauge 90 degrees and measure a second time. Now that you’ve found the diameter of cylinder on its vertical axis, repeat the process on the horizontal axis. Put this measurement down as “Top 2,” “1-B,” or similar, being sure to stick with the same format throughout the entire chart.[16]
- Performing 2 separate measurements at each point will help account for areas with excessive wear and paint a more complete picture of the cylinder’s dimensions all the way around.
Tip: If you’ve opted to measure 3 separate axes along each point of the cylinder’s depth for maximum precision, start with your vertical measurement, then rotate the head of the gauge 45 degrees to both the left and right for your next 2 measurements.[17]
-
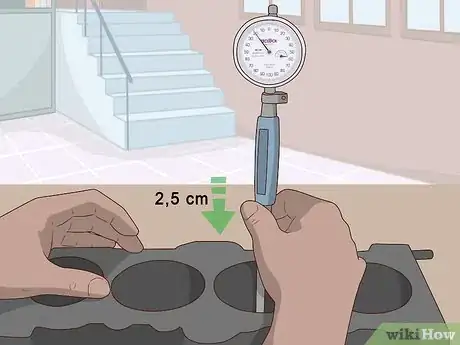
6Reset the gauge vertically and lower it by about 1 inch (2.5 cm). Turn the instrument once again so that its head is running across the cylinder from front to back, then guide it down to its next point along the inside of the cylinder. Proceed to take your second pair of measurements, one vertical and one horizontal, exactly the same way you did the first set.[18]
- Stop after each position to record the indicated dimension clearly. Don’t attempt to memorize your measurements—there’s a good chance that you’ll have forgotten the previous number by the time you figure out the next one.
-
7Continue measuring and lowering the gauge in 1 in (2.5 cm) increments. Keep on in this fashion until you’ve filled out all 8 measurement slots for the first cylinder in the block. When you’ve found the overall bore of this cylinder, move your gauge over to the next one and repeat the process. Do this for each cylinder you want to measure.[19]
- By the time you’re done, you’ll be able to visualize the many small variations in width along the inside of each cylinder, which will help you decide what needs to be done to it.
- Compare the measurements of each of your cylinders to the dimensions listed in the engine’s service manual. If any part of a cylinder’s internal surface exceeds the minimum or maximum amount of clearance recommended for the piston, you may need to have it rebored.[20]
Things You’ll Need
- Dial bore gauge kit
- Micrometer
- Table vice
- Pencil and paper
- Cloth or towel (optional)
References
- ↑ https://www.dragzine.com/news/how-to-check-piston-to-cylinder-bore-clearance-with-mahle-motorsport/
- ↑ https://itstillruns.com/measure-cylinder-bore-6321146.html
- ↑ https://www.youtube.com/watch?v=2-cm_ocn9p4&feature=youtu.be&t=4
- ↑ https://faraday.physics.utoronto.ca/PVB/Harrison/Micrometer/Micrometer.html
- ↑ https://www.youtube.com/watch?v=n572qMo3g0A&feature=youtu.be&t=17
- ↑ https://www.youtube.com/watch?v=n572qMo3g0A&feature=youtu.be&t=30
- ↑ https://www.youtube.com/watch?v=n572qMo3g0A&feature=youtu.be&t=64
- ↑ https://www.swtc.edu/Ag_Power/diesel_engines/job_sheets/cylinder_block/Cylinderlinerbore.pdf
- ↑ https://www.freeasestudyguides.com/cylinder-bore-taper-measurements.html
- ↑ https://www.engineeringtoolbox.com/pneumatic-cylinder-force-d_1273.html
- ↑ https://www.youtube.com/watch?v=n572qMo3g0A&feature=youtu.be&t=153
- ↑ https://www.dragzine.com/news/how-to-check-piston-to-cylinder-bore-clearance-with-mahle-motorsport/
- ↑ https://itstillruns.com/measure-cylinder-bore-6321146.html
- ↑ https://www.mitutoyo.co.jp/eng/pdf/E4329_QuickGuide.pdf
- ↑ https://www.youtube.com/watch?v=n572qMo3g0A&feature=youtu.be&t=166
- ↑ https://itstillruns.com/measure-cylinder-bore-6321146.html
- ↑ https://www.youtube.com/watch?v=qLzMQtJAljg&feature=youtu.be&t=236
- ↑ https://www.swtc.edu/Ag_Power/diesel_engines/job_sheets/cylinder_block/Cylinderlinerbore.pdf
- ↑ https://itstillruns.com/measure-cylinder-bore-6321146.html
- ↑ http://www.secondchancegarage.com/public/192.cfm
- ↑ https://www.dragzine.com/news/how-to-check-piston-to-cylinder-bore-clearance-with-mahle-motorsport/
- ↑ https://www.freeasestudyguides.com/cylinder-bore-taper-measurements.html
