This article was co-authored by wikiHow staff writer, Hunter Rising. Hunter Rising is a wikiHow Staff Writer based in Los Angeles. He has more than three years of experience writing for and working with wikiHow. Hunter holds a BFA in Entertainment Design from the University of Wisconsin - Stout and a Minor in English Writing.
There are 18 references cited in this article, which can be found at the bottom of the page.
The wikiHow Video Team also followed the article's instructions and verified that they work.
This article has been viewed 26,737 times.
Learn more...
Are you looking for a way to neatly store your earbuds? Earbuds can easily get tangled if you leave the wires loose. If you want to keep your cords organized and not tangled at the bottom of your backpack or purse, try making a DIY earbud wrap or container. To create something simple, try a credit card, clothespins, or a piece of fabric to make an easy wrap—no sewing required! For something sturdier, try an empty mint container as an earphone cord holder. Once you finish making your holder, your earbuds will stay organized and tangle-free!
Steps
Cutting a Credit Card Earbud Holder
-
1Punch a hole 1⁄2 in (1.3 cm) in from the short side of a credit card. Use a credit card or gift card that’s expired or invalid for your project. Place a hole punch in the middle of the credit card’s short side so it’s about 1⁄4 inch (0.64 cm) in from the edge. Squeeze the handles of the hole punch together to make the hole.[1]
- The single hole will hold the jack side of the earbud cord.
- You can buy a hole punch from a craft or office supply store.
Warning: Never use a valid credit card to make your earbud holder since someone could easily steal the information if you lose it.
-
2Make 2 more holes on the opposite short side of the credit card. Turn the card so you’re working on the other short side directly across from the hole you just punched. Punch the holes so they’re 1⁄4 inch (0.64 cm) in from the short side and 1⁄2 inch (1.3 cm) from the long sides. That way, you have space to put each of the earbuds in the holes.[2]Advertisement
-
3Cut straight lines from the short edges of the card to the centers of each hole. Line up the scissor’s blades so they’re perpendicular to the short side of the credit card and so it crosses through the middle of one of the nearest hole. Make a straight cut from the short edge to the hole so there’s a small slit in the card. Repeat the process with the rest of the holes so they each have a slit.[3]
- The slits allow you to easily bend the credit card so you can slide the wires into the holes.
- If you aren’t able to cut through the card easily with scissors, make the slits with a utility knife instead.
-
4Use your scissors to cut curved notches into the long sides of the credit card. Start your cut with a pair of scissors 1 inch (2.5 cm) from the corner along the long side of the card. Carefully cut a concave curve that goes 1⁄2–3⁄4 inch (1.3–1.9 cm) in from the long edge. End your cut so it stops 1 inch (2.5 cm) from the opposite corner of the credit card. Make the same cuts on the other long side so the credit card has an hourglass shape.[4]
- The curved edges will prevent the cord from sliding around so it doesn’t fall off of the holder.
- If there are sharp corners after you make your cuts, smooth them out with 120-grit sandpaper so you don’t get hurt or damage your earbuds.
-
5Feed the earbuds through the 2 holes on one of the short edges. Slightly push the section of the credit card between the punched holes forward so the slits open up. Feed the wire at the base of an earbud into the slit on one of the holes. Put the other earbud into the second hole on the same side of the card as the first one.[5]
-
6Wind the cord around the notches before putting the jack in the empty hole. Straighten out the cord for the earbuds so there aren’t any snags or tangles. Loosely coil the cord around the narrowest section of the cards long sides so they don’t slide around on the credit card. Once you’ve wrapped the entire cord, push the headphone jack through the slit of the last hole.[6]
- Don’t pull the cord too tightly, or else you could damage the internal wires.


Creating a Simple Clothespin Wrap
-
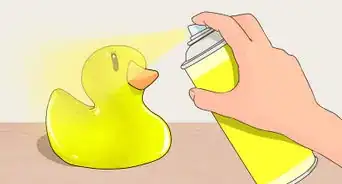
1Paint or draw on 2 clothespins if you want your holder to have a design. If you want to add simple designs, lightly sketch on the clothespins with a pencil to see what it looks like. Fill in your design with colored markers or pencils to complete it. If you want to change the colors of the clothespins, pick an acrylic paint and brush a light coat onto them. Let the paint dry completely before moving on.[7]
- Wooden clothespins work best for making earbud holders.
- You don’t have to paint or draw designs on the clothespins if you don’t want to.
-
2Stack and hot-glue the clothespins so the openings face opposite directions. Set one of the clothespins on top of the other so one points to the left and one points to the right. Apply a line of hot glue along the length of the top piece on one of the clothespins. Press the bottom of the second clothespin against the line of glue and hold it in place for 30 seconds so the glue can set.[8]
- Hot glue dries within about 1 minute, so be sure to work quickly so the glue doesn’t dry.
Variation: If you don’t have hot glue, you can use standard white school glue, but it will take about 5–10 minutes for it to dry completely.
-
3Clamp the earbuds in the top clothespin. Straighten out the cord for your earbuds to make sure it isn’t twisted or tangled together. Squeeze the left side of the clothespin holder together to open the right side. Put the bottoms of the earbuds in the open right side and let go of the clothespins to snap them shut. The earbuds will stay tightly inside the pin so they don’t pull out.[9]
- Lightly tug on the cord to make sure the earbuds don’t slip out from the clothespins. If they do, make sure the clothespin only clamps around the wires at the base of each earbud.
-
4Wrap the cord around the clothespins lengthwise to secure it. Start with the wires attached to the earbuds and pull them toward the left side of the holder. Position the wires so they go in the opening you squeeze together to open the clothespins. Continue coiling the earbud cord around the large openings on the ends of the holder so it doesn’t fall off. When you reach the headphone jack, clamp it in the bottom clothespin.[10]
- Don’t pull the cord too tightly or else you could break the internal wires and need to buy new earbuds.


Making a Fabric Cord Wrap
-
1Make a 4 in × 4 in (10 cm × 10 cm) H-shaped template with paper. Cut a piece of paper with a pair of scissors to make a 4 in × 4 in (10 cm × 10 cm) square. Fold the piece of paper in half and crease it along the edge. Cut off a 1⁄2 in × 3⁄4 in (1.3 cm × 1.9 cm) rectangle from the corners on the folded edge. Unfold the piece of paper so it looks like the letter H.[11]
- The notches at the top and bottom of the paper will help your earbuds stay in place without them slipping around.
-
2Trace and cut the shape from a piece of stiffened felt. Stiffened felt is slightly thicker than standard felt, so it holds its shape better. Place the paper template on top of the felt and outline around it with a pencil or marker. Use your scissors to cut the shape out from the felt to use for your DIY earphone cord holder.[12]
- You can buy stiffened felt from a fabric or craft store.
- If you have trouble making clean cuts with a regular pair of scissors, use a pair that’s specifically made for fabric.
Tip: If you don’t want the outline you traced visible on the holder, use a disappearing ink marker instead. The ink will fade within 1–2 days of you drawing the outline. You can buy disappearing ink markers from your local craft or fabric store.
-
3Place a self-adhesive Velcro dot in the center of each long edge. Lay the piece of felt flat on your work surface so the long edges are on the left and right sides. Remove the backing paper from one of the Velcro dots and press it in the middle of the long edge on the left side of the felt. Place the second Velcro dot on the right side so it lines up with the first one when you fold the felt in half.[13]
- You can buy Velcro dots online or from craft stores.
- If you can’t find self-adhesive Velcro dots, attach them to the felt with dots of hot glue instead.
-
4Wrap the earbud cord around the notches in the felt. Straighten out the cord and place it on the piece of felt so the earbuds are just above the top notch. Guide the other end of the cord underneath the piece of felt and loop it around the notches on the top and bottom. Continue wrapping the cord until you reach the headphone jack.[14]
- Don’t pull the cord too tight, or else you could break the wires inside and damage the earbuds.
-
5Fold the felt in half vertically to secure the Velcro dots together. Grab the left side of the felt and make a vertical fold so it lines up with the right edge. Push the Velcro dots together so they stay attached and hold the cord inside the holder. Put the holder in your pocket or a bag to transport them without getting tangled.[15]
- Tie a ribbon or piece of twine around the outside of the felt if you’re worried about the Velcro coming undone.


Repurposing a Mint Container
-
1Peel the labels off of a circular plastic mint container. Look for a circular mint container that’s made of plastic and has a hinged opening in the middle. Pick the label off with your fingernail and remove as much as you can by hand. Completely remove the top and bottom labels so there isn’t any sticky residue left on the container.[16]
- If the label or adhesive doesn’t easily come off, spray an adhesive remover on the label and try wiping it off with a paper towel.
-
2Drill 2 holes on the side of the container underneath the lid opening. Attach a bit that’s 1⁄4 inch (0.64 cm) thick to your drill to make your holes. Position the first hole on the side of the mint container so it’s 1⁄2 inch (1.3 cm) below where the lid opens. Keep your nondominant hand on top of the mint tin and slowly push the bit through the plastic. Place the second hole so it’s 1⁄2 inch (1.3 cm) to the left or right from the first one.[17]
- You don’t need to drill holes in the side of the mint container if you don’t want to add a key ring. The ring allows you to clip the container to a keychain or backpack so you don’t lose it.
Variation: Secure the mint container to your work surface with a C-clamp if it slides around or if you can’t get a good grip on it.
-
3Feed a key ring through the drilled holes. Pull apart the key ring with your fingers so you can slide it onto the mint container. Feed the end of the ring through one of the holes you drilled and push the ring through it. Rotate the ring so the end exits through the second hole. Continue rotating the ring until it snaps closed to secure it to the mint container.[18]
- The key ring allows you to clip the container to a backpack, bag, or keychain so you don’t misplace it.
-
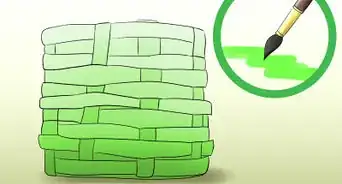
4Attach fabric to the top of the container with Mod Podge to customize it. Trace the top of the container onto a piece of fabric you want to use for your design. Cut the piece of fabric out with your scissors and line it up with the top of the mint container to ensure it fits. Apply a thin layer of Mod Podge to the top of the container and set the fabric on top of it. Press down on the fabric to secure it to the container.[19]
- You don’t have to put fabric on the container if you don’t want to.
-
5Wrap your earbuds by hand into a circular coil. Straighten out the cord to make sure it doesn’t have any tangles or snags. Grab the jack end of the cord with your nondominant hand and slowly wrap the cord around your fingers. Continue wrapping the cord so it has a circular shape and fits easily inside the mint container.[20]
-
6Place the earbuds in the mint container and close the lid. Pop open the lid of the container and set your earbuds inside. Make sure the entire cord fits inside the container and doesn’t stick out from the edge. Close the lid to keep your earbuds safe and tangle-free. Clip the key ring onto a keychain or a bag strap so you don’t lose your earbuds.[21]
- The mint container can easily also fit into a pocket or bag so you can transport your earbuds.


Warnings
- If you’re using a credit card, make sure that it’s expired or invalid first.⧼thumbs_response⧽
Things You’ll Need
Cutting a Credit Card Earbud Holder
- Credit card of gift card
- Hole punch
- Scissors
Creating a Simple Clothespin Wrap
- Hot glue gun
- 2 clothespins
- Paint or markers (optional)
Making a Fabric Cord Wrap
- Paper
- Scissors
- Stiffened felt
- Self-adhesive Velcro dots
- Hot glue gun
Repurposing a Mint Container
- Adhesive remover
- Drill with 1⁄4 in (0.64 cm) bit
- Key ring
- Fabric (optional)
- Mod Podge (optional)


References
- ↑ https://youtu.be/Pn6eIkRu9gc?t=42
- ↑ https://youtu.be/Pn6eIkRu9gc?t=52
- ↑ https://youtu.be/ZQSYoFZtcxQ?t=76
- ↑ https://youtu.be/ZQSYoFZtcxQ?t=36
- ↑ https://youtu.be/ZQSYoFZtcxQ?t=98
- ↑ https://youtu.be/Pn6eIkRu9gc?t=125
- ↑ https://youtu.be/xnrOEjdJBK4?t=40
- ↑ https://www.neathousesweethome.com/diy-earbuds-holder/
- ↑ https://www.neathousesweethome.com/diy-earbuds-holder/
- ↑ https://youtu.be/xnrOEjdJBK4?t=78
- ↑ https://averageinspired.com/2016/04/10-minute-diy-earbud-holder.html
- ↑ https://averageinspired.com/2016/04/10-minute-diy-earbud-holder.html
- ↑ https://averageinspired.com/2016/04/10-minute-diy-earbud-holder.html
- ↑ https://youtu.be/0oVOmaw5SRw?t=162
- ↑ https://www.thesimplycraftedlife.com/earbud-holder/
- ↑ https://youtu.be/Z-aZRBq6-Cg?t=12
- ↑ https://youtu.be/Z-aZRBq6-Cg?t=23
- ↑ https://makeit-loveit.com/make-an-earphone-holder-from-a-mint-container
- ↑ https://makeit-loveit.com/make-an-earphone-holder-from-a-mint-container
- ↑ https://makeit-loveit.com/make-an-earphone-holder-from-a-mint-container
- ↑ https://youtu.be/Z-aZRBq6-Cg?t=104
- ↑ https://youtu.be/HrVDcmGcVYg?t=247
About This Article

There are lots of different ways you can make your own custom DIY earbud holder right at home. Once easy option is using an old credit card. Punch a hole 1/2-inch in from one of the short sides of the card, then punch 2 holes on the opposite short side. Cut a straight line from the edge of the card into the center of each hole. Finally, cut curved notches into the long sides of the card. To use your holder, feed the earbuds into the 2 holes right next to each other, then wrap the cord around the notches on the long sides and tuck the jack into the opposite hole. Another easy option is using 2 clothespins. Decorate the clothespins, then glue them on top of each other so the openings are facing in opposite directions. Clamp the earbuds into the top clothespin, then wrap the cord around the clothespins lengthwise. To learn how to make an earbud holder using an old mint container, scroll down!