This article was co-authored by Crystal Chadwick. Crystal Chadwick is a Licensed General Contractor and the Owner of Yin & Yang Construction out of Salt Lake City, Utah. With over 16 years of experience in the construction industry, she specializes in remodels, repairs, and handyman services. Crystal leads her team with vision and a detail-oriented approach, allowing them to provide quality work and design to their clients.
This article has been viewed 145,483 times.
Particle board, or chipboard, is a very lightweight type of wood that's often found in inexpensive furniture or small decorations. Although it is still wood, it's a lot softer and easier to damage than regular lumber, making it more likely to get scratched and more difficult to paint. If you want to paint some particle board, sand it down lightly, apply a thin layer of primer, and cover it with several coats of paint to get the look you're after.
Steps
Priming the Board
-
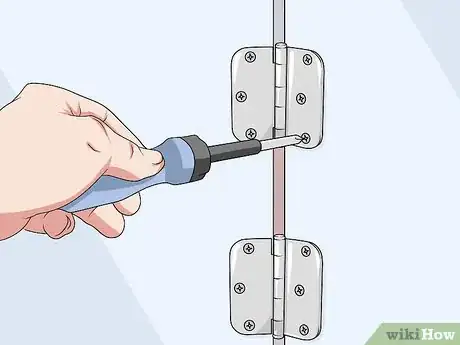
1Remove any hardware or accessories you don't want to paint over. If you're painting particle board furniture or touching up cabinets, there may be metal fittings or handles that you want to keep unpainted. Use a screwdriver to carefully remove any hardware, fittings, or accessories attached to the particle board that you don't want to be painted.[1]
- If you're painting particle board furniture, it might be easier to disassemble it and paint each piece individually. If you can, follow the assembly instructions in reverse to carefully take apart the item you want to paint.
- Make sure that you store all of the fittings, hardware, screws, and anything else you take out of the particle board somewhere where it won't get lost.
-
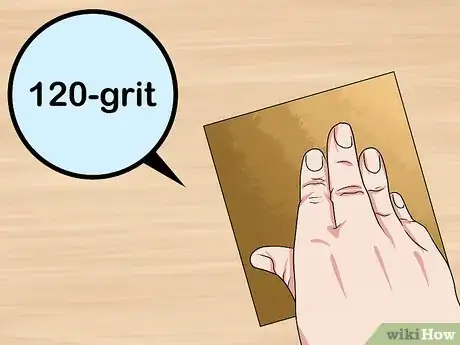
2Sand the board down with 120-grit sandpaper. The lamination or sheen on the particle board will prevent paint from sticking to it. Use a medium to fine grit sandpaper, around 120-grit, to sand down the face of the particle board you want to paint. Sand it down lightly, only enough to remove the shine from it and expose the wood.[2]
- Particle board is a very soft wood, which makes it easier to work with and move around, but also easier to scratch and damage. Use only light pressure when sanding to avoid damaging your particle board.
- Use a vacuum cleaner or shop-vac to remove any dust that comes off the board while sanding it.
- To avoid getting the inside of your home messy, sand, prime, and paint your particle board outside.
Advertisement -
3Coat the particle board with a layer of oil-based primer. The most difficult part of painting particle board is getting the paint to adhere to the surface. Once the board has been sanded down, use a wide paintbrush to cover it with a single layer of oil-based primer. Make sure to get into any hard to reach areas so that the entire surface is covered.[3]
- A water-based primer will seep into the particle board and cause it to swell up. Always use an oil-based or solvent-based primer when painting particle boards.
- Oil-based primer should be available at your local hardware store. If you're unsure which type to use, ask an employee for help choosing the right primer and paint for you.
-
4Give the primer 30 minutes to an hour to fully dry. Your coat of primer needs to be completely dry before you can begin painting the wood. Leave the particle board sitting out in the sun for 30 minutes to an hour to give it plenty of time to completely dry.[4]
- Check the manufacturer's instructions for your chosen primer for more specific advice on how long it will take to dry.
- You can check if the primer is fully dry by scratching at it lightly with a fingernail. If the primer is dry, a fingernail scratch won't leave a mark or remove any primer.[5]
Refinishing Your Particle Board
-
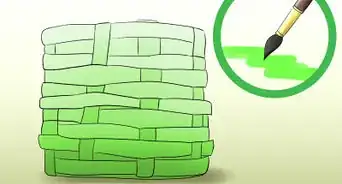
1Cover the board with a coat of oil-based paint. Once the particle board has been primed, you can begin coating it with your paint of choice. Dip a wide-bristled paintbrush or a paint roller into an oil-based paint in your desired color. Work slowly and methodically to cover the entire surface with a coat of paint.[6]
- If you have a paint sprayer, you could also use this to evenly paint the particle board. Work in thin layers to make sure the paint is applied evenly and dries quickly.
- Oil or lacquer-based paints will work best for painting particle boards. However, if you have primed the wood with an oil-based primer, you should be able to use water-based paint without the particle board absorbing any water.
- A variety of different colored paints should be available at your local hardware store. Choose one that you like and that will work well with the other colors in the room where you'll put your finished particle board.
-
2Let the paint dry for 30 minutes to an hour. Once you've finished the first coat of paint on your particle board, leave it to dry. Give your paint around an hour in the sun to begin to dry. If you can touch the paint lightly without getting any paint on your finger, the paint should be dry enough to apply a second coat.[7]
- If you live in a colder or more humid environment, it may take longer for your paint to dry. It's better to give it more time than it needs to dry than it is to move on while the paint is still wet.
- Consult the manufacturer's instructions on your chosen paint for more specific advice on how long it will take to dry.
-
3Apply another coat of paint and let it dry. When the paint is dry to the touch, apply a second layer of paint using the same brush or roller. Leave the paint to dry for another 30 minutes to an hour. Repeat this process until you are happy with the look of your particle board.[8]
- With most particle board, it will take between 2 and 4 layers of paint to completely cover the primer.
-
4Reassemble and reattach the hardware. With your particle board painted and dry to the touch, you can begin putting it back together. Reassemble the particle board if you disassembled it to paint it, and reattach any hardware or fittings until everything is put back together.[9]
- The paint may still be soft when you begin reassembling your particle board, so make sure you work carefully. Alternately, you can leave your particle board to dry for 12 to 24 hours before reassembling it.
Expert Q&A
-
QuestionDo you need to sand particle board before painting?
 Crystal ChadwickCrystal Chadwick is a Licensed General Contractor and the Owner of Yin & Yang Construction out of Salt Lake City, Utah. With over 16 years of experience in the construction industry, she specializes in remodels, repairs, and handyman services. Crystal leads her team with vision and a detail-oriented approach, allowing them to provide quality work and design to their clients.
Licensed General Contractor Yes, this is a good idea. Particle board is a pretty rough material, so take some time to sand any rough edges before you get started.
 -
QuestionCan I use two-in-one primer and paint instead of priming separately?
 Crystal ChadwickCrystal Chadwick is a Licensed General Contractor and the Owner of Yin & Yang Construction out of Salt Lake City, Utah. With over 16 years of experience in the construction industry, she specializes in remodels, repairs, and handyman services. Crystal leads her team with vision and a detail-oriented approach, allowing them to provide quality work and design to their clients.
Licensed General Contractor You could, but I wouldn't recommend it. You'll get better results if you prime first, then apply two coats of paint after that.
Warnings
- Work outside or in a well-ventilated area when painting and sanding. This will keep the inside of your home clean and free of strong paint fumes.⧼thumbs_response⧽
Things You'll Need
- 120-grit sandpaper
- Oil-based primer
- Paintbrush or paint roller
- Paint
References
- ↑ https://youtu.be/5up7g7Ks4WA?t=305
- ↑ https://www.finewoodworking.com/2006/06/06/tips-for-painting-mdf
- ↑ https://www.finewoodworking.com/2006/06/06/tips-for-painting-mdf
- ↑ https://www.finewoodworking.com/2006/06/06/tips-for-painting-mdf
- ↑ https://youtu.be/WP85J68rNnk?t=177
- ↑ https://www.finewoodworking.com/2006/06/06/tips-for-painting-mdf
- ↑ https://www.finewoodworking.com/2006/06/06/tips-for-painting-mdf
- ↑ https://youtu.be/klYt-2hh8zo?t=63
- ↑ https://youtu.be/klYt-2hh8zo?t=63

