This article was co-authored by Mantas Silvanavicius. Mantas Silvanavicius is a Licensed Electrician and the Owner of M+S Electric based in Las Vegas, Nevada. With more than 20 years of experience, he specializes in home electrical installations, testing, and wiring. Mantas and his team have completed projects for companies such as Seiko and Springhill Suites by Marriott. M+S Electric is licensed, bonded, and insured.
This article has been viewed 203,697 times.
A theremin is a musical instrument played without touching it. To create sound with a theremin, electromagnetic fields are generated by antennae and manipulated by hand. The instrument is better known for its use as a special effect in science fiction movies than for music, though the inventor toured the US playing classical pieces on this ethereal-sounding creation. Used famously in songs by the Beach Boys, Led Zeppelin, and the Pixies, you can build a theremin using radio frequency oscillators and other items readily available at electronic parts stores. While you need to have a good handle of basic electronics and wiring, you can learn the basics of wiring the circuits and putting together a unit of your own.
Steps
Planning Your Project
-
1Learn the essential components of the theremin. A theremin is basically a box with two antennas, one of which controls the pitch of the instrument, the other of which controls the volume. These antennas create electromagnetic fields which are "played" by manipulating them with the hands. Coils of tight-pack wire act as oscillators, producing signals fed into the antennae.[1] While it may seem like spooky magic, the fields are created by relatively straightforward circuitry. A theremin involves the following components, most of which you should be able to purchase at electronics supply:
- Pitch-reference oscillator
- Pitch-control oscillator
- Mixer
- Volume-control oscillator
- Volume-resonant circuit and voltage-controlled amplifier
- Audio amplifier
- 12-volt power supply
-
2Develop the skills essential to building a theremin. Building a theremin from scratch isn’t a project for a weekender with a love for spooky sounds. If you want to build one easily and cheaply, buy a kit, follow the instructions and put it together. If you want to wire your own, there’s a lot you need to learn to do first. Even if you want to put together a theremin, it’s likely that you’ll need to understand how to read a basic schematic. To build a theremin, you need to know how to:
- Read an electronic schematic
- Solder electronics
- Wire a potentiometer
- Wire a circuit
- If you want to put a theremin together, kits are available at a variety of different price ranges, some of them relatively easy to put together and some more complex. It's somewhat easier than starting from scratch and getting all the boards and circuits you'll need individually. Unless you're an experienced maker of circuits, it'll be difficult, though not impossible, to make your own theremin without a kit.[2]
Advertisement -
3Start with the theremin housing. Find or construct a box big enough to house the theremin's internal circuitry. A professional theremin, the type of which can be played comfortably, should be large enough to stand in front of, your arms held shoulder-width apart, about 24 inches (61 cm) wide for most adults.
- The top should be hinged so you can install the components and make adjustments when necessary. Kits are available for this purpose, which can be a good idea to get the basic housing shape, even if you still want to customize the circuitry.
-
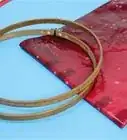
4Install the antennae. A monopole antenna for pitch needs to be attached to the top of the box and a similar antenna for pitch needs to be installed vertically. A loop antenna used to control the volume will be attached to the side of the box. The looping antenna is sometimes a somewhat more difficult device to find, but should be available at specialty electronics stores.[3]
- While it may seem like it's more important to wire the circuits first, it's much easier to get the housing in place before you start worrying about the circuitry, to make sure that everything is spaced accurately and comfortably to play. Just as you'd build the guitar's body before wiring the pickups, you want to start with the housing. You're making an instrument, not a radio.


Wiring the Theremin
-
1Connect the pitch control. The pitch of a theremin is controlled by creating a circuit between a variable oscillator and a reference oscillator, which should be available at specialty electronics stores as individual units. Each should be tuned to the same frequency, ideally in the middle of the low frequency radio range.
- The pitch-reference oscillator should work around 172kHz, used in conjunction with a 10k potentiometer. The signal this oscillator creates should be fed into the mixer with screened cable. The pitch-variable oscillator should also work around 172khz, and will be affected by the stray capacitance of the reference unit.
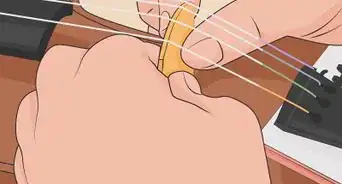
- Potentiometers need to be wired into the circuit to make the relationship of your hand movement to the change in pitch more linear. Without them, the instrument's pitch be almost impossible to control, changing wildly with only a microscopic movement of the hand.[4]
-
2Connect the variable oscillator to the pitch antenna. Using screened cable, wire the circuit of the pitch control components into the antenna when you're finished. When playing the theremin, your hand changes the capacitance of the antenna, which will change the frequency of the variable oscillator. Essentially, you're sending the signal into the antenna to be manipulated manually.
-
3Connect a variable oscillator to the volume antenna. This should also be in the low frequency radio range and carefully tuned, operating somewhere in the neighborhood of 441kHz. This signal will be influenced directly by the volume antenna, manipulating it by hand. A 10k trim potentiometer needs to be installed to enable the operator to tune the theremin appropriately.
- Send the output of this variable oscillator into a volume resonant circuit. The output will be a DC voltage that varies according to the output of the variable oscillator.[5]
- Tuned correctly, the oscillator frequency will match the tuning of the volume-resonant circuit as the operator's hand approaches the antenna, causing the signal to cut off gradually. In other words, the closer the hand to the antenna, the quieter the sound.
-
4Feed the output of each oscillator into a mixer. The purpose of the mixer is to compare the frequency of the variable oscillator with the reference frequency. The output will be an audio signal between 20Hz and 20kHz. Assembling the mixer is the simplest step in the process. Fed with two slightly different frequencies from the oscillators, the mixer will produce an output with a complex waveform, giving it the distinctive warble we associate with the sci-fi sound of the theremin.
- The output actually contains two distinct frequencies, which require the need of a low pass filter, that is two 0.0047uF capacitors and a 1k resistor, used to extract the output and boost it into a listenable range.
-
5Route the signal from the mixer into an amplifier. Route the outputs of the mixer and the volume resonant circuit into a voltage-controlled amplifier. The voltage from the volume resonant circuit changes the amplitude of the audio signal from the mixer, helping to boost the sound and control the volume of the instrument.


Finishing the Theremin
-
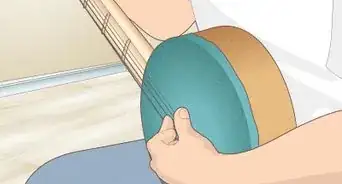
1Install a speaker. Send the output of the voltage controlled amplifier into an audio amplifier and then a speaker to amplify the sound created by the electromagnetic fields as you manipulate them. In a pinch, you can use the internal components or a guitar amp you connect to the theremin with a jack installed in the back of the case.
-
2Power the theremin with 12-volts AC. You should need a power converter that operates at about 12 volts to power a basic theremin with this assembly. You can build a step-down transformer that will convert the normal house voltage or buy a power cord with a built in converter.
- Use extreme caution if you're not an experienced electrician. There's a fairly serious amount of voltage going through these circuits, and fire or injury can result from mistakes. Brush up on the skills outlined at the beginning of this article before trying to wire these circuits and apply them to power.
-
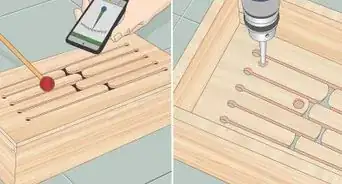
3Tune the components with an oscilloscope. If you're going to take the time to build a theremin from scratch, it's important to tune it accurately and make sure that you've got a playable prototype. Each module should be built, tested, and tuned so that the final assembly is the simple process of hooking everything together and performing a few final adjustments.
- In order to test and tune the modules, hook your theremin into the input jacks on an oscilloscope and you'll be able to see the sound waves you're creating as you manipulate the theremin. Adjust the modules accordingly, if the sound waves are off.
-
4Explore the theremin community. It's important to work from a detailed schematic and brush up on the skills necessary to circuit-wiring if you're going to undertake a DIY theremin project. Tons of schematics, tips, and tricks of the theremin-building trade are available online. You can learn more about building theremins with the community of ThereminWorld.[6]


Warnings
- Take care when working with electricity. You can be injured or even killed by an electric shock.⧼thumbs_response⧽
Things You'll Need
- Box
- Monopole antenna
- Loop antenna
- Variable oscillators
- Potentiometers
- Fixed oscillator
- Mixer
- Volume Resonant Circuit
- Voltage Controlled Amplifier
- Audio Amplifier
- Speaker
- AC Power Supply


References
- ↑ http://www.hoge-theremin.com/salon/hoge-what-is-a-theremin.html
- ↑ http://www.popsci.com/diy/article/2008-04/build-pocket-theremin-cheap
- ↑ https://www.cs.nmsu.edu/~rth/EMTheremin.pdf
- ↑ https://www.cs.nmsu.edu/~rth/EMTheremin.pdf
- ↑ https://web.mit.edu/6.101/www/s2016/projects/djgomez_Project_Final_Report_s.pdf
- ↑ http://www.thereminworld.com/schematics