This article was co-authored by Kpoene Kofi-Bruce and by wikiHow staff writer, Amy Bobinger. Kpoene Kofi-Bruce is a tailor, couture wedding gown designer, and the Creative Director of Mignonette Bridal and Ette the Wedding Tailor in Chicago, Illinois. With nearly two decades of experience as a wedding gown designer, small business owner, and vintage sewing enthusiast, Kpoene specializes in wedding gown design and the social history of wedding dresses. She received a BA in Creative Writing from Middlebury College and studied the business of fashion at the Fashion Institute of Technology. She is also a graduate of the Goldman Sachs 10KSB program and the Chicago Fashion Incubator and has written about wedding fashion for Jezebel, Catalyst, the Sun Times, and XO Jane.
There are 21 references cited in this article, which can be found at the bottom of the page.
This article has been viewed 24,104 times.
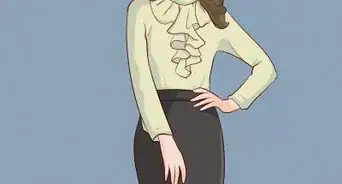
Strapless dresses are perfect for warm weather—they're comfortable, cute, and easy to style. Even better, you can easily make a strapless dress yourself! For instance, you might try drafting your own pattern to make a strapless tube dress that's custom-fit to your body. For an even easier project, try turning an oversized T-shirt into a super-cute dress!
If you're interested in making a more complicated design, like how to make a strapless dress with a sweetheart neckline, it's best to use a sewing pattern.
Steps
Drafting and Sewing a Tube Dress
-
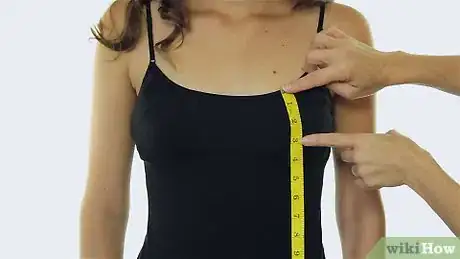
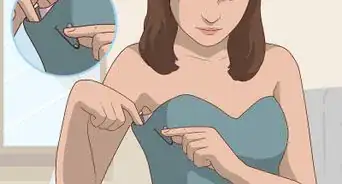
1Measure around your overbust, bust, waist, and hips. To make your own strapless dress pattern, start by taking using a fabric tape measure to take a measurement just above your bust, or under your armpits. This will be where the top of your dress sits. Then, measure around the fullest part of your bust, the narrowest part of your waist, and the fullest part of your hips.[1]
- Keep the tape measure as straight as you can while you're measuring.
- Take careful measurements, especially at your chest—the bodice is what will hold the dress in place.[2]
- If you're making the dress for yourself, it may help to have someone else take your measurements to ensure they're accurate.
-
2Divide those numbers by 4, then label them A, B, C, and D. Take each of the measurements you just found, and divide each one by 4, since you'll have 4 panels that make up the dress. Label the overbust measurement "A," the bust measurement "B," the waist measurement "C," and the hip measurement "D."[3]
- For instance, if you measure 36 in (91 cm) at your overbust, 40 in (100 cm) around your bust, 32 in (81 cm) at your waist, and 44 in (110 cm) around your hips, line A would be 9 in (23 cm), B would be 10 in (25 cm), C would be 8 in (20 cm), and D would be 11 in (28 cm).
Pattern Shortcut: For a super-fast way to make your own pattern, take a strapless or tank dress that fits you well, fold it in half, and trace the shape onto your fabric, starting just under the armpits and running all the way down through the length.[4]
Advertisement -
3Take vertical measurements between lines A, B, C, and D. First, measure from your overbust straight down to the fullest part of one of your breasts. It helps to do this centered over a breast, rather than in the middle of your chest. Then, measure from the fullest part of your breast down to the narrowest part of your waist, and from your waist to the fullest part of your hips. Finally, measure from the center of your chest down to where you want the dress to end.[5]
- Label the line from your overbust to your bust as line F, the line from your bust to your waist as line G, from your waist to your hips as line H, and the total length of the dress as line I.
-
4Draw line I on a piece of pattern paper near the left edge. Lay your pattern paper flat in front of you, then measure and draw the length of line I vertically down the left side of the paper. This will create the total length of your pattern.[6]
- If you'd like, you can use chalk and draw the pattern directly onto the fabric. However, using pattern paper is helpful in case you make a mistake.
- Start each of your lines on the left side of the pattern, beginning along line I and extending to the right.
-
5Draw lines A, B, C, and D all extending from line I. Starting at the top of line I, draw a horizontal line the length of the measurement you wrote down for A. Measure vertically down from line A, using the length of line F—the distance from your overbust to your bust—then draw line B extending from that point. Measure down again, this time the length of G, then draw line C extending horizontally from there. Finally, measure down the length of line H, and draw line D horizontally from that point.[7]
-
6Connect the free ends of lines A, B, C, and D. You should now see a vertical line with 4 horizontal lines coming out of it. Take your pencil and connect the right sides of lines A and B with an angled line, then continue from B to C and C to D. Then, draw a straight line down from the end of line D, and connect it to line I with a horizontal line along the bottom of the pattern.[8]
- When you're finished, you should be able to see the rough shape of an hourglass along the right side of the pattern.
-
7Add a 1 in (2.5 cm) seam allowance to all but the center line, then cut the pattern. Measure just outside of your pattern by about 1 in (2.5 cm) all the way around, except on the outside of line I. This will give you extra fabric so you can connect the sides of the dress and hem the top and bottom. Once you've done that, carefully cut all the way around your pattern, including the seam allowance.[9]
- If you're experienced at sewing, you might prefer to work with a smaller seam. If that's the case, you can adjust it to 1⁄2 in (1.3 cm) or 3⁄4 in (1.9 cm), if you'd like. However, if you're just getting started sewing, a 1 in (2.5 cm) will be easier to work with.
-
8Fold one end of the fabric over itself. Depending on the size of the dress you're making, you'll need about 1–2 yd (0.91–1.83 m) of a 4-way stretch fabric, like jersey. Lay the fabric in front of you, then fold it over by at least as much as the width of your pattern, including the seam allowance.[10]
-
9Trace the pattern onto the fabric and cut it out twice. Cut out the shape of your pattern from the pattern paper and lay it on top of your folded fabric so line I is against the fold. Trace around the pattern with fabric chalk, then cut around the shape you drew, being careful not to cut along the fold. Once you have the first piece, fold the fabric again, then retrace the pattern and cut a second piece.[11]
- If you don't want to use fabric chalk, you can pin the pattern to the fabric, then cut around it.
-
10Place the pattern pieces right-sides-together, then sew along the seams. If your fabric has a right side and a wrong side, put both pieces so the right sides are together. Then, use a zig-zag setting on your sewing machine and carefully sew along the left and right sides of the pieces, about 1 in (2.5 cm) from the edge, to create your hem.[12]
- A zig-zag stitch will work with the natural stretch of your dress.
- Only sew the hourglass-shaped curves you drew when you connected all the pieces on your pattern. Do not sew the tops and bottoms of the pieces, or you won't be able to put your dress on.
-
11Fold over the top and bottom hems by 1 in (2.5 cm) and sew them. With the dress still inside-out, fold down the fabric along the top hem and sew it into place with the same zig-zag stitch you used on the sides of the dress. Then, turn the hem up on the bottom and sew it down, as well.[13]
- Be sure to only sew through the folded fabric, rather than through all 4 layers. If you sew the dress closed, you won't be able to wear it.
- When you're finished, turn the fabric right-side-out, and try on your new custom-fitted dress!
Tip: Although your dress should fit you securely if you measured it properly, if you're concerned about how to make your strapless dress stay up, place a strip of elastic inside the top hem before you fold it down and sew it.
Converting a T-Shirt into a Strapless Dress
-
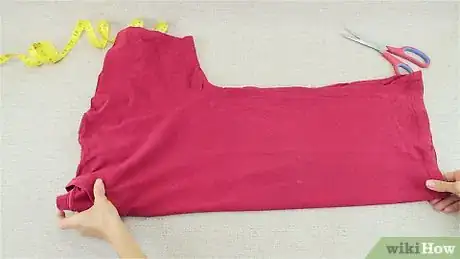
1Fold an oversized T-shirt in half longways. Start with a T-shirt that's big and cozy on you. Lay it flat in front of you, then fold it in half so the sleeves are lined up together and the fold runs vertically along the center of the shirt.[14]
- The shirt doesn't necessarily have to be long enough to be a dress on its own, since you'll add some length with the bust piece. However, it is best if the shirt is a little long, so avoid babydoll-style tees for this project!
- You can use this same technique to make a T-shirt dress into a strapless dress!
-
2Cut off the sleeves, then cut horizontally below the collar. With the folded shirt laying in front of you, carefully cut off both sleeves. Then, make a horizontal cut running from just under the center of the collar, all the way across to the sleeve area. This should leave you with a roughly rectangular shape, although the T-shirt may still be wider at the bottom than the top.[15]
- Be sure to remove the seam with the rest of the sleeve, since leaving that on your dress will look messy.
-
3Cut the sleeves along the bottom, then cut them into rectangles. First, cut carefully along the bottom seam of each sleeve piece. Once you've done that, unfold both pieces and lay them on top of each other so the right sides (or the outsides of the fabric) are together. Then, cut the pieces into a rectangle shape. To do that, first cut straight vertical lines along the left and right edges of the sleeves to square them off. Then, cut a straight horizontal line across the bottom of the fabric to remove the curved bottom seam.[16]
- Cutting the sleeve pieces together helps ensure they'll be exactly the same size.
-
4Pin and sew the sides of the sleeve pieces together. With the right sides of the fabric still facing together, put pins in the left and right sides of the sleeve pieces. Then, use a straight or zig-zag stitch to sew those two edges together, leaving you with a tube-shaped piece of fabric. This will be the bust of your dress.[17]
-
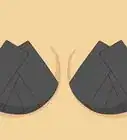
5Try on the bust piece to ensure it fits snugly. Once you've sewed the sleeves into a tube shape, slip that piece on over your head and situate it around your bust. Look in the mirror to ensure you have the coverage you'll be comfortable with. If the bust piece is too loose, take it in a little at the sides.
- If you need more coverage in your bust area, you can use fabric from another T-shirt instead of using the sleeves. Just cut 1 rectangle that fits all the way around your bust, and sew the left and right edges together vertically to create the tube shape.[18]
-
6Turn the T-shirt inside-out and place the bust piece on top. Take the body of the shirt that you already cut and turn it inside-out. Lay it in front of you with the top of the dress away from you and the bottom closest to you. Then, place the bust piece right above the top edge of the T-shirt.[19]
- Make sure to center the bust piece neatly, since if it's messy, the dress might come out uneven.
- The bust piece can be right-side-out or inside-out for this.
-
7Draw a vertical line from the bust piece to the bottom of the T-shirt. Using a straightedge and fabric marker or fabric chalk, draw a line starting at the outside left edge of the bust piece, running all the way down the length of the T-shirt. Then, do the same thing for the right side of the bust piece.[20]
- If you'd like a little more room at the bottom of the dress, you can angle both lines toward the outside corner of the dress. However, if the angles on the sides are different, the dress may not fit well, so it's easiest to work with straight lines.
-
8Cut about 1⁄2 in (1.3 cm) outside of the lines you just drew. Once you've drawn the lines for the body of your dress, take your fabric scissors and cut carefully along the outside of the line, leaving about 1⁄2 in (1.3 cm). This extra fabric will be your seam allowance.
-
9Sew the sides of the dress, then turn it right-side out. Use a zig-zag stitch to sew all the way down the left side of the T-shirt along the line you drew. Repeat for the right side of the shirt, then turn the body of the dress so it's right-side-out.[21]
- About 1⁄2–3⁄4 in (1.3–1.9 cm) should be enough room for your seam.
- A zig-zag stitch is best when you're working with a stretch material, like a cotton T-shirt, because the seam will be able to stretch with the fabric.
-
10Turn the bust piece inside-out and place it over the dress body. Take the tube you sewed from the sleeves and turn it inside-out, if it isn't already. Then, slide that piece over the T-shirt piece, lining up the top edge of the tube piece with the top of the T-shirt body.[22]
- The bust piece should be sheathed around the body of the T-shirt, with the top edges lined up.
- If the bust piece has a design that needs to be right-side-up on the finished piece, make sure it's upside-down (and inside-out) for this step.
-
11Pin and sew the top edges of the bust piece and body together. Use a zig-zag stitch to sew all the way around the bust and body, right at the edge where the two pieces meet. This will create a seam that will hit just below your bust.[23]
- Only sew right along the top hem of the dress. If you sew down into the bust piece, you won't be able to turn it right-side-out when you're finished.
- You don't need to hem the bottom of the dress because the T-shirt hem should still be intact there.
-
12Fold the bust piece up to see the finished dress. Once you've sewed the bust seam, your dress is finished! Flip the bust piece up to turn it right-side-out, then try on your dress to see how you like it![24]
Looking for a no-sew option? Take an oversized T-shirt or button-down shirt and put your arms and head through the neck hole. Then, tie the arms behind you to cinch the waist![25]
Expert Q&A
-
QuestionHow should a strapless dress fit?
 Kpoene Kofi-BruceKpoene Kofi-Bruce is a tailor, couture wedding gown designer, and the Creative Director of Mignonette Bridal and Ette the Wedding Tailor in Chicago, Illinois. With nearly two decades of experience as a wedding gown designer, small business owner, and vintage sewing enthusiast, Kpoene specializes in wedding gown design and the social history of wedding dresses. She received a BA in Creative Writing from Middlebury College and studied the business of fashion at the Fashion Institute of Technology. She is also a graduate of the Goldman Sachs 10KSB program and the Chicago Fashion Incubator and has written about wedding fashion for Jezebel, Catalyst, the Sun Times, and XO Jane.
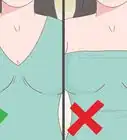
Couture Bridal Designer A strapless dress has to be very tight to your chest, and it has to have enough structure in the top to hold up the skirt.
Things You'll Need
Tube Dress
- 1–2 yd (0.91–1.83 m) fabric
- Fabric tape measure
- Pencil or pen
- Pattern paper
- Scissors
- Fabric chalk
- Thread
- Sewing machine
Strapless Dress from T-Shirt
- Oversized T-shirt
- Scissors
- Straightedge
- Fabric marker or chalk
- Sewing machine
- Thread
References
- ↑ https://youtu.be/Kd1HBbu4vVs?t=9
- ↑ Kpoene Kofi-Bruce. Couture Bridal Designer. Expert Interview. 28 January 2021.
- ↑ https://youtu.be/Kd1HBbu4vVs?t=9
- ↑ https://youtu.be/WRX-EvQc2VE?t=56
- ↑ https://youtu.be/Kd1HBbu4vVs?t=28
- ↑ https://youtu.be/Kd1HBbu4vVs?t=42
- ↑ https://youtu.be/Kd1HBbu4vVs?t=42
- ↑ https://youtu.be/Kd1HBbu4vVs?t=84
- ↑ https://youtu.be/Kd1HBbu4vVs?t=84
- ↑ https://youtu.be/WRX-EvQc2VE?t=36
- ↑ https://youtu.be/Kd1HBbu4vVs?t=101
- ↑ https://youtu.be/v_pjVgoS5wc?t=56
- ↑ https://youtu.be/WRX-EvQc2VE?t=480
- ↑ https://youtu.be/g-LVXMBMbWs?t=14
- ↑ https://youtu.be/g-LVXMBMbWs?t=20
- ↑ https://youtu.be/g-LVXMBMbWs?t=41
- ↑ https://youtu.be/g-LVXMBMbWs?t=75
- ↑ https://youtu.be/g-LVXMBMbWs?t=66
- ↑ https://youtu.be/g-LVXMBMbWs?t=94
- ↑ https://stitchandpink.com/2013/06/tip-of-week-choosing-best-way-to-mark.html
- ↑ https://crazylittleprojects.com/learn-to-sew-series-lesson-2-zigzag-stitch-2/
- ↑ https://youtu.be/g-LVXMBMbWs?t=118
- ↑ https://youtu.be/g-LVXMBMbWs?t=118
- ↑ https://youtu.be/g-LVXMBMbWs?t=157
- ↑ https://youtu.be/QNizrZjMuLw?t=32
