This article was co-authored by wikiHow Staff. Our trained team of editors and researchers validate articles for accuracy and comprehensiveness. wikiHow's Content Management Team carefully monitors the work from our editorial staff to ensure that each article is backed by trusted research and meets our high quality standards.
This article has been viewed 107,519 times.
Learn more...
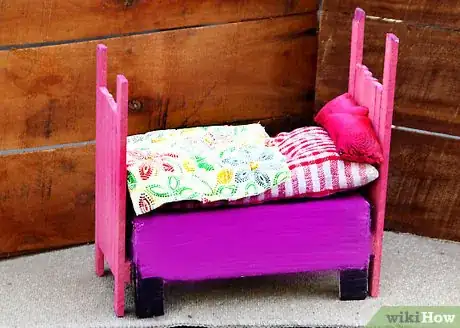
Putting dolly to bed at night is one of the most enjoyed childhood rituals. Instead of buying an expensive doll bed, you can create your own at home. Make a frame out of wood or cardboard and then sew a mattress and pillows to decorate the bed.
Steps
Making a Frame with Wood or Cardboard
-
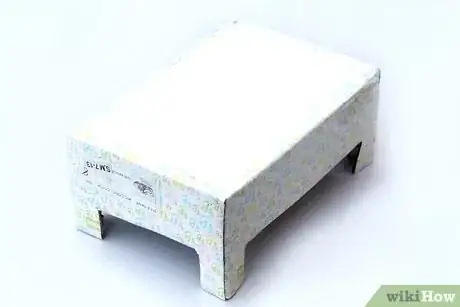
1Get a wooden fruit crate or a cardboard shoe box. The easiest way to make a doll bed, no power tools required, is to use a wooden fruit crate or a cardboard shoe box. You can find a wooden fruit crate at the grocery store. They are often used to hold fruits like clementines, small oranges, or grapes and many grocery stores will give you empty fruit crates if you find one available in the produce section.
- Many fruit crates already have small “legs” on each corner made of wood. You will use these legs to help the crate stand up off the ground when you transform it into a doll bed.
- Alternatively, you can use a standard cardboard shoe box to make the frame. Look for a cardboard box in good condition and made of stiff material that can hold some weight.
-
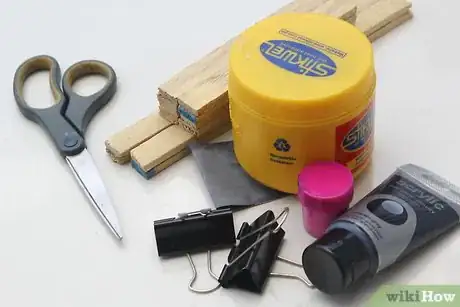
2Gather your other supplies. You find most of the supplies for this method at your local hardware store. You will need to following supplies for this method:
- A 4” x 4” fruit crate or a standard cardboard shoe box
- 16 wooden paint stirring sticks (12 short ones, 4 long ones)
- Wood glue (hot glue works too)
- Scissors
- Large binder clips
- Sandpaper or a sanding block
- Gesso or primer
- Acrylic paint in your desired color
Advertisement -
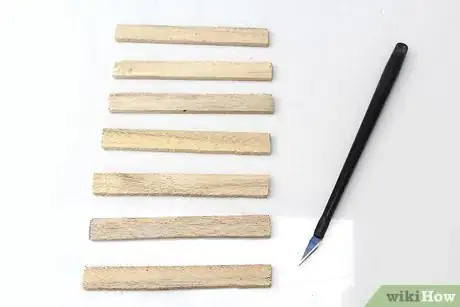
3Trim seven of the short paint stirring sticks to 8 inches long. Measure the sticks and mark the 8 inch line on each with a pencil before you cut them. Then, score the sticks with the X-ACTO knife seven to eight times against a ruler and then cut them easily with the scissors or the X-ACTO knife.
-
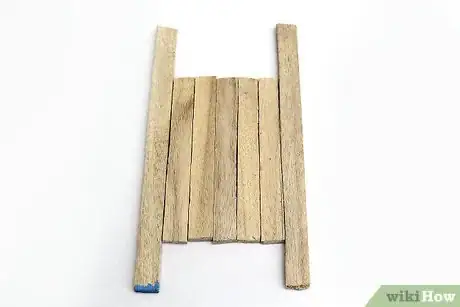
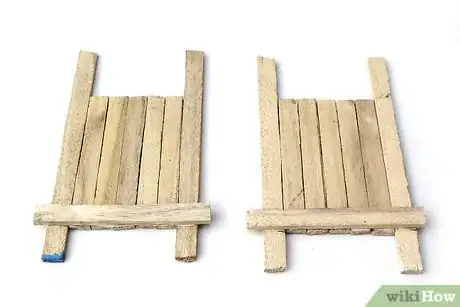
4Place five of the trimmed sticks side by side of a flat, clean surface. Lay one of the longer sticks next to each end so the bottom of the long stick extends 1 ½ inches past the bottom of the row of trimmed sticks. This is going to form your footboard.
-
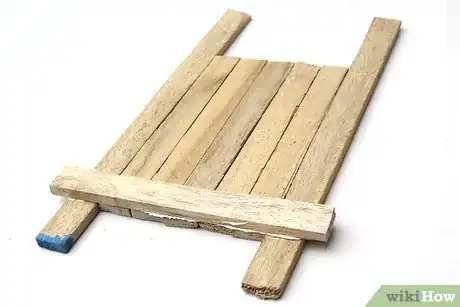
5Secure the footboard with wood glue, or hot glue. You can do this by laying one of the trimmed sticks across all the sticks so it is parallel and about ½ inch above the bottom of the five trimmed sticks. Drizzle the stick with wood glue and secure it over all the sticks so it holds them in place.
- Let the footboard dry for at least one hour with a heavy object, like a book, sitting on top of the sticks.
-
6Repeat this process to make the headboard. Trim five of the short paint stirring sticks so they are 8 inches long using scissors and/or an X-ACTO knife. Then, place the five trimmed sticks side by side on a flat, clean surface.
- Take two of the longer sticks and place each on on either end of the five trimmed sticks so the long sticks extend 1 ½ inches past the bottom row of trimmed sticks.
- Secure the headboard with wood glue by drizzling a trimmed stick with glue and laying it across all the sticks, parallel and ½ inch above the bottom. Let the headboard dry for at least one hour, placing a heavy flat object on top of the sticks.
-
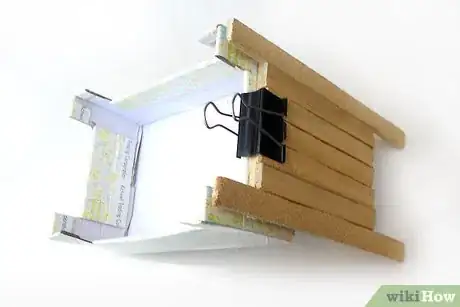
7Turn over the fruit crate or the cardboard box. It should be balancing on one of the short ends of the crate or box. Take the footboard piece and drizzle glue across the short stick lying parallel on the sticks. Press the footboard on the short end of the crate or box.
- If the box has short wooden legs attached to the corners of the crate, line up the longer sticks with the wooden legs so the doll bed will sit evenly on the ground when it is done.
-
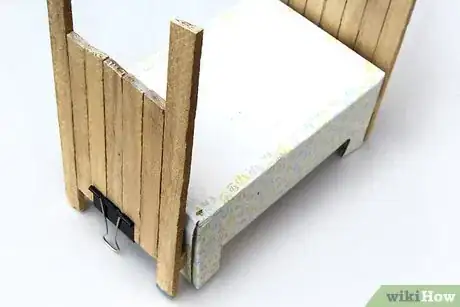
8Clamp the footboard into place using the binder clips. Make sure the binder clips are secure over the sticks and the crate. Let this dry for at least one hour.
-
9Follow the same process for the headboard. Once the footboard side is dry, you can attach the headboard to the other short end of the crate or box following the same steps.
- Make sure you clamp the headboard into place with the binder clips and let it dry for one hour so it is secure.
-
10Sand the bed with sandpaper. Use sandpaper to lightly sand the bed so there are no rough corners or patches. Make sure you sand the cut edges on the headboard and the footboard until they are smooth.
- If you are using a cardboard box for the bed section of the frame, you only need to sand the headboard and the footboard.
-
11Finish the bed frame by painting it with acrylic paint. You can finish the bed frame by painting one primer layer of gesso on the bed. You can then apply two to three coats of acrylic paint to the bed frame, sanding between each coat.
- Let the bed frame dry overnight and then add on other elements to the bed, like a mattress and pillows.
Creating a Frame Out of Paper
-
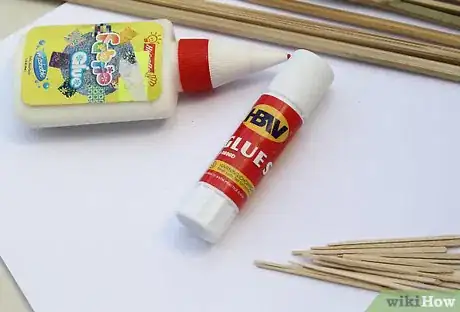
1Gather your materials. To make a bed frame for your doll out of paper, you will need the following materials:[1]
- 10-12 pieces of paper
- 10-12 wooden dowels
- Toothpicks
- Fabric glue
- A glue stick
-
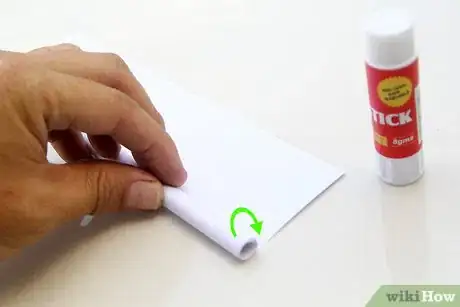
2Roll the wooden dowels around the paper. To make the dowels more aesthetically pleasing and smooth, you can roll the paper around the dowels. To do this, you will take a wooden dowel and place it at one end of a piece of paper. Then, roll the paper around the dowel, stopping every one to two rolls to apply glue with the glue stick to the paper so the paper stays in place on the dowel.[2]
- Do this for all ten to twelve dowels. Wrap each dowel in at least one sheet of paper, gluing the paper to the dowel as you roll them in the paper.
- You can make the paper tube thicker by gluing another layer of paper onto the tube. You may decide to create thicker tubes for the longer tubes on the bed frame so they are more durable.
-
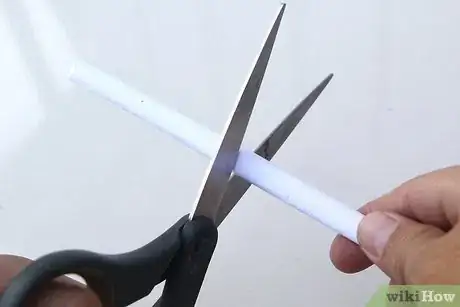
3Combine or cut the tubes based on the size of your doll. If you are making the bed for a larger doll, you may need to make a larger frame so she can fit on the bed. You should lay your doll on a flat surface and place the wrapped dowels around the doll in the shape of a bed. You can then determine if you need to combine or trim down the tubes to fit the doll.[3]
- Cut the tubes with scissors, making sure you cut the ends evenly and smoothly.
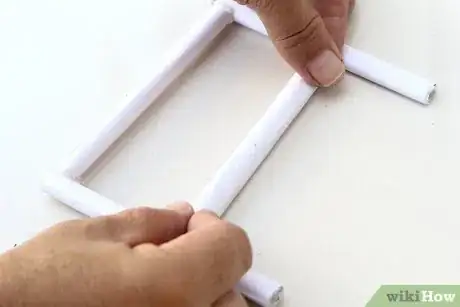
- Combine the tubes using toothpicks and fabric glue. Put fabric glue in one end of the tube and then insert a toothpick ½ inch into the tube. Then, apply fabric glue into the end of another tube and gently push the tube onto the toothpick until the two tubes come together.
-
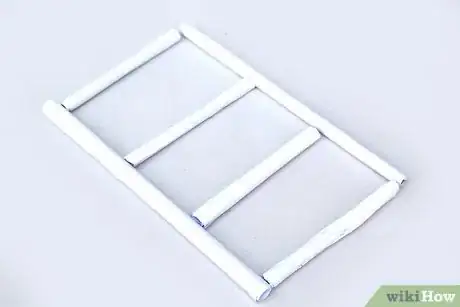
4Lay out the design for the bed frame. Now that you have your wrapped wooden dowels in the appropriate lengths, you can lay them out to form the bed frame. You should have two long dowels on either end of the frame and two to three shorter dowels going across the frame. You may want to double up on the dowels, parallel and horizontal, to make the frame stronger.[4]
- Use a pencil to mark where the tubes will connect to make the frame. This will make it easier for you to put the frame together.
-
5Make holes in the tubes. Use the sharp edge of the scissors to make small holes where you have marked on the tubes. The holes should be just big enough to fit toothpicks.
- Then, slide a toothpick into each hole. Secure the toothpicks with a dab of glue.
-
6Connect the tubes together. Put glue into one end of the tube and slide the toothpick into the tube until the two tubes connect. Continue to do this for the rest of the tubes until you have made the bed frame.[5]
- You should have a frame that consists of at least five to seven tubes total, one to two long tubes running vertical and three to five tubes running horizontal.
-
7Create a headboard and a footboard for the frame. If you would like to add a headboard and a footboard to your bed frame, you can do so with the remaining dowels.[6]
- Lay out the design for the headboard and the footboard before you attach the tubes together. Use the toothpicks and the glue to secure the tubes. Then, attach the headboard and the footboard to each end of the bed frame. You will need to stand the headboard and footboard right side up to attach to them to the bed frame.
-
8Paint if preferred. Let the bed frame dry overnight and then add on other elements to the bed, like a mattress and pillows.
Making the Mattress and the Pillows
-
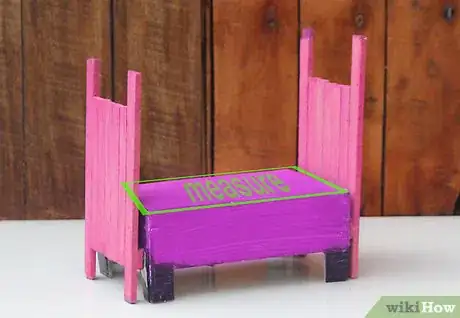
1Measure the base of the frame. To ensure your mattress fits the bed frame properly, you will need to measure the base of the frame. Once you have the measurements, you can determine how much material you need to make a mattress and pillows.
-
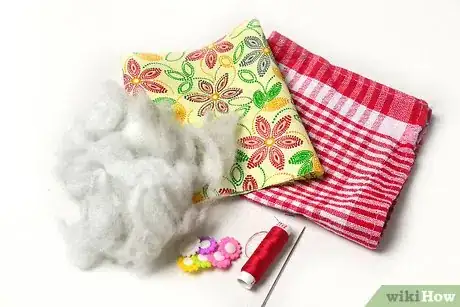
2Gather your materials. To make the mattress and the pillows, you will need the following supplies:
- A fat quarter of fabric
- A dish towel
- Loose stuffing
- Needle and coordinating thread
- Doll needle
- Buttons (optional)
- Sewing machine (optional)
-
3Cut off the hemmed edges of the dish towel. Then, cut the towel in half. Place the right sides together and sew all the edges. Be sure to leave a 2-inch opening on one edge.[7]
- Pull the corners into a triangle. Use the needle and thread to sew the box corners or use a sewing machine if you have access to one.
-
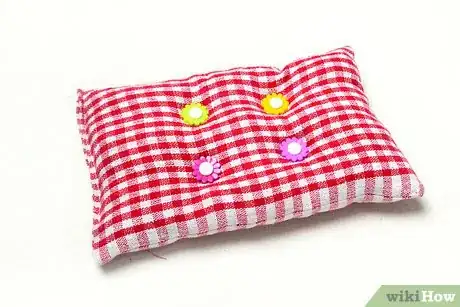
4Stuff the mattress. Turn the dish towel right side out and use your hands to gently stuff the mattress until it is your desired thickness. Avoid overstuffing the mattress and make sure the stuffing is dispersed evenly. Then, sew the opening closed.
- At this point you can add buttons to the mattress if you would like.
-
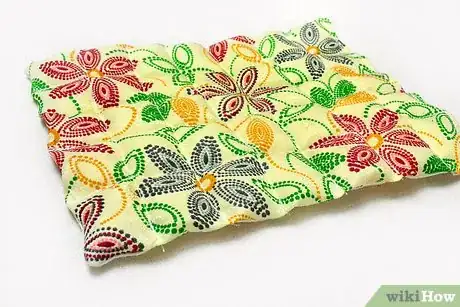
5Add a quilting effect to the mattress. As a finishing touch, you can add a quilting effect to the mattress to make it look more polished. Start by folding the fat quarter of fabric in half, with the right sides facing up. Then, sew along the two open edges, leaving the third edge open. Flip the fabric right side out and fill it with quilt batting that has been cut to fit the mattress.[8]
- You can then hand sew the open side closed or use a sewing machine. Finish the quilt effect by sewing straight horizontal and vertical lines at even intervals across the quilt. This will also help to secure the batting in place.
-
6Sew the pillows. You can use scrap fabric and/or another dish towel to create pillows for the bed to finish it off. Measure the fabric or dish towel so it is small enough to make pillows that fit the bed. Then, cut out the fabric. Place the right sides together and sew all the edges, leaving a 2-inch opening on one edge.[9]
- Flip the fabric right side out and stuff the pillow with stuffing. Then, sew the opening closed.
-
7Make a comforter, You can then hand sew the open side closed or use a sewing machine. Finish the quilt effect by sewing straight horizontal and vertical lines at even intervals across the quilt. This will also help to secure the batting in place.
-
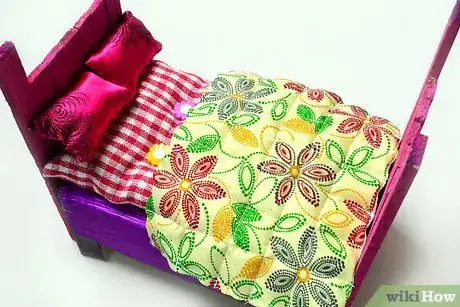
8Put the mattress and pillows on the frame. Lay the mattress and pillows on the bed frame. Test out the frame by placing your doll on it the next time she is ready to go to sleep.
Things You'll Need
Wood or Cardboard Frame
- A 4” x 4” fruit crate or a standard cardboard shoe box
- 16 wooden paint stirring sticks (12 short ones, 4 long ones)
- Wood glue
- Scissors
- Large binder clips
- Sandpaper or a sanding block
- Gesso or primer
- Acrylic paint in your desired color
Paper Frame
- 10-12 pieces of paper
- 10-12 wooden dowels
- Toothpicks
- Fabric glue
- A glue stick
Mattress and Pillows
- A fat quarter of fabric
- A dish towel
- Loose stuffing
- Buttons
- Needle and coordinating thread
- Doll needle
- Buttons (optional)
- Sewing machine (optional)
References
- ↑ https://www.youtube.com/watch?v=MlHwbNbpDpo
- ↑ https://www.youtube.com/watch?v=MlHwbNbpDpo
- ↑ https://www.youtube.com/watch?v=MlHwbNbpDpo
- ↑ https://www.youtube.com/watch?v=MlHwbNbpDpo
- ↑ https://www.youtube.com/watch?v=MlHwbNbpDpo
- ↑ https://www.youtube.com/watch?v=MlHwbNbpDpo
- ↑ https://sonotadomesticdiva.wordpress.com/2011/03/09/bedding-basics-mattress-pillows-for-doll-bed/
- ↑ https://sonotadomesticdiva.wordpress.com/2011/03/09/bedding-basics-mattress-pillows-for-doll-bed/
- ↑ https://sonotadomesticdiva.wordpress.com/2011/03/09/bedding-basics-mattress-pillows-for-doll-bed/
About This Article
To make a doll bed, start by laying five 8-inch sticks side by side. Next, place a longer stick at each end, and glue another stick horizontally across the bottom to create a headboard. While the glue dries, repeat the process with the sticks to make a footboard. Then, glue the headboard and footboard onto the ends of a shoebox, and clamp them in place with a binder clip while the glue dries. Finally, sand any rough edges and paint the bed frame with 2 layers of acrylic paint. To learn how to make a mattress and pillows for your doll bed, read on!

