This article was co-authored by Natasha Dikareva, MFA. Natasha Dikareva is a San Francisco, California based sculptor, and installation artist. With over 25 years of ceramics, sculpting, and installation experience, Natasha also teaches a ceramic sculpture workshop titled "Adventures in Clay" covering concept development, hand-building techniques, texture, and glazing techniques. Her work has been featured in solo and group exhibitions at the Beatrice Wood Center for the Arts, Abrams Claghorn Gallery, Bloomington Center for the Arts, Maria Kravetz Gallery, and the American Museum of Ceramic Art. She has taught at the University of Minnesota and the American Indian OIC School. She has been awarded the Excellence Award at the 1st World Teapot Competition, Best in Show at the 4th Clay & Glass Biennial Competition, and a Grand Prize at the American Museum of Ceramic Art. Natasha holds an MFA from the University of Minnesota and a BFA from Kiev Fine Arts College.
This article has been viewed 622,555 times.
The venerable clay pot has its roots deep in ancient history. Our ancestors needed vessels to carry water and store food, and found the water-resistant naturally occurring clays in the soil were ideal. Even though today we can buy our vessels at the store and usually carry our water through pipes, clay pots remain beautiful, and are functional works of art and craft.
Steps
Preparations
-
1Knead the clay. Start with about 1/2 pound (.25 kilos) of clay. Slowly warm it and work out the air bubbles by kneading it with your hands. This will even out the clay’s consistency, eliminating lumps of soft spots, and make it more pliable and easier to work with. Take care to avoid folding, poking, or other actions that could add air pockets and bubbles to your clay—these could cause your pottery to explode in the oven.
-
2Slice your clay in half with a stiff wire, and check for bubbles or gaps.Advertisement
-
3Once your clay is kneaded, try one of the methods below to make your own pot.
- See the wikiHow article How to Knead Clay

Coiled Clay Pots
-
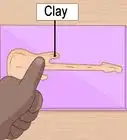
1Once the clay is warm and pliable, take a fist-sized clump and roll it into a long rope called a coil. The diameter of the coil will determine the thickness of your pot's walls. For your first pots, roll your coils out till they’re a little thicker than a pencil, and about 12 to 24 inches (30 to 60 cm) long. Sculptor Natasha Dikareva suggests "keeping the coil as even in thickness as possible."
- You may get thin or weak spots as you roll your coil out. Try avoiding that section as you work, but if it becomes a problem just break the coil at the weak spot, set one part aside, and finish the other.
-
2Create the bottom.[1] Starting from one end, wrap the coil in a spiral until the bottom is the size you have in mind. For example, for a pot using coils about 1/4 inch (.6 cm), your base might be 3 inches (8 cm) in diameter.
- You can also create the bottom by rolling out some clay to about the same thickness as your coils, and then trim the excess with a knife, using cup or plate as your guide.
-
3Prep the clay and start working. Score the outer 1/4 (.6 cm) inch of the bottom, and dampen with water or slurry (a thin mix of clay and water). Do the same with the bottom of the coils as you work. This will improve the clay bond and make your pot stronger. Lay the first coil on top of the base, and wrap it around, building up the wall.
-
4Strengthen your pot. To make your work durable, strengthen the clay bond by smoothing down the inside of the pot, forcing down the clay from the upper coil into the joint below it.
- To maintain the shape of your pot, support the outside of the pot as you smooth the inside.[2]
- You can smooth both inside and outside if you wish.
-
5Shape your pot as you make it. Create your contours by adjusting the placement of the coils, and shaping the clay during the smoothing and strengthening process. If the clay is a little hard, sculptor Natasha Dikareva advises that "you might need to slip and score in between the coils to make sure they stick together nicely."
-
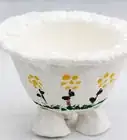
6Finish your pot. Add any decoration or glazing as desired, and depending on what kind of clay you are using you may air-dry your pot, bake it, or fire it in a kiln. Follow the manufacturer’s instructions on the correct method.


Make a Pinch Pot
-
1Make a ball. Roll the clay into a ball, and make sure it's moist.
-
2Make a hole. Sculptor Natasha Dikareva suggests "using your thumb to create a hole that doesn't go all the way through the clay."
-
3Work the sides. According to sculptor Natasha Dikareva, "Start to rotate your bowl with the thumb inside your bowl. Then, squeeze and pull at the same time." Work all around the inside, and with each pass, pinch from the bottom and move up, repeating until your vessel has the shape you want.
-
4Flatten the bottom. Press from the inside, against the table you're working on, so that the bottom is smooth and flat. Sculptor Natasha Dikareva adds that "you can also use a paddle tool to shape your pinch pot and create a nice bottom for it."
-
5Smooth out the inside and outside of the pot, as desired. Decorate, and follow the manufacturer's instructions for curing and finishing your pot.
-
6For more detailed information, see How to Make a Pinch Pot.
Using a Wheel
-
1Smack your clay. Throw it firmly from hand to hand, smacking it into a ball shape.
-
2Dry your wheel. This will help the ball of clay adhere to the wheel once it starts spinning. The last thing you want is a ball of wet clay flying across the room.
-
3Have some water. Place a bucket of water where you can easily reach it to wet your hands while you work.
-
4Throw the clay. Throw down the ball of clay as close to the center of the wheel as you can, then press it down into a conical shape.[3]
-
5Start spinning.[4] As you build up speed, wet the clay, and with one hand on the side of the clay lump, and the other side on top of it, ease the clump towards the middle. Use the upper hand to keep the clay from flying out of control.
- You can tell the clay is centered when it no longer looks like it's wobbling, but sitting stationary in the center of the spinning wheel. Don't stop spinning.
-
6Wet your hands.[5] Then work the clay into a cone, then press it down into a thick disk. Repeat this step a couple times. This is known as "wheel wedging" and helps to condition the clay. Make sure you keep the clay centered as you work.
-
7Push a thumb into the middle of the spinning mass, until it's about 1/2 inch (1.5cm) from the bottom.[6]
-
8Push 4 fingers into the hole, and work them around until the hole is as big as you would like. Continue working the hole, using a hand on the outside of the clay to shape your pot.
-
9Work slowly. Gradually pull the clay up with even pressure, until it's the desired height.[7]
-
10Spread the top. If you want it a bit wider at the neck, just pull back with your inside fingers. Don't do it too hard.
-
11Remove the finished pot from the wheel.[8] Wet the wheel (not the pot) and using a stiff wire or fishing line, and holding it with both hands, pull it from the back of the pot towards you until the pot is separate from the wheel.
-
12Follow the manufacturer's instructions for finishing and firing your clay pot.


Expert Q&A
-
QuestionHow do you open clay?
 Deanna RanlettDeanna Ranlett is a Pottery and Ceramics Professional and the Owner of Mudfire Inc. in Decatur, Georgia. With more than 22 years of experience in the ceramics industry and eight years of experience owning a studio, they specialize in glaze formulation, firing ceramic and pottery pieces, general clay projects, and screen printing for ceramics. Deanna holds a BFA in Ceramic Arts and Ceramics from Georgia State University.
Pottery & Ceramics ProfessionalUltimately, you have to find a position that's comfortable for you. Some people use their thumb while some use their index finger. Other people find it more comfortable to hold a sponge or use their middle finger. -
QuestionHow can you tell if clay is centered?Deanna RanlettDeanna Ranlett is a Pottery and Ceramics Professional and the Owner of Mudfire Inc. in Decatur, Georgia. With more than 22 years of experience in the ceramics industry and eight years of experience owning a studio, they specialize in glaze formulation, firing ceramic and pottery pieces, general clay projects, and screen printing for ceramics. Deanna holds a BFA in Ceramic Arts and Ceramics from Georgia State University.
Pottery & Ceramics ProfessionalThe clay isn't moving and you aren't moving. Plus, you aren't fighting the clay—it's perfectly still but spinning in a circle. -
QuestionHow do you make pottery tall?Deanna RanlettDeanna Ranlett is a Pottery and Ceramics Professional and the Owner of Mudfire Inc. in Decatur, Georgia. With more than 22 years of experience in the ceramics industry and eight years of experience owning a studio, they specialize in glaze formulation, firing ceramic and pottery pieces, general clay projects, and screen printing for ceramics. Deanna holds a BFA in Ceramic Arts and Ceramics from Georgia State University.
Pottery & Ceramics ProfessionalUse a technique called pulling! Change your hand position to have one hand on the outside of your piece and one on the inside. Use one hand to pull the clay over the other and then pull straight up, as though you're pulling straight toward your nose. You might have to do this 5-8 times before you're happy with your pot's height.
Warnings
- Carefully follow the instructions on how to bake your clay if it is not an air drying kind. This is because if dry clay gets into the air or flicked about, it forms a dust called silica dust which causes long term health problems.⧼thumbs_response⧽
- Follow the directions for materials to work on. Some clays will stain wood.⧼thumbs_response⧽


References
- ↑ Deanna Ranlett. Pottery & Ceramics Professional. Expert Interview. 12 November 2021.
- ↑ Natasha Dikareva, MFA. Ceramics & Sculpting Instructor. Expert Interview. 5 May 2020.
- ↑ Deanna Ranlett. Pottery & Ceramics Professional. Expert Interview. 12 November 2021.
- ↑ Deanna Ranlett. Pottery & Ceramics Professional. Expert Interview. 12 November 2021.
- ↑ Deanna Ranlett. Pottery & Ceramics Professional. Expert Interview. 12 November 2021.
- ↑ Deanna Ranlett. Pottery & Ceramics Professional. Expert Interview. 12 November 2021.
- ↑ Deanna Ranlett. Pottery & Ceramics Professional. Expert Interview. 12 November 2021.
- ↑ Deanna Ranlett. Pottery & Ceramics Professional. Expert Interview. 12 November 2021.
- Videos provided by The Clay Teacher
About This Article

To make a clay pot, start by rolling some moist clay into a ball. Then, use your thumb to press an indent into the center of the clay that's about 1/4 of an inch from the bottom. Next, hold your thumb in the indent you made and rotate the clay as you pinch the sides with your finger to widen the hole. Continue doing this until you're satisfied with the size of the hole and the thickness of the sides. Finally, flatten out the bottom of your pot so it's able to rest on a flat surface. To learn how to make a clay pot using a wheel, scroll down!