This article was co-authored by Natasha Dikareva, MFA. Natasha Dikareva is a San Francisco, California based sculptor, and installation artist. With over 25 years of ceramics, sculpting, and installation experience, Natasha also teaches a ceramic sculpture workshop titled "Adventures in Clay" covering concept development, hand-building techniques, texture, and glazing techniques. Her work has been featured in solo and group exhibitions at the Beatrice Wood Center for the Arts, Abrams Claghorn Gallery, Bloomington Center for the Arts, Maria Kravetz Gallery, and the American Museum of Ceramic Art. She has taught at the University of Minnesota and the American Indian OIC School. She has been awarded the Excellence Award at the 1st World Teapot Competition, Best in Show at the 4th Clay & Glass Biennial Competition, and a Grand Prize at the American Museum of Ceramic Art. Natasha holds an MFA from the University of Minnesota and a BFA from Kiev Fine Arts College.
This article has been viewed 190,620 times.
Making people out of clay is an easy way to get crafty with your hands and have fun! Maybe you just want to pass the time with a little sculpting, or maybe you want to make a claymation movie. You can put your little clay person on display somewhere when you're done or you can squish it up and make something else. You can use any kind of clay, but modeling clay works best. Remember to be creative! All the details are up to you, but this technique will give you a good clay person to start with.
Steps
Prep
-
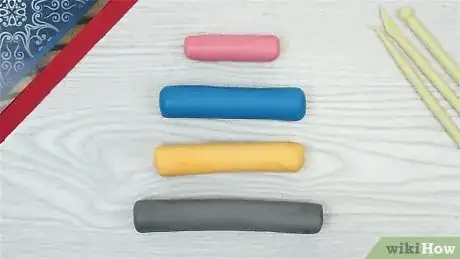
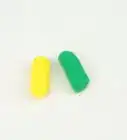
1Get clay. If you want to be able to move your clay person around after it's finished, you'll need modeling clay. This clay doesn't dry in the air, so it's perfect for making clay models out of. If you want your clay person to be still once it's done, you can use oven-bake clay.
- You can make your clay person all the same color, or you can use different colors for different parts of the body. For example, if you want it to look like your clay person is wearing a shirt, you can use a green or white piece of clay for the torso.[1]
-
2Make a ball for the head. Pinch off a piece of the clay. Roll the piece of clay into a ball. This will be the clay person's head.
- It's up to you what color the clay person's skin will be. You can make the whole person out of blue clay, or you can find some flesh colored clay for the head and arms.[2]
Advertisement -
3Make a tube for the body. Pinch off a piece of clay that's larger than the head. Shape this piece into a fat snake-like cylinder. Flatten the cylinder slightly.
-
4Make two long tubes for the arms and legs. Pinch off two more pieces of clay. Roll these pieces into two long tube shapes. One tube should be thicker than the other. These will become the arms and legs.[3]
Head
-
1Pinch out the neck. Take the ball that will be the head and pinch out of it a little spike of clay. This will be how the head will attach to the body.
- The neck should jut out of the head like a small spike or cone, and should be about half the length of the neck. And make sure it's thick enough that you can hold the head up by holding nothing but the neck between two fingers.
-
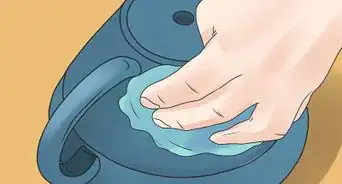
2Make a hole for the neck. Take something narrow, like a pencil, or a toothpick, and burrow out a small hole in the top of the body cylinder. Make sure the hole isn't too wide, but wide enough for the neck to fit in. Make the hole deep enough for the neck to go completely in.
-
3Attach the head to the body. Stick the neck into the hole in the body so that the ball touches the body. Smooth out the edge where the head meets the body to make it secure.[4]
Legs and Arms
-
1Tear the arm tube into two pieces. Find the middle of the smaller tube and tear it into, for the two arms.
-
2Flatten the ends of the arms. With your thumb and finger, flatten a small bit of one end of both arms. These will become the hands.
-
3Mold the hands. First, cut out a bit of the flattened parts. Use something sharp to cut out a corner of the flattened ends of the arms. Then round out the corners of the hand so that it looks like a cartoony thumb and fingers.
-
4Attach the arms. Take the finished arms and attach them to the sides of the body. Smooth out the connection between the arms and body to secure them.
- If the arms are too long, tear off an even amount from both arms until they're as short as you'd like.[5]
-
5Tear the leg tube into two pieces. Find the middle of the larger tube and tear it into, for the two legs.
-
6Make the feet. Bend one end of both of the legs. Shape this bent part into a rough foot shape. Make sure they are large enough to support the legs. Stand the legs up to test the feet. Press the feet into the table so that the feet bottoms are flat.
-
7Attach the legs. Stick the legs into the bottom of the body. Smooth the connection between the legs and body to secure them together. Make sure the feet are facing forward.[6]
- If the clay person can't stay standing on its own at this point, you'll need to redo the legs and make them thicker.
-
8Troubleshoot any balancing issues. If you're clay person can't stand up on its own after you attach the legs, there could be a balancing issue. You can always make the legs thicker, but sometimes the legs are plenty thick, and it still falls over. In that case, you might want to redo various parts of the person and experiment with a shorter torso, less clay for the torso, smaller arms, a smaller head, ect.
- Also make sure the clay person's torso is straight, and that the arms are close to the same size and weight.
Face
-
1Make balls for the eyes. Tear off four small bits of clay. Make four balls out of these clay pieces. Two of these balls should be smaller than the others.
-
2Finish the eyes. Push the smaller balls into the larger ones. Flatten them a bit into the bigger balls. These will be the eyes.
-
3Attach the eyes. Press both eyes firmly into to the head of your person.[7]
- If you want, you can use another method to make eyes, such as using two googly eyes, or making eyes out of paper.[8]
- If you want a simpler method for making eyes, you can just take a pencil and make two round holes in the head for eyes. You can use a pencil to carve out a smile or open mouth as well.
-
4Make a small tube for the mouth. Take a small pinch of clay and roll it into a small tube. The tube should be no longer than the width of the head. You can make it as thin as you'd like the mouth to be.
-
5Attach the mouth to the head. Place the small tube under the eyes, where the mouth should go. With the flexibility of the tube, you can make any sort of expression you want, a smile, a frown, or any other mouth shape.
-
6Add a nose. You can add a nose to your clay person's face by just taking a small bit of clay and sticking it in the center of the face. Then use your fingers to form it into any sort of nose shape you want, a small ball, a little triangle, whatever shape you prefer.
Community Q&A
-
QuestionHow can I make the hair and facial expressions more clear and realistic?
 Community AnswerBetter to paint the facial expressions to help make them more clear and realistic.
 -
QuestionHow do I make a clay person's hair?
 Community AnswerThis is difficult, but practice. Use a pencil or toothpick to sculpt edges, and make sure it’s not too thick and heavy. Practice makes perfect!
 -
QuestionHow do I make it look like it's wearing a dress?
 Community AnswerYou just have to make a cone shape for the dress and put it on the doll.
Warnings
- If the clay you use is oven-baked, then be careful not to burn yourself and read the package instructions very carefully.⧼thumbs_response⧽
- Children should be supervised.⧼thumbs_response⧽
Things You'll Need
- A good-sized piece of any kind of clay
- A toothpick or pencil
References
- ↑ https://www.youtube.com/watch?v=ZeaZLIlTTY8
- ↑ https://www.youtube.com/watch?v=ZeaZLIlTTY8
- ↑ https://www.youtube.com/watch?v=t76XbAPNDIk
- ↑ https://www.youtube.com/watch?v=t76XbAPNDIk
- ↑ https://www.youtube.com/watch?v=t76XbAPNDIk
- ↑ https://www.youtube.com/watch?v=t76XbAPNDIk
- ↑ https://www.youtube.com/watch?v=ZeaZLIlTTY8
- ↑ https://www.youtube.com/watch?v=t76XbAPNDIk
- ↑ Natasha Dikareva, MFA. Ceramics & Sculpting Instructor. Expert Interview. 5 May 2020.
- ↑ Natasha Dikareva, MFA. Ceramics & Sculpting Instructor. Expert Interview. 5 May 2020.
About This Article
To make a clay person, start by making a ball for the head, tube for the body, and smaller tubes for the arms and legs. Next, take the ball that will be the head and pinch out a spike of clay to form the neck. Then, use a toothpick to make a small hole in the top of the body cylinder, and stick the neck into this opening to attach the head and body. For the arms and legs, flatten the ends of the tubes, mold them into hands and feet, and attach them to the body. To learn how to make the face for your clay person, keep reading!
