This article was co-authored by Christine George. Christine George is a Master Hairstylist, Colorist, and Owner of Luxe Parlour, a premier boutique salon based in the Los Angeles, California area. Christine has over 23 years of hair styling and coloring experience. She specializes in customized haircuts, premium color services, balayage expertise, classic highlights, and color correction. She received her cosmetology degree from the Newberry School of Beauty.
There are 11 references cited in this article, which can be found at the bottom of the page.
This article has been viewed 1,248,586 times.
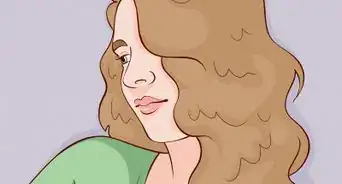
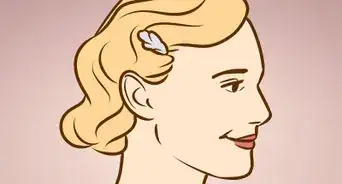
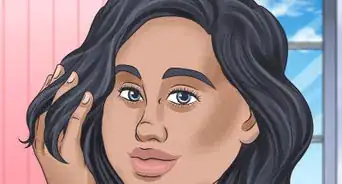
Wavy hair is a great alternative when you don't feel like wearing your hair straight or curly. There are countless ways to get wavy hair, ranging from heat to no-heat. Even if you already have wavy hair, you might want to check this out; it will help shape and tame your waves.
Steps
Using a Curling Iron
-
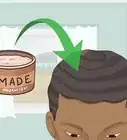
1Apply a volumizing product and a heat protectant to damp hair. You need to start with damp hair because you will be blow drying it first, unless your hair is naturally straight. This will help make your waves appear smoother while also adding volume.[1]
- The volumizing product is especially important if your hair doesn't hold styles well.
- If your hair tends to get frizzy, use a smoothing product instead.
-
2Part your hair as desired, then blow dry it straight using a round brush. If your hair is naturally straight, then you can skip the blow dryer. Place the brush under a thin section of hair, and pull it slowly down towards the ends. Point your hairdryer down on top of the hair that’s wrapped around the brush. As you reach the ends, rotate the brush downwards so that the ends curl in.[2]
- Hold the brush horizontally and parallel to the floor, not vertically.
- Work in small sections, starting at 1 side of your head and finishing at the other.
- The sections should be a little shorter than the brush. How thin they are depends on how thick your hair is; the thicker it is, the thinner the sections should be.
- If you want to add volume, blow dry your hair upwards at the roots as well.
Advertisement -
3Curl your hair using a 1 in (2.5 cm) curling iron. This time, hold the curling iron vertically and perpendicular to the floor. Wrap thin sections around the rod, alternating them as you work your way around your head.[3]
- Wrap 1 section towards your face, and the other away from your face. This will give your waves a more natural look.
-
4Brush or comb your hair to separate the waves. Which tool you use depends on how fluffy you want your hair to be. If you use a brush, your waves will loosen and soften up more. If you use a wide-toothed comb or your fingers, the waves will retain their shape.[4]
- It would be a good idea to let your hair cool for a few minutes first, or use the cool setting on your blow dryer after you finish blow drying each section. If you brush or comb it while it is still warm, you’re more likely to undo those gorgeous waves.
-
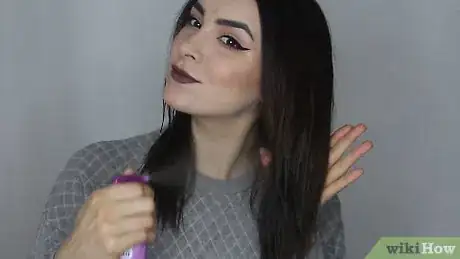
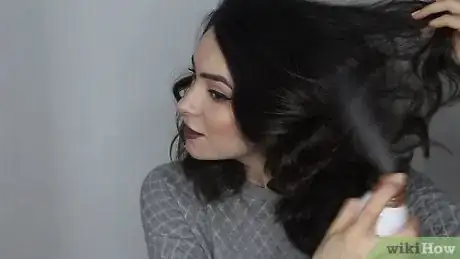
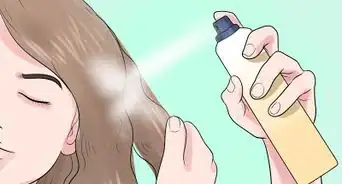
5Mist your hair with hairspray to help set the style. If you want to add a little more volume to your style, mist some dry shampoo onto your hair instead, focusing on the roots.[5]
Getting Waves without Heat
-
1Dampen your hair and part it down the middle. Your hair needs to be damp in order for this to work, so either mist it with water from a spray bottle, or take a quick shower. Next, part your hair down the middle.[6]
- You can change your part later, after you have created the waves. You need an equal amount of hair on each side of your hair.
- Make sure that your hair is not dripping wet, or it will take too long to dry.
-
2Gather a section of hair from the front and split it in half. Choose a side on your head to start on: left or right. Next, gather a section of hair from the front of your head, right next to the part. Split that section in half.[7]
- The section should be at least twice the width of your index finger.
-
3Twist both sections together 2 times. Twist each section downwards individually first to create 2 ropes. Next, twist the sections together upwards by bringing the outermost section over the inner section.[8]
- This process is sort of like creating a rope braid.
-
4Add some hair to the outer rope. Gather a long, vertical section of hair, spanning from your part down to your hairline, and add it to the outer rope. Depending on the direction you split your hair in, this section will either be on the bottom or next to your face.[9]
- This step is similar to French braiding or French rope braiding.
-
5Twist the ropes together once, and repeat until you reach your nape.[10] This is similar to French braiding, except that you are only adding hair to the bottom/outer section. Keep adding sections of hair to the outer rope, then twisting the rope over the inner rope. When you reach your nape, stop.[11]
- When you are done, the hair that you were working with should be ready to gather into a pigtail, which you will later turn into a bun. In the end, you'll end up with 2 buns!
-
6Twist the rest of your hair into a bun. For a more wavy look, finish with a rope braid first. For a less wavy look, simply combine the 2 ropes into 1 thick rope instead. Twist the rope(s) into a bun, then secure it with a hair tie.[12]
- Don’t add the hair from the other side of the part into the bun.
-
7Repeat process for the other side of your head. Gather a section of hair from the other side of your head. Create a French rope braid, only adding hair to the bottom strand. Finish with a bun, then secure the bun with a second hair tie.[13]
- All of your hair should be gathered into your buns at this point.
-
8
-
9Undo your buns and braids. Work 1 bun and braid at a time. Remove the hair tie from your first bun, and gently unwind it. Next, use your fingers to carefully unravel the French rope braid.[16]
- If your hair feels damp at any point, stop! Wrap it back up into a bun and let it dry some more.
-
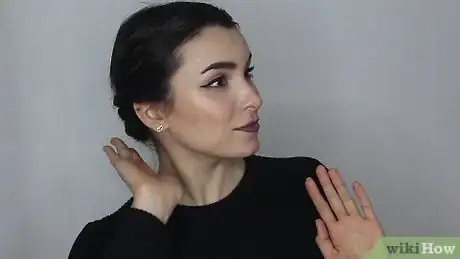
10Finger comb your hair, then set it with hairspray. You can also use a wide-toothed comb for this step, but do not use a brush, or you will get frizz.[17] Once you have your hair combed out, you can part it the way you want it, then mist it with hairspray.[18]
- If you want more volume, flip your hair over, mist it with hairspray, then flip it back.
Creating Waves with a Hairdryer
-
1Apply a small amount of hair product to damp hair. Dampen your hair with water from a spray bottle or in the shower. Make sure that it is no longer soaking-wet, then apply a volumizing mousse, focusing on the roots.[19]
- If your hair is prone to frizz, use a smoothing cream.
-
2Apply a heat protectant and blow dry your roots for additional lift. This step is completely optional. If you already have thick hair, then you may not even need to do this. If you have fine or limp hair, however, blow dry just your roots to give them some lift.[20]
- Don’t blow dry all of your hair just yet.
-
3Create multiple braids. This is key to creating waves. Divide your hair into 4 to 8 sections, then braid each section. Do a simple 3-strand braid on each section of hair. Hold your hair straight out from your scalp as you braid is so that the braids stick out; this will help give you a little more volume.[21]
- The more sections you create, the smaller and tighter the waves will be.
-
4Finish blow drying your hair. If you don't want to use a hairdryer, you can certainly let your hair air dry instead. Make sure that your hair is completely dry before you move on, however. If your hair is the slightest bit damp, the waves won't stay.[22]
- Speed up the air drying process by sitting out in the sun. Be sure to wear sunscreen!
-
5Undo the braids and gently finger comb your hair. If your hair feels even the slightest bit damp as you are unbraiding it, braid it back up and let it dry some more. Once you have taken all of the braids out, run your fingers through your hair to help break up the waves.[23]
- Do not brush your hair, or it will turn bushy. If you don't want to use your fingers, you can use a wide-toothed comb instead.
-
6Mist your hair with a styling product. Hairspray, anti-humidity spray, and volumizing spray are all great choices here. It really depends on what you want. If you want the style to last, use hairspray. If your hair tends to get frizzy, anti-humidity spray will be your friend. Lastly, if you desire more volume, then use a volumizing spray![24]
- You can part your hair down the center or off to the side.
Expert Q&A
Did you know you can get expert answers for this article?
Unlock expert answers by supporting wikiHow
-
QuestionHow do I make my hair permanently wavy?
 Ashley AdamsAshley Adams is a Licensed Cosmetologist and Hair Stylist in Illinois. She completed her Cosmetology education at John Amico School of Hair Design in 2016.
Professional Hair Stylist
-
QuestionHow can I make my hair wavy and stop it from becoming frizzy if I have curly hair?
 Ashley AdamsAshley Adams is a Licensed Cosmetologist and Hair Stylist in Illinois. She completed her Cosmetology education at John Amico School of Hair Design in 2016.
Professional Hair Stylist To achieve waves while taming your frizzy, curly hair, you need to first blow dry your hair straight. Blow drying curly hair will elongate your tresses and reduce some of the frizziness of it. Afterwards, apply product such as a gel or cream and braid your hair into several braids. After your hair has dried, unravel the braids and you should have waves.
 -
QuestionIf I make two buns instead of one, will it be the same?
 Sharia FarhanCommunity AnswerYes, but then once you open your hair, your hair will be parted from the middle, since it dried that way.
Things You'll Need
Using a Curling Iron
- Smoothing cream (for frizzy hair)
- Volumizing mousse (for thin hair)
- Heat protectant
- Hairdryer
- 1 in (2.5 cm) curling iron
- Comb
- Round brush
Getting Waves without Heat
- Hair ties
Creating Waves with a Hairdryer
- Hairdryer
- Styling mousse
- Heat protectant
- Comb
- Round brush
References
- ↑ https://www.elle.com/uk/beauty/hair/beauty-tips/a40948/how-to-get-wavy-hair/
- ↑ https://www.elle.com/uk/beauty/hair/beauty-tips/a40948/how-to-get-wavy-hair/
- ↑ https://www.elle.com/uk/beauty/hair/beauty-tips/a40948/how-to-get-wavy-hair/
- ↑ https://www.elle.com/uk/beauty/hair/beauty-tips/a40948/how-to-get-wavy-hair/
- ↑ https://www.elle.com/uk/beauty/hair/beauty-tips/a40948/how-to-get-wavy-hair/
- ↑ https://www.youtube.com/watch?v=bsGuWokn47A&feature=youtu.be&t=40s
- ↑ https://www.youtube.com/watch?v=bsGuWokn47A&feature=youtu.be&t=40s
- ↑ https://www.youtube.com/watch?v=bsGuWokn47A&feature=youtu.be&t=40s
- ↑ https://www.youtube.com/watch?v=bsGuWokn47A&feature=youtu.be&t=1m16s
- ↑ Christine George. Master Hair Stylist & Colorist. Expert Interview. 10 January 2020.
- ↑ https://www.youtube.com/watch?v=bsGuWokn47A&feature=youtu.be&t=1m35s
- ↑ https://www.youtube.com/watch?v=bsGuWokn47A&feature=youtu.be&t=2m25s
- ↑ https://www.youtube.com/watch?v=bsGuWokn47A&feature=youtu.be&t=2m58s
- ↑ Christine George. Master Hair Stylist & Colorist. Expert Interview. 10 January 2020.
- ↑ https://www.youtube.com/watch?v=bsGuWokn47A&feature=youtu.be&t=3m35s
- ↑ https://www.youtube.com/watch?v=bsGuWokn47A&feature=youtu.be&t=3m52s
- ↑ Christine George. Master Hair Stylist & Colorist. Expert Interview. 10 January 2020.
- ↑ https://www.youtube.com/watch?v=bsGuWokn47A&feature=youtu.be&t=4m4s
- ↑ https://www.brit.co/blow-dry-wavy-hair/
- ↑ https://www.brit.co/blow-dry-wavy-hair/
- ↑ https://www.brit.co/blow-dry-wavy-hair/
- ↑ https://www.brit.co/blow-dry-wavy-hair/
- ↑ https://www.brit.co/blow-dry-wavy-hair/
- ↑ https://www.brit.co/blow-dry-wavy-hair/
About This Article
To make your hair wavy, start by washing your hair and then blow drying it straight. To do this, separate your hair into small sections and use a round brush to keep your hair taut as you blow dry it. Once your hair is relatively straight, start curling your hair with your curling iron. Start with small sections and hold your curling iron vertically to get loose curls. After you've curled all of your hair, run your fingers or a wide-toothed comb through your hair to make your hair go from curly to wavy. For advice from our Cosmetologist reviewer on how to wave your hair without heat, scroll down!
