This article was co-authored by wikiHow Staff. Our trained team of editors and researchers validate articles for accuracy and comprehensiveness. wikiHow's Content Management Team carefully monitors the work from our editorial staff to ensure that each article is backed by trusted research and meets our high quality standards.
wikiHow marks an article as reader-approved once it receives enough positive feedback. In this case, 95% of readers who voted found the article helpful, earning it our reader-approved status.
This article has been viewed 255,693 times.
Learn more...
Wood pellets can be used for a variety of purposes, including making fuel, acting as tinder for a fire, and creating bedding for animals. Most pellets are made in bulk by industrial pellet mills, but homeowners and small businesses can also turn organic materials into wood pellets. You can make your own pellets at home by breaking raw wood matter into small pieces and pressing the wood into dense pellets.
Steps
Cutting and Drying the Wood
-
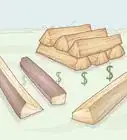
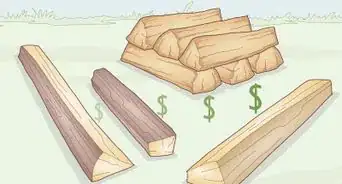
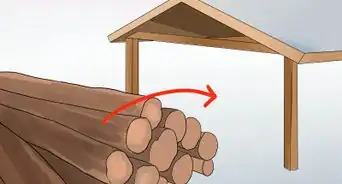
1Gather raw materials, like logs, wood chips, or sawdust. If you’re making a small batch of wood pellets, you should only need a 8-10 logs or 4-5 buckets of sawdust. If you’re going to make more than 10 to 20 pounds (4.5 to 9.1 kg) of pellets, plan to order scrap wood from a local lumber yard or saw mill. To order logs or wood from a scrap yard or saw mill, expect to buy at least 1 ton of product and pay for shipment to your location, which can be expensive.
- Remember to order your materials in advance if you won’t be gathering them yourself, since the demand for sawdust and wood is very high.
- Many people who make smaller batches of pellets also order excess raw plant material from local farmers to use in their wood pellets. This includes items like branches or the stalks and leaves of dead plants.
-
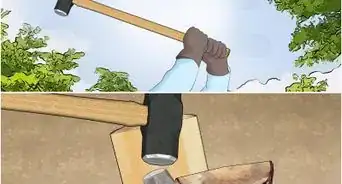
2Chip the wood into pieces that are 2.5 cm (0.98 in) or smaller. Turn on the wood chipper by activating the ignition, and carefully feed the branches, logs, or other materials into the mouth of the chipper. Set a container at the opposite end of the chipper to catch the wood chips as they shoot out of the machine.[1]
- Some wood chippers won’t let you choose the size that you want the chips to be. In that case, you may have to run the wood through the chipper 2 times to make it as small as you can.
- If you’re using pre-processed sawdust, you won’t be able to make the pieces smaller, so you can skip this step.
Advertisement -
3Use a hammer mill to reduce the size of the pieces to 5 mm (0.20 in). The hammer mill grinds and chops the smaller pieces into very small particles for making pellets. Turn the hammer mill on and slowly pour the wood chips into the mouth of the machine. Place a container under the mill to catch the small particles as they come out of the machine.[2]
- If you don’t have a hammer mill, you may be able to rent one from a local saw mill or lumber yard.
- This step isn’t necessary if you’re starting with sawdust, since it’s already milled and refined to small pieces.
-
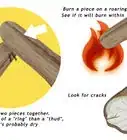
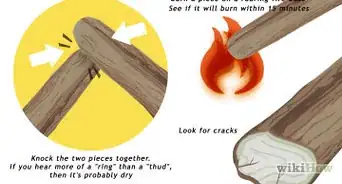
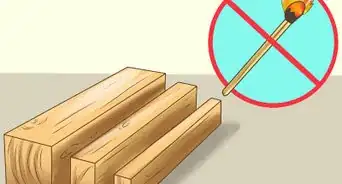
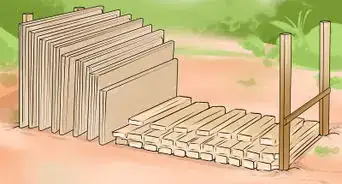
4Dry the wood until the moisture level is between 10-20%. For a small batch of pellets, leave the wood in the sun for at least 24 hours to dry naturally. If there’s wind, cover them with a mesh screen to hold them in place. For a larger batch, place the wood pieces in an industrial dryer or drum heater until the pieces are dried to the desired moisture level.[3]
- You can test the moisture level of the wood using a moisture meter, which you can purchase at most agriculture stores or online.
- In most cases, you don’t have to dry sawdust. However, if your sawdust has been stored in a moist environment or feels wet to the touch, spread it out on a flat surface in a dry room for 24 hours to dry the dust.


Mixing and Conditioning the Wood
-
1Run the raw materials through a sieve to remove contaminants. If you’re making a large batch of pellets and there’s a chance that the wood particles might contain stone or metal, carefully pour the raw material into the sieve. Wait while the sieve uses magnets and strainers to remove extra particles, and collect the raw materials at the output area of the machine.
- If metal or stone particles do get into an industrial mill, they can cause clogs or backups in the machinery.
- This step isn’t necessary for small batches of pellets since they won’t be placed in an industrial mill.
-
2Add vegetable oil to help the materials stick together in a small batch. If you’re making a small batch of pellets, add 1 tablespoon (15 mL) of vegetable oil for every 1 pound (0.45 kg) of wood pieces before mixing them. This will help the pieces bind together as they’re mixed without adding harmful chemicals to the pellets. There won’t be a major difference in the texture of the wood material, since the vegetable oil is absorbed quickly.[4]
- Don’t add too much vegetable oil at first, since it’s easier to add more later if necessary.
- If you’re working with more than 10 to 20 pounds (4.5 to 9.1 kg) of raw material, you don’t need a binding agent to make the pellets. With a large amount of wood, vegetable oil and other additives are easily absorbed by the wood and aren’t effective because the pressure and heat used in industrial processing will be enough to make the pellets stick together without the oil.
-
3Pour the dried wood into a batch mixer to make the material more consistent. Mixing the wood will ensure all of the wood pieces are uniform in density, moisture, and size. Make sure there is a rolling drum or an agitator in the batch mixer to thoroughly combine the pieces, and turn the mixer on. Pour the raw material into the mixer, wait for 10-20 minutes while the pieces mix, and then remove them from the mixer.[5]
- For small batches, you can use a kitchen stand mixer to accomplish this. You can find stand mixers at most housewares stores. Pour the wood into the bowl, adding vegetable oil if you’re using it, and attach a curved arm for mixing the material. Plug in the mixture and turn it on, letting it run for 10-20 minutes.
- If you’re using sawdust, you don’t have to mix the wood since it is already a fairly consistent size and shape.


Making and Storing the Pellets
-
1Transfer the material to a flat die pellet mill if you’re making a large batch. Industrial flat die mills press the pellets using heat and die casts. Activate the machine and then wait for the die in the mill to heat up to the optimum temperature, which varies depending on the machine. Then, pour the wood pieces into the machine to heat and press the wood into pellets.[6]
- Most pellet mills operate at around a maximum of 170–190 °F (77–88 °C) to ensure the pressure in the machine stays constant for binding the pellets but prevents scorching or burning.
- Be sure to feed the wood into the machine slowly at first to prevent backup. Then, slowly add more wood to the machine as production ability increases.
-
2Use a pellet press that includes a die and roller to make smaller batches. The pellet press die is a metal piece with holes drilled through it. Sprinkle the wood pieces evenly over the die to prepare it. Then, move the roller across the die to press the wood through the holes into pieces the size of finished pellets.[7]
- Don’t worry about working quickly when you’re using the die and roller. The process is slower and requires more effort, making it ideal for small batches.
-
3Separate deformed pellets from the batch using a sieve or screen. Some pieces will fall apart or break during the pressing process. Gather the pieces and shake or sift them through a special straining screen with holes that are the same size as the pellets to remove the ones that are misshapen.[8]
- If you’re making the pellets for your own personal use, you can leave misshapen pellets in with the regular ones to avoid producing waste.
-
4Allow the pellets to cool, making them rigid. When the pellets come out of the pellet press, they will be hot and moist. If you’re making a small batch, spread them out on a flat area and allow them to cool and dry naturally for at least 24 hours. If you’re making a lot of pellets at once, use an industrial freezer or cooler to lower the temperature of the wood, which should take about 1-2 hours.
- If you bag and store the pellets before they’re cool and dry, they can become flattened.
-
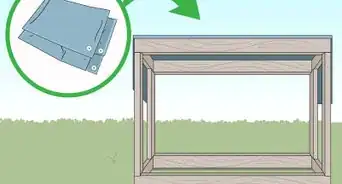
5Pour the cooled pellets into resealable bags and keep them in a dry area. Bag the pellets and seal them in plastic or paper bags, making sure no air can enter them. Then, keep them in an area away from direct sunlight where the air is dry and cool.[9]
- For a small batch, you can store the pellets in a garage or storage closet.
- For larger batches, use a temperature and humidity controlled warehouse to store the pellets.


Community Q&A
-
QuestionHow much does it cost to make pellets?
 Samantha L. CampbellCommunity AnswerThe answer depends on where you purchase your raw materials from. Buying lumber, like logs and scrap lumber, can be very expensive because resources are limited. Using sawdust from a local mill or carpenter can be inexpensive, but the wood tends to have more contaminants like rocks and metal. You may also have to purchase special machinery for making pellets, which can get pretty expensive.
 -
QuestionCan I use the same pellet mill machine for making poultry feeds and wood pellets?Samantha L. CampbellCommunity AnswerMost pellet mills are pretty similar, regardless of their purpose, so you should be able to use the same machine for making feed pellets and wood pellets. However, when you're switching between making feed and wood pellets, be sure to clean the machine thoroughly according to the manual. This will prevent contamination in the pellets.
-
QuestionAre wood pellets smokeless when burning?
 Community AnswerNo, they are low smoke when burned in an appropriate environment.
Things You'll Need
- Wood (logs, chips, or sawdust)
- Wood chipper (for logs)
- Hammer mill (for logs and chips)
- Industrial sieve
- Vegetable oil
- Industrial dryer
- Industrial mixer (large batches)
- Stand mixer (small batches)
- Flat die pellet mill (large batches)
- Pellet press (small batches)
- Industrial cooler
- Resealable bags


References
- ↑ http://www.biomasspelletplant.com/news/how-to-make-wood-pellets.html
- ↑ http://worldforestindustries.com/forest-biofuel/wood-pellets/making-wood-pellets/
- ↑ http://worldforestindustries.com/forest-biofuel/wood-pellets/making-wood-pellets/
- ↑ http://worldforestindustries.com/forest-biofuel/wood-pellets/making-wood-pellets/
- ↑ http://worldforestindustries.com/forest-biofuel/wood-pellets/making-wood-pellets/
- ↑ http://www.biomasspelletplant.com/news/how-to-make-wood-pellets.html
- ↑ http://worldforestindustries.com/forest-biofuel/wood-pellets/making-wood-pellets/
- ↑ http://worldforestindustries.com/forest-biofuel/wood-pellets/making-wood-pellets/
- ↑ http://worldforestindustries.com/forest-biofuel/wood-pellets/making-wood-pellets/
About This Article

Wood pellets can be used for a variety of purposes, like fuel and bedding for animals. If you have machinery, like a wood chipper, flat die pellet mill, and a batch mixer, you can make wood pellets from logs, wood chips, or sawdust. If you’re using wood, first you’ll need to use your wood chipper and hammer mill to reduce the pieces to no larger than 0.2 inches. Leave the wood to dry in the sun for 24 hours. Then, sieve the wood particles to remove contaminants and mix it in your batch mixer. You’ll then need to run the material through a flat die pellet mill or pellet press with a die and roller. Once you’ve pressed the pellets, leave them to cool for 24 hours. For more tips, including how to store your wood pellets, read on!