X
wikiHow is a “wiki,” similar to Wikipedia, which means that many of our articles are co-written by multiple authors. To create this article, 28 people, some anonymous, worked to edit and improve it over time.
This article has been viewed 171,538 times.
Learn more...
With a little time, effort, and skill you can use a variety of tools and materials to make jewelry. You can use these skills to start a business or make necklaces, rings, bracelets and earrings for personal use.
Steps
Method 1
Method 1 of 3:
Designing Your Jewelry
-
1Get ideas. When designing your own jewelry, you will first want to get ideas. This will help you to think about which design aspects are most important to you and what will best fit your needs.[1]
- Look at your collection. Look at your own jewelry, purchased or made by others. You can recreate or take ideas from aspects of pieces you already own and like. Maybe you like a particular type of bead or clasp or color combination. You will also want to look at your own collection to assess if there is a type of jewelry that you might need. Look for holes in your collection, such as a lack of casual pieces for everyday use, and think about what you can make to fill that need.
- Look at stores. Go to stores that specialize in jewelry, like Claire’s, or larger stores with jewelry departments, like Macy’s, to get ideas about what you might want to make. The wide selection in stores like these will allow you to get more ideas, as well as helping you stay at the front of fashion trends.
- Look at others. You can look at the jewelry your friends have, what you see in magazines and the internet, and what your favorite celebrities are wearing. Think about what you like about their jewelry and what pieces you really wish you had for yourself.
- Look at vintage pieces. In looking at vintage pieces and the history of jewelry, you can see a large number of styles very easily. Examine what aspects of the vintage pieces you like to get ideas for design elements you would like to emulate.
-
2Decide your materials. Once you have decided upon the design aspects you enjoy most and what your needs and desires are, you will want to decide which materials are best for you. Some material choices will be based on taste, some on availability, and some on necessity.
- Metals. Metals will usually be used, in the form of wires, chains and rings, to bind together the other elements of the jewelry piece. The type of metal used will depend on what it is being used for, as well as personal taste. For example, soft metals are better for bending and should be used when you need to create loops. Whether or not that metal is gold or copper, however, is up to personal preference.
- Stones. You may want to use stones or gemstones in the creation of your jewelry, especially if you are making pendants or rings. Choose your stone largely based on personal taste but be aware that some stones are more expensive than others. You may also wish to use false stones in order to save money. When choosing colors, try to choose those that mimic your natural eye color or fit well with your wardrobe. This will make your jewelry stand out and show off your wonderful design.
- Other materials can also be used, depending on the look you are trying to achieve. If metal and gemstone is too traditional for you, try alternative materials like wood, resin, plastic, twine, leather and other less common sources. You could create a stunning resin pendant or beautiful leather earrings, for instance.
Advertisement -
3Sketch your image. Before you make your jewelry, you will want to sketch out your ideas and then draw your final design. This will let you plan how large or long each element should be and ensure that you have a plan to follow. This will keep you from wasting supplies.
- Sketching on graph paper can help you better align design elements and gauge relative sizes. You can also use tools like rulers, stencils, and tracing paper to further hone your drawn designs.


Advertisement
Method 2
Method 2 of 3:
Gathering Supplies
-
1Get chains. If you do not wish to make a string of beads but would rather attach charms or beads to a chain, then purchasing a chain will be very important. These come in a variety of sizes and can be further trimmed down with wire cutters or pliers.[2]
-
2Get clasps. There are many different types of claps. You will have to choose what is best for your project, based on what type of jewelry it is as well as the size and weight of the string and beads. Clasps can also be chosen for aesthetic appeal or they can be left simple and downplayed.[3]
- Lobster clasp. The most common clasp for necklaces and bracelets in recent years, the lobster clasp is fairly strong and easy to use.
- Toggle. Toggles are good for a more streamlined, modern look. They are especially appropriate for pieces with a chunky appearance. These are simple clasps which are easy to use but less secure than some others.
- Barrel clasp. This is a very secure clasp which consists of two tube shapes pieces which screw together. It is best used on necklaces, however, as there is a certain level of dexterity involved in closing it.
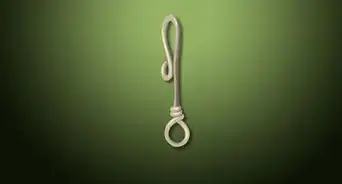
- Hook and eye. A simple clasp and one easily made yourself with the proper tools, the hook and eye consists of a hook and loop. This is less secure and best used on heavy necklaces which have the weight to hold the clasp closed.
-
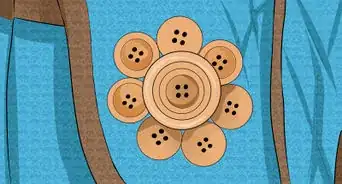
3Think about getting beads. Frequently used in jewelry-making, beads can provide interest for a simple chain or they can be strung together to back up a more opulent pendant. Beads can be inexpensive or pricey depending on their material and they do come in a very wide range of materials.
- Beads can be found in all colors and made from ranging materials: plastic, glass, wood, shell, bone, stone, clay, polymer, and a wide variety of other materials as well.
-
4Use gems for flourish. You may wish to give your jewelry a bit of bling and use either real or fake gemstones. Be sure that if you plan to use stones, you have the proper setting with which to place it on your project. Gems can be relatively less expensive or highly expensive, depending on the size, type and quality of the stone.
- Common gemstones used in jewelry include diamonds, sapphires, rubies, emeralds, amethyst, opal, and topaz.
-
5Buy string. In order to string together beads, charms and pendants, you will need some sort of material that is appropriately strong and flexible. Depending on the weight of your item and how you intend it to be closed, you can use wire, elastic string, twine, fishing line, or any other number of materials.
-
6Buy wire for structure. You will need larger gauge, much less flexible wire in order to make many components of jewelry items. Examples include chain rings, posts, connecting bars, and spacers. Be sure to check the gauge of wire before purchasing it to be sure that it is right for your project.
-
7Buy the right tools. You will want and need several tools in order to make moderate to complex pieces of jewelry. If your project requires working with any metal, tools will certainly be required. Be sure that your tools are high quality and sharp. Dull tools are a common way to hurt yourself.[4]
- Get a complete set of pliers. Many different types of pliers are required to create different aspects of jewelry pieces. These include nylon jaw pliers, round nose pliers, chain nose pliers, and bent chain nose pliers.
- Scissors and wire cutters. Have tools appropriate and at hand for all of your cutting needs. Scissors should be used for fishing line and elastic string. Always use wire cutters for cutting wire, as attempting to use scissors will likely only end in injury.


Advertisement
Method 3
Method 3 of 3:
Basic Skills
-
1Straighten the wire. This is the first step in making your own jewelry. If your wire is bent when you cut it, it will also be bent when used to make your jewelry, as it is very difficult to straighten the wire after it has been cut.
- Begin by holding the spool with a length of wire unrolled. Using nylon jaw pliers, pull along the length of the wire until it is straight. You can turn the wire or hold it at a different angle occasionally, to ensure that it is straight on all sides.
-
2Cut the wire. You will want to use “flush cutters,” which are specially designed for jewelry making. They allow you to achieve two different ends for the wire by leaving one side flat and one side angled.
- Know which side of the cutter results in which type of cut and use it accordingly. Be careful when using these cutters as they are very sharp.
- Do not use dull cutters as this is a common way to hurt yourself. If the cutters are not sharp enough, you risk that they will slip on the wire.
-
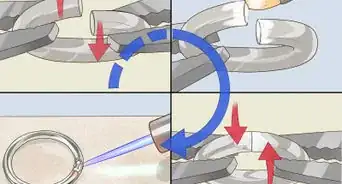
3Bend the wire. Bending wire at sharp angles is another necessary skill for jewelry making. This is easily accomplished using pliers, preferably bent chain-nose pliers. Simply grasp the wire with the pliers and bend with your finger until the desired angle is achieved.[5]
-
4Make loops. You can make loops at the end of a wire very easily. This is useful for making several jewelry components. Begin by grasping the wire with a pair of round nose pliers, such that only a very small amount of wire is poking through the other side of the pliers. Then proceed to bend the wire around the jaw of the pliers until a p-shaped loop is formed.
- You can further center this loop by grasping the wire with your round nose pliers at the point where the loop begins and bending it back slightly. This frequently results in the loop opening but it is easy to re-close.
-
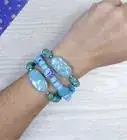
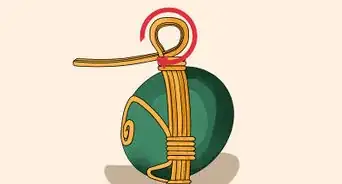
5Attach clasps. Attaching a clasp is a necessary finishing process for necklaces and bracelets. The easiest method of attaching a clasp is to use a crimper. When you have finished threading all your beads, place a crimper at the end. Loop the wire through the end loop of the clasp and then back through the crimp bead. Thread the wire through a few of the ending beads, pull tight, close the crimper by squeezing it with the cutters, and then trim the excess wire.
-
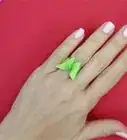
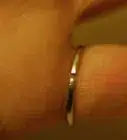
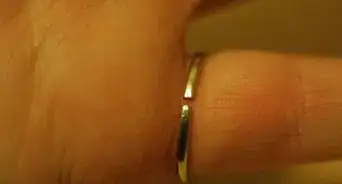
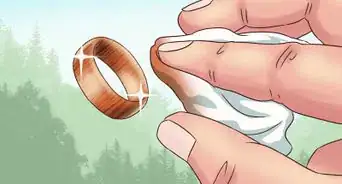
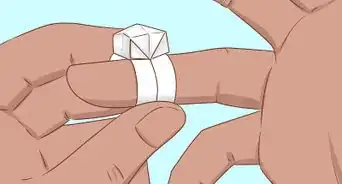
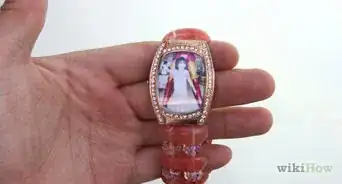
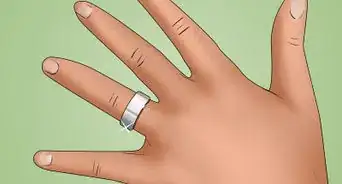
6Size jewelry. Necklaces and bracelets should be made according to your personal preference but rings will need to be carefully sized. Use a ring sizer or measure your finger by wrapping it in thread and comparing the measurements against the standard sizes, found easily online.


Advertisement
Community Q&A
-
QuestionHow do I make bracelets with pre-strung beads? They are strung with plastic instead of wire.
 Community AnswerUsually when you buy glass beads, they are strung on a plastic cord to display them and keep them from breaking in a box or bag. It's okay to use the plastic string to make a bracelet, but I don't believe that that is the intent when beads are sold pre-strung. My advice is to (gently) remove the beads from the plastic cord and put them onto metal wire yourself.
 -
QuestionHow do I make earrings?Community AnswerEarrings are made with slightly different supplies than that used for necklaces and bracelets. You will need earring posts (studs and fishhooks are examples), jump rings, head and eye pins, beads, and pliers. Simple earrings can be made by just opening a jump ring, sliding a bead in, and attaching to a fishhook base before closing. More complex ones can be made by sliding beads on head or eye pins and hanging from chandelier findings.
-
QuestionWhere can I find beads?
 Kathequeen2006Community AnswerYou can find beads in many craft stores or online. However, if you don't find any there, you could always create your own by cutting up a plastic straw and coloring it or wrapping it with colorful paper.
Advertisement
References
- ↑ https://www.mybluprint.com/article/want-to-start-making-jewelry-these-10-tips-will-launch-you
- ↑ https://www.momsandcrafters.com/jewelry-making-supplies-for-beginners/
- ↑ https://www.momsandcrafters.com/jewelry-making-supplies-for-beginners/
- ↑ https://www.mybluprint.com/article/the-8-tools-every-jewelry-maker-needs
- ↑ https://www.youtube.com/watch?v=AtWFlox474s
About This Article
Advertisement