wikiHow is a “wiki,” similar to Wikipedia, which means that many of our articles are co-written by multiple authors. To create this article, 16 people, some anonymous, worked to edit and improve it over time.
wikiHow marks an article as reader-approved once it receives enough positive feedback. This article received 11 testimonials and 88% of readers who voted found it helpful, earning it our reader-approved status.
This article has been viewed 500,513 times.
Learn more...
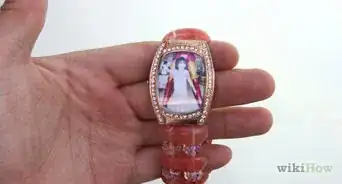
Transferring a photo to a locket can be a little tricky, as the shape of the photo needs to match the locket hole. However, there are some smart solutions that are simple to implement, such as making a tracing paper template, photocopying the locket or transferring the locket shape by ink. Choose the method that works best for the type of locket you have, and soon you'll be pasting your photo in place with ease.
Steps
Using Paper
-
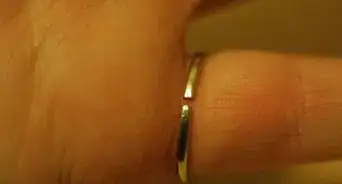
1Open the locket. Lay it flat with the open side facing you.
-
2Place a piece of tracing paper or regular paper over the photo recess. The inside of the locket should have a slight recess meant to hold the photo in place. Lay a piece of tracing paper over the locket so you can see the recessed part through the paper.
- If you don't have tracing paper, you can use tissue paper or any thin paper you can see through.
- Some lockets have a recess on both sides, so it can hold two photos, while others just have it on one side.
Advertisement -
3Use a pencil to trace around the recess. Lightly trace around the circular or ovular area where the photo will sit. Try not to crease the paper, since this will affect the size and shape of your tracing.
-
4Cut out the tissue paper template. Now you have a template the exact size your photo will need to be to fit neatly into the locket.
-
5Place the template over your chosen image. Position it so that the face or image you want to store in your locket is contained within the borders of the template. Use a pencil to lightly trace around the template onto the photo.
-
6Cut out the photo to the same size as the template. Use a scissors or a craft knife to neatly cut the photo to the exact size of your template.
-
7Glue the photo into the locket recess. Place a dab of glue on the back of the photo. Gently insert it into the locket. Press it lightly to ensure it stays in place.[1]
-
8Allow the glue dry before closing the locket. Once dried, the locket is ready to wear.


Copying the Locket
-
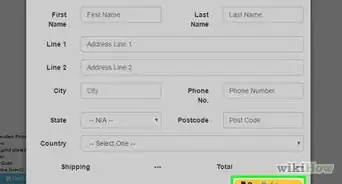
1Take the locket with you to a copy center. If you work in a place that has a copy machine, you're in luck. Otherwise take it to a store where you can make a copy using a machine.
- This method is best used for a locket that lies flat when it is open. If your locket's hinge won't allow it to lie flat, you won't be able to make a good copy.
- If you have a scanner and printer at home, that will work just as well.
-
2Open the locket and set it on the copy surface. Make sure it is lying flat on the surface. The inside of the locket should be facing down.
-
3Make a copy. Be sure the copy machine settings are such that the copy is true to size (100 percent), rather than coming out smaller or larger than the actual locket.
- If you're using a scanner, scan the locket, open the image file on your computer, then print out the image. Make sure your scanner and printer settings allow you to print an image of the locket that's true to size (100 percent).
-
4Cut out the shape of the photo recess. You should be able to see a faint outline of the photo recess inside the locket.[2] Use a scissors or craft knife to carefully cut it out. You'll use this template to cut your photo down to the right size.
-
5Place the template over your chosen image. Position it so that the face or image you want to store in your locket is contained within the borders of the template. Use a pencil to lightly trace around the template onto the photo.
-
6Cut out the photo to the same size as the template. Use a scissors or a craft knife to neatly cut the photo to the exact size of your template.
-
7Glue the photo into the locket recess. Place a dab of glue on the back of the photo. Gently insert it into the locket. Press it lightly to ensure it stays in place.[3]
-
8Allow the glue dry before closing the locket. Once dried, the locket is ready to wear.


Using Ink or Paint
-
1Obtain either an ink pad or simple craft paint. A water soluble, washable ink or paint is best, since you'll be stamping your locket directly into it. If using craft paint, to spread it very thinly on a paper plate.
- Don't use this method if your locket is very valuable. Since you'll be getting ink or paint directly on the locket, there's a possibility that it could get damaged.
- You may want to test the ink or paint in an inconspicuous spot, like the inside of the locket. Put a dab in the center of the locket and see if it easily wipes off with a damp cloth. If not, use another method.
-
2Open your locket and find the photo recess. This is the side of the locket with a slightly raised border.
-
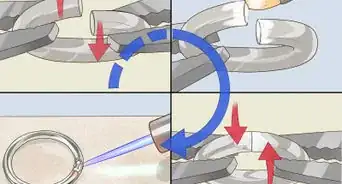
3Dip it into the ink or paint. Try not to get too much ink or paint on the locket; you only need enough to create a print of the photo recess.
-
4Stamp your locket on a piece of paper. Place it carefully on the paper and lightly press down. When you lift the locket, an imprint of the inside edge should be on the paper. If this is not the case, repeat using more ink or paint.
-
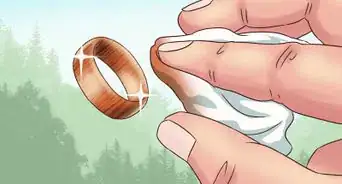
5Immediately wipe the ink or paint off the locket. It is best to do this quickly, before the substance dries. Use a paper towel dipped in warm water to wipe it away, then dry it with a towel.
-
6Place the template over your chosen image. Position it so that the face or image you want to store in your locket is contained within the borders of the template. Use a pencil to lightly trace around the template onto the photo.
-
7Cut out the photo to the same size as the template. Use a scissors or a craft knife to neatly cut the photo to the exact size of your template.
-
8Glue the photo into the locket recess. Place a dab of glue on the back of the photo. Gently insert it into the locket. Press it lightly to ensure it stays in place.
-
9Allow the glue dry before closing the locket. Once dried, the locket is ready to wear.


Community Q&A
-
QuestionIs there any way I can keep the photo in there without gluing it?
 Community AnswerMost lockets have bits on the side that help the picture from falling out, but if that doesn't work, use a tiny amount of glue tack.
 -
QuestionMy locket has a space for two photos, but it's heart-shaped, which makes it harder to make the photo exact. How can I make sure the photo fits the locket edges precisely?
 Ryleigh HempeCommunity AnswerYou could take a scrap piece of paper and trace around the frames, then use that as your guide.
 -
QuestionWhat if I want to use a full picture?Community AnswerIf you want to use a full picture, it will have to have a fairly large image on it or it will be too blurry to see once it's shrunk down into the locket. For example, a portrait of someone's face would be a good choice, but a large group photo would not.
Warnings
- Do not use any type of permanent ink or paint to stamp your locket. You need to be able to wash it off when you are finished. Cheap craft paints from the dollar store are good for this, just make sure the paint or ink is washable - kids paints are nearly always washable.⧼thumbs_response⧽


References
About This Article
To put a picture in a locket, open the locket and lay it flat so that the open side is facing you. Next, place a piece of paper over the locket and lightly trace around the recessed area with a pencil. Then, cut out the shape you’ve traced and use it as a template to trace the same shape over the image you want in your locket. Once you’ve traced over the photo, cut it out with scissors. Finally, dab a small amount of glue into the recess of the locket and gently press the photo into it so that it stays in place. For tips on how to make a locket template using a photocopier or an ink pad, read on!