This article was co-authored by wikiHow staff writer, Jennifer Mueller, JD. Jennifer Mueller is a wikiHow Content Creator. She specializes in reviewing, fact-checking, and evaluating wikiHow's content to ensure thoroughness and accuracy. Jennifer holds a JD from Indiana University Maurer School of Law in 2006.
This article has been viewed 21,664 times.
Learn more...
The most secure way to ensure people can't find you on Facebook is to delete your account. However, if you want to remain on Facebook but still want to make it harder for people to find your page, this is possible through tightening up your privacy settings and limiting the information you provide. Additionally, you should take some security precautions to control the way your information is shared with apps and advertisers.[1]
Steps
Adjusting Your Privacy Settings
-
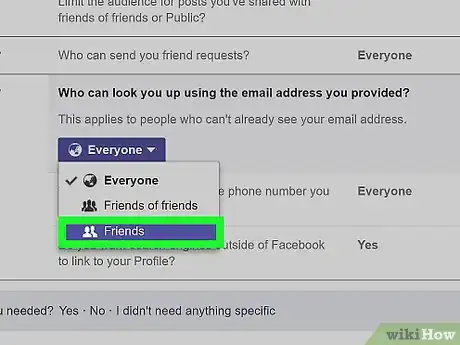
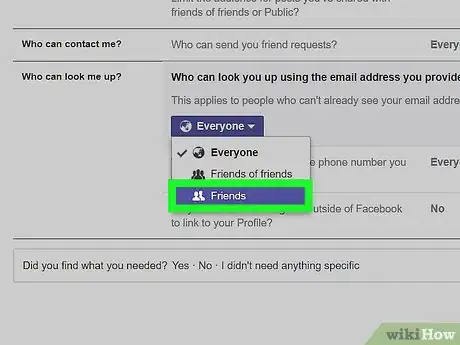
1Limit who can look you up. Under your settings, you have the ability to control who can look up your profile on Facebook and how they can look you up. However, the default setting allows anyone to look you up who has your phone number or email address.[2]
- Click the edit link to change this setting so that only people already on your friends list can look you up with your phone number or email address.
- Additionally, you might want to use a separate email address for school or work contacts to eliminate the chance someone can look you up by your email address. This can be helpful if you're trying to hide your Facebook from potential employers.[3]
-
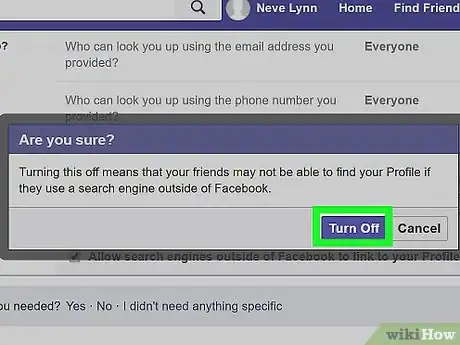
2Hide your profile from search engines. On the same settings page where you edited who could look you up, you also have the option to remove your page from search engine results. The default allows your page to be found in search results.[4]
- If you toggle this option off, your Facebook profile won't appear if someone searches your name on a public search engine such as Bing or Google.
- Keep in mind this still won't keep people from looking you up within Facebook. The only way you can eliminate that is to either deactivate your account or make all of your posts and information visible only to you.
Advertisement -
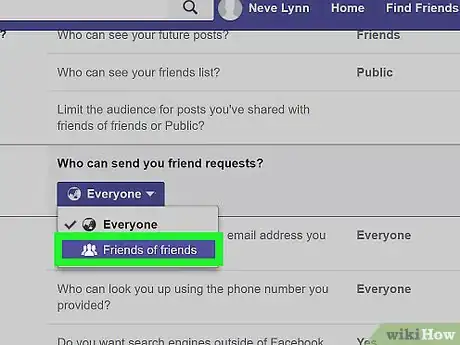
3Restrict the people who can contact you or add you. Under your privacy settings, you have the ability to prevent random people from sending you messages or trying to add you as friends. However, the default setting here is that "everyone" can send you friend requests.[5]
- Changing this to "friends of friends" gives you a little more control, because at least then the person has to be connected to you in some way before they can attempt to add you as a friend.
-
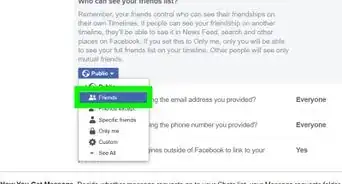
4Limit all connections to friends only. Under the heading "Connecting on Facebook," you can set all options to friends only. Read each of these options carefully before you change them, because this will give you the strictest possible privacy settings you can get on Facebook short of deactivating your account.[6]
- However, switching all connections to friends only does give you the greatest amount of control over your profile. If you want to make it harder for people to find you on Facebook, this will enable you greater control over your privacy.
-
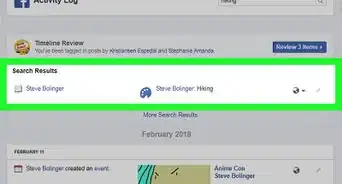
5Eliminate leaks through friends. No matter how tight your privacy settings are, you still can't control the privacy settings of your friends. That means that any time you interact with your friends, you can potentially be discovered by someone.[7]
- To take care of this, go to your privacy settings and click on "Info Accessible Through Your Friends." This will let you see how much of your information is getting through your friends' more open security or privacy settings so you can act accordingly.
-
6Block problematic users. Whether someone's harassing you, or you just no longer trust them having access to what you post, you can easily block their account so they will no longer be able to see your profile or interact with you.[8]
- Simply go to your settings and click "Blocking." Under "block users," add their name. Save your changes and they will no longer have access to your account.
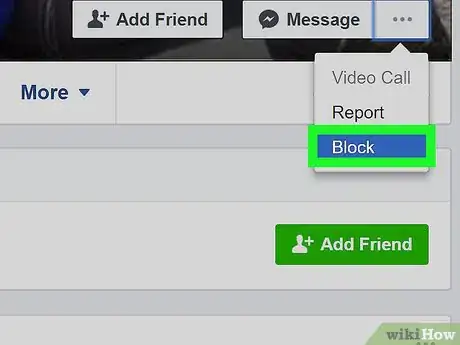
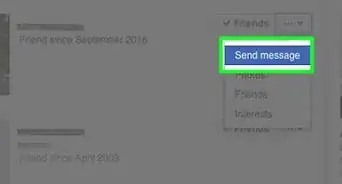
- You also can block friends by going to their profile and tapping the three dots under their cover photo. Choose "block" from the menu of options that appears and they will be blocked automatically.
Limiting Your Information
-
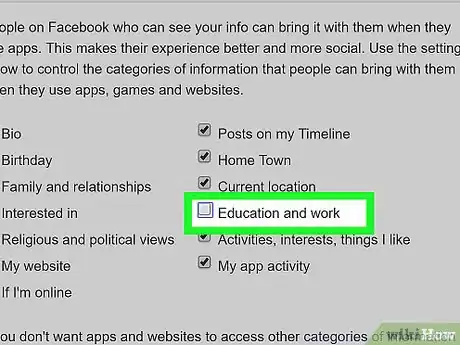
1Remove connections to workplaces, schools, and towns. Listing where you've worked, where you went to school, or where you've lived enables people to look you up using those entities. Deleting these entries means people won't be able to find you that way.[9]
- For example, suppose you got married and took your partner's name. If you list your high school, it connects you to everyone else who went to your high school. From that page, someone from your high school class could find your profile by browsing the class members – even if they didn't know your new last name.
- Likewise, anyone who happened to find your Facebook page could verify your identity by checking that information against the information they already knew about you, such as your hometown or your last employer.
-
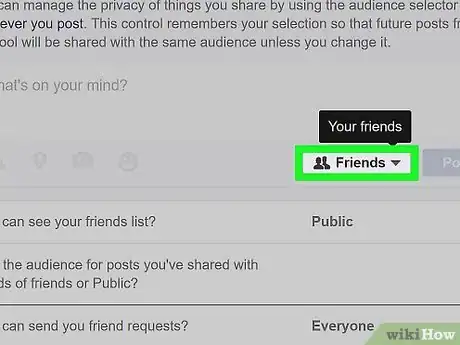
2Share content with friends only. The settings on the content you post are one of the easiest ways to control who can find you on Facebook and what people not on your friends list can see of your content.[10]
- From your account settings, adjust the default privacy of your posts and photos so that they are only visible to friends.
- You also can create lists that you can choose so some of your content is only visible to some of the people on your friends list. This could be helpful if, for example, you want to post photos of your family but only want them to be visible to other family members.
- You also can adjust the privacy of specific posts from the bottom corner of the post box as you post them. If you make a mistake, you can go back and change it.
-
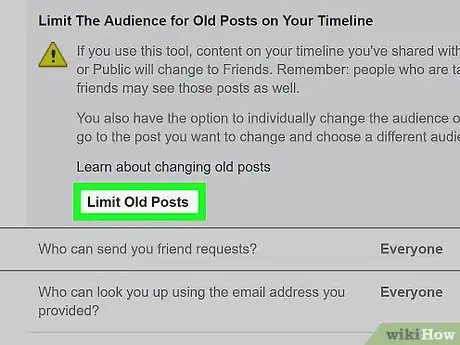
3Check privacy on old photos. Even if you've adjusted your default privacy setting for future photos, the settings on your old photos will remain the same unless you go back through and change those as well.[11]
- You can do this manually, but that may be time-consuming if you've uploaded a lot of photos. The other option is to go to your privacy settings. Under "Who can see my stuff" you'll see an option to "limit the audience for posts you've shared with friends of friends or public." You can select "limit old posts" and it will change the privacy settings of old posts you may have posted as public in the past.
-
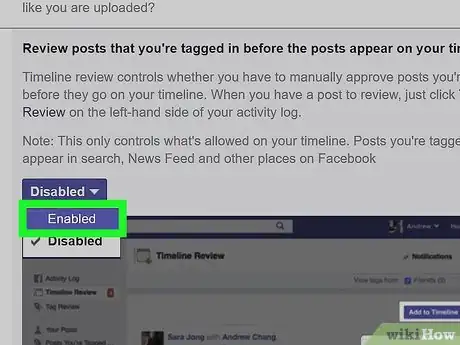
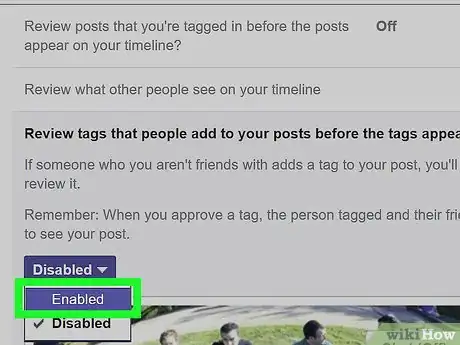
4Restrict tagging. When someone tags you in a photo, or in a post, that tag is now visible to your friends, their friends, and anyone else with whom they've shared that photo or post. This means if they've posted something publicly, you are now tagged in a public post that anyone on the internet can see.[12]
- Open the timeline and tagging section of your settings and edit the setting that allows you to review tags before they appear on Facebook. When someone tags you, Facebook will send you a notification. You can review the tag and the privacy setting of the post and determine whether you want it to appear. If you don't, you can simply deny it.
- You also can manage the people, in addition to those already tagged, who will see the tag.
-
5Disable checking in. If you don't want to "check in" to a location to let your friends know where you are, the solution is simple – don't click the button to check in to that location. However, you may want to disable the feature that allows your friends to check you into a location without your permission.[13]
- This can be done under the timeline and tagging section of your settings. Anyone who attempts to check you in will appear in your timeline review, and you'll have to approve the check-in before it goes live on Facebook.
-
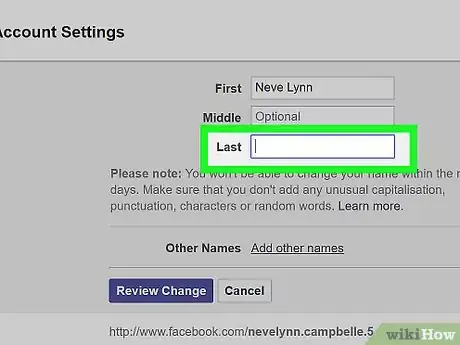
6Use an alternate name. If you want to make it extremely difficult for anyone who knows you to find you on Facebook, you may want to take the additional step of changing your name. If you want to act conservatively, you could simply use your middle name as your last name.[14]
- You also can create something wholly original that isn't connected to your name. Just be careful not to make it too ridiculous. Don't change it to anything you might be embarrassed by if your page was discovered by professional colleagues or family.
- Keep in mind that when you change your name, you will still be searchable by your real name for a brief period of time. So if you want to hide your Facebook page in anticipation of a particular event or meeting, make sure you give yourself enough time.
Maintaining Security
-
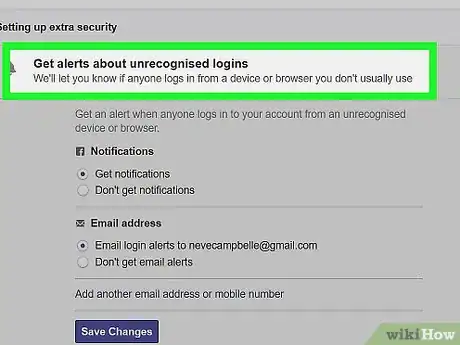
1Get login notifications. Under your account's security, you can request notifications whenever anyone logs in to your account. Getting these notifications can alert you if your account has been breached by a hacker, so you can take precautions to minimize the damage.[15]
- The notification will provide a date, time, and location of the access on your account, so you can determine whether it was you or someone else. For example, if you log on to your account at school, you would get a notification of that log on when you logged into your account later at home.
-
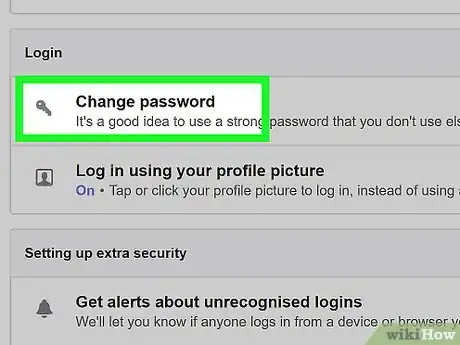
2Create a complicated password. If you have a simple password that anyone could guess, it may be time to change it to something more complex. Your password should be a lengthy series of upper- and lower-case letters, numbers, and special characters.[16]
- You can change your password under general settings.
-
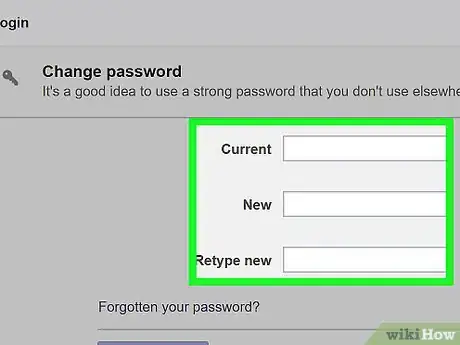
3Change your password regularly. Keeping hackers from accessing your profile also means changing your password every few months or so, just to be on the safe side. You should do this even if you have no reason to suspect anyone has accessed your account.[17]
-
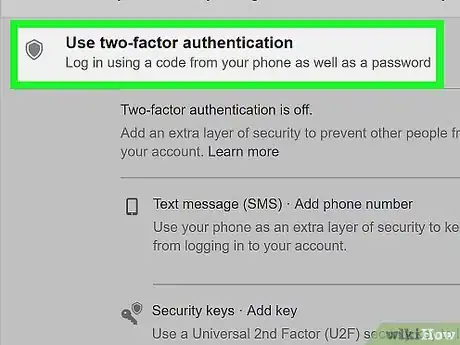
4Enable two-factor authentication. With two-factor authentication (or "Login Approvals," as Facebook calls it), you'll receive a text message with a code when you enter your username and password to log in to Facebook.[18]
- The text message includes a code that you must enter before you can access your Facebook account. This makes your account more secure because even if your password is hacked, the hacker still must somehow get your phone as well.
-
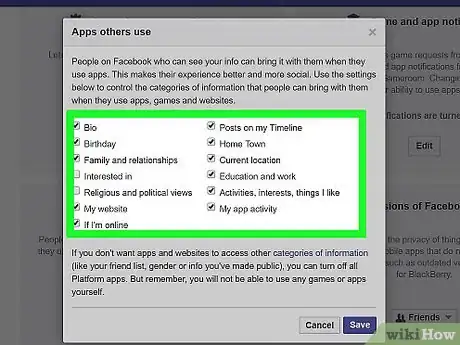
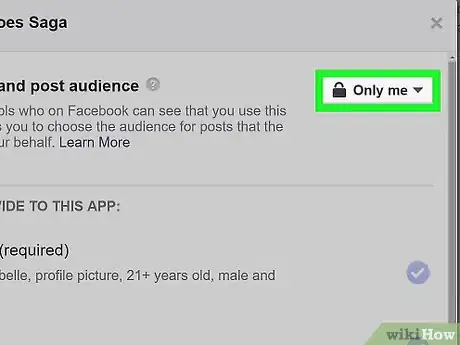
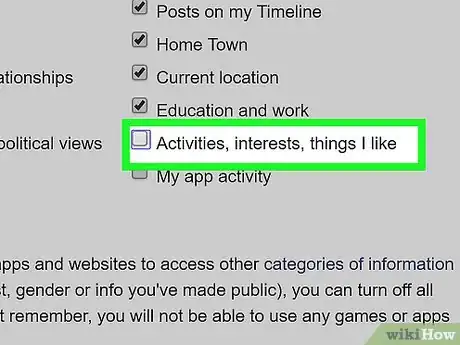
5Check your connected apps. If you use a lot of apps with Facebook, you should check every few months and see what permissions those apps have. Some of their default settings allow you to post on your profile or access all of your information.[19]
- Go to your app settings under your account settings, and you can review the permissions each app has. If you don't agree with the information that is shared with the app, you can always remove it.
- Change the privacy settings to "only me," and then anything the app posts will only be visible to you, not to any of your friends or to the general public.
-
6Deny targeted advertising. Targeted advertising looks at your Facebook and general browser activity to figure out what you're interested in so relevant ads will be placed on your feed. If you don't want advertisers to have access to all this information about you, you can deny targeted advertising.[20]
- You also can decide whether your friends are able to see products or services you like. For example, if you like a page on the internet using the Facebook "like" button, or if you like a company's Facebook page, when those things show up on a friend's Facebook feed it will say that you liked it. You can turn this off if you wish for a little more privacy.
References
- ↑ http://fieldguide.gizmodo.com/make-it-harder-for-people-to-find-you-on-facebook-1745667071
- ↑ http://fieldguide.gizmodo.com/make-it-harder-for-people-to-find-you-on-facebook-1745667071
- ↑ https://thetab.com/2015/11/02/how-do-you-change-your-name-on-facebook-60245
- ↑ http://fieldguide.gizmodo.com/make-it-harder-for-people-to-find-you-on-facebook-1745667071
- ↑ http://www.pcadvisor.co.uk/how-to/social-networks/how-secure-facebook-how-avoid-facebook-scams-facebook-hoaxes-3637264/?p=2
- ↑ https://hide.me/en/blog/2015/03/facebook-security-guide-how-to-keep-yourself-anonymous/
- ↑ https://hide.me/en/blog/2015/03/facebook-security-guide-how-to-keep-yourself-anonymous/
- ↑ http://www.pcadvisor.co.uk/how-to/social-networks/how-secure-facebook-how-avoid-facebook-scams-facebook-hoaxes-3637264/
- ↑ http://fieldguide.gizmodo.com/make-it-harder-for-people-to-find-you-on-facebook-1745667071
- ↑ https://hide.me/en/blog/2015/03/facebook-security-guide-how-to-keep-yourself-anonymous/
- ↑ http://www.pcadvisor.co.uk/how-to/social-networks/how-secure-facebook-how-avoid-facebook-scams-facebook-hoaxes-3637264//
- ↑ http://www.pcadvisor.co.uk/how-to/social-networks/how-secure-facebook-how-avoid-facebook-scams-facebook-hoaxes-3637264//
- ↑ http://www.pcadvisor.co.uk/how-to/social-networks/how-secure-facebook-how-avoid-facebook-scams-facebook-hoaxes-3637264/
- ↑ https://thetab.com/2015/11/02/how-do-you-change-your-name-on-facebook-60245
- ↑ https://hide.me/en/blog/2015/03/facebook-security-guide-how-to-keep-yourself-anonymous/
- ↑ http://www.pcadvisor.co.uk/how-to/social-networks/how-secure-facebook-how-avoid-facebook-scams-facebook-hoaxes-3637264/?p=2
- ↑ http://www.pcadvisor.co.uk/how-to/social-networks/how-secure-facebook-how-avoid-facebook-scams-facebook-hoaxes-3637264/?p=2
