This article was co-authored by wikiHow Staff. Our trained team of editors and researchers validate articles for accuracy and comprehensiveness. wikiHow's Content Management Team carefully monitors the work from our editorial staff to ensure that each article is backed by trusted research and meets our high quality standards.
This article has been viewed 45,802 times.
Learn more...
Holographic nails are one of the fastest growing fashion trends, and for a good reason. They are sparkly, colorful, and oh-so-pretty! One of the best ways to get them is to use holographic nail powder, but not everyone likes to mess with powder. Luckily, there are other ways to get holographic nails, using holographic nail art foil; you can even use holographic cellophane in a pinch! Whichever method you choose, you are bound to end up with something that will wow all of your friends!
Steps
Using Nail Powder
-
1Get some holographic nail powder. You can find it online, or in a well-stocked beauty supply store. You may also find it labeled as “hologram mirror powder."[1] For the hologram look, choose something that is silvery or iridescent.
-
2Do your manicure as usual, starting with a basecoat and finishing with your favorite color. Apply your base coat first, then your favorite color. You can use any color you want—each color will create a slightly different look. The darker your base color is, the more dramatic the hologram effect will be.
- If you are new to painting nails, consider using silver as your base color. This way, if you accidentally leave any gaps in the powder, it will be less noticeable.[2]
Advertisement -
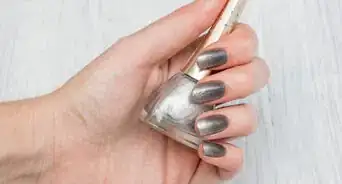
3Apply a layer of non-wipable gel top coat, and wait until it gets rubbery, but not tacky. This will allow the powder to stick to it.[3]
-
4
-
5Use a soft brush to dust off the excess powder. Gently sweep the brush across your nail, starting from the base and going past the tip in a single stroke. This will not only get rid of any excess powder, but also help the powder lay more smoothly.[6]
- Be sure to sweep to either side of your nail to remove any powder that might be stuck to your skin.
- The best brush for this would be a soft, fluffy eyeshadow brush or a kabuki brush.
-
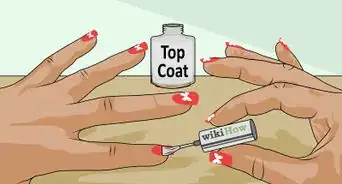
6Apply one more layer of non-wipable top coat. Be sure to sweep it across the top of your nail, as well as down the sides. This will seal your manicure, and prevent it from peeling.[7]
-
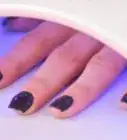
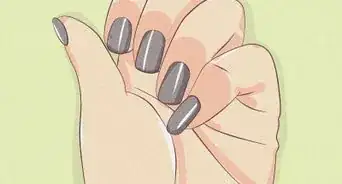
7Cure your manicure under a UV light. This should only take about 60 seconds. Once it is done, your nails are ready to show off!


Using Holographic Foil
-
1Get some holographic foil. You can buy special holographic or "spectrum" foil meant for nail art online or in a well-stocked beauty supply shop. You can also buy some holographic cellophane from any store that sells gift wrap.[8]
-
2Start your manicure as you usually would, with a base coat and your favorite color. You can use any color you want. If you are new to the realm of nail art, consider choosing silver as your base color. This way, if your foil rips or tears while you are applying it, the gaps won't be as visible.[9] Do not apply a top coat just yet.
-
3Cut your foil down to nail-sized pieces using a pair of manicure scissors. They don't have to be perfect, but try to get them as close to the right size as possible. The width is more important than the length; you can always trim off any excess foil from the top of your nail.
-
4
-
5
-
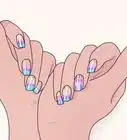
6Press the foil into your nails, foil-side-up. If you are using holographic cellophane, check to see if it is the same on both sides. If it isn't, then make sure that you are pressing it holographic-side-up into the adhesive or top coat. Next, position the base of the foil piece against the base of your nail, then press it down. Any excess foil should be hanging over the tip of your nail.
-
7Gently smooth the foil down with an orange wood stick. This will help adhere it to your nail, as well as smooth out any wrinkles or air bubbles. Avoid applying too much pressure, or it may rip![14]
-
8Clean it up. If you are using foil, it is thin enough so that you can tear off any excess or overhang. If you are using cellophane, use a pair of nail clippers to trim off any excess from the tip of your nail.
-
9Finish off with a top coat. If you can, try to use a top coat designed specifically for nail art.[15]


Creating "Shattered" Nails
-
1Get some holographic cellophane. You can get it in just about any store that sells gift wrap. If you want something that looks like an opal instead, you could get some iridescent cellophane instead.[16]
-
2Cut the cellophane into small, jagged shapes. Try to get some different shapes and sizes; this will create a more "natural" and spontaneous look found in shattered glass and opals. Make sure that the shapes are much smaller than your nails, however. You will be piecing them together on each nail to create a "shattered" effect.
- Place some double-sized tape onto your table, then stick your cut shapes down into it. Make sure that just the edges are touching the tape, so that they are standing up. This will make grabbing them easier.[17]
-
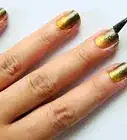
3Apply a base coat and a top coat. Here is where you can get really creative. For example, if you want something that looks like glass, you could go with silver nail polish. If you want something that looks like an opal, try nude (this works great with iridescent nail polish). If you want something dramatic, try black!
-
4Apply a layer of top coat. It might be a good idea to do just one hand for now, or even a few nails. Make sure that you are using the regular kind of top coat, and not the quick drying kind—otherwise, you may not have enough time to set the pieces down![18]
-
5Start placing the cellophane pieces down onto your nail. Use a pair of tweezers to grab the cellophane pieces, and to place them onto your nail. You can place the pieces as close together or as far apart as you'd like, but avoid overlapping them. If you overlap them you will create seams, which will create bulk. Don't worry if some of the pieces extend past the tip of your nail.
- If the top coat dries too quickly, just paint more on.
- Try to get the position right the first time; if you nudge the pieces too much, you may create "ripples."
- Don't focus too much on perfection. The shattered look is supposed to be random.
-
6Finish the rest of your nails, then clean it up. Once you have everything done, get out a pair of nail clippers, and use them to trim off any excess foil that might be extending past the tips of your nails.
-
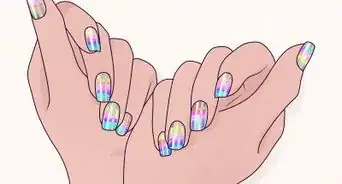
7Seal your nails with a layer of top coat. Be sure to sweep some top coat over the very tips of your nails as well. This will prevent the polish from peeling.


Warnings
- If you used holographic powder, avoid washing your hands under hot water, as this may cause the powder to come off.⧼thumbs_response⧽
Things You'll Need
Using Nail Powder
- Base coat
- Nail polish
- Non-wipable gel top coat
- Holographic nail powder
- Brush or foam brush
- Soft brush
Using Holographic Foil
- Base coat
- Nail polish
- Top coat
- Holographic nail art foil
- Foil adhesive
- Orange wood stick
Creating "Shattered" Nails
- Base coat
- Nail polish
- Top coat
- Holographic or iridescent cellophane
- Manicure scissors
- Tweezers
- Double-sized tape (optional)
References
- ↑ http://thebeautydepartment.com/2016/08/hologram-chrome-nails/
- ↑ https://www.youtube.com/watch?v=tfby6bZ5GQ0
- ↑ https://www.youtube.com/watch?v=Ys4KDVgifgk
- ↑ https://www.youtube.com/watch?v=tfby6bZ5GQ0
- ↑ http://thebeautydepartment.com/2016/08/hologram-chrome-nails/
- ↑ https://www.youtube.com/watch?v=tfby6bZ5GQ0
- ↑ https://www.youtube.com/watch?v=Ys4KDVgifgk
- ↑ http://www.today.com/series/shortcuts/shattered-glass-nail-art-hottest-trend-internet-t52046
- ↑ http://studiodiy.com/2015/12/21/diy-holographic-manicure/
- ↑ http://studiodiy.com/2015/12/21/diy-holographic-manicure/
- ↑ http://www.today.com/series/shortcuts/shattered-glass-nail-art-hottest-trend-internet-t52046
- ↑ http://studiodiy.com/2015/12/21/diy-holographic-manicure/
- ↑ http://www.today.com/series/shortcuts/shattered-glass-nail-art-hottest-trend-internet-t52046
- ↑ http://studiodiy.com/2015/12/21/diy-holographic-manicure/
- ↑ http://www.today.com/series/shortcuts/shattered-glass-nail-art-hottest-trend-internet-t52046
- ↑ http://www.abeautifulmess.com/2015/12/hologram-nail-decal-diy.html
- ↑ http://www.abeautifulmess.com/2015/12/hologram-nail-decal-diy.html
- ↑ http://www.abeautifulmess.com/2015/12/hologram-nail-decal-diy.html
About This Article