This article was co-authored by wikiHow Staff. Our trained team of editors and researchers validate articles for accuracy and comprehensiveness. wikiHow's Content Management Team carefully monitors the work from our editorial staff to ensure that each article is backed by trusted research and meets our high quality standards.
This article has been viewed 34,923 times.
Learn more...
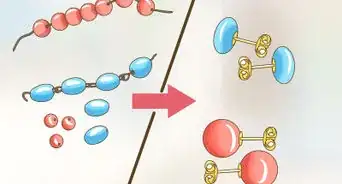
There are countless ways to make earrings. If you can put an earring hook on it, then you can turn it into an earring. Fabric earrings are quickly becoming popular. They are cute and shabby and chic. There are also lots of ways to make them, from using plain fabric to lace to fabric-covered buttons. Whichever method you choose, you are bound to end up with something cute and unique!
Steps
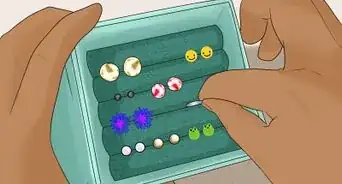
Making Scrap Fabric Earrings
-
1Make your template out of thin cardboard. Draw a simple shape on a thin piece of cardboard. Great starter shapes include circles, triangles, hearts, and leaves. Cut the shape out using a craft blade or a sharp pair of scissors.[1]
-
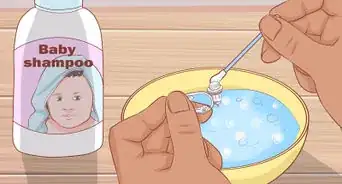
2Fuse your double-sided interfacing to your fabric. Set your fabric right-side-down on the ironing board. Place the double-sided interfacing face-down on top. Iron the interfacing according to the manufacturer's instructions.[2]
- Double-sided interfacing has a shiny side and a matte side. Place it shiny-side down.
- Each brand will be a little different. Typically, you will need to iron the interfacing using a low-heat, no-steam setting for a few seconds.
Advertisement -
3Cut the fabric into four equal pieces. Each piece should be a little bit bigger than your template. Don't cut it into your final shape just yet, however.
-
4Peel the backing off. Go through each of your fabric pieces, and peel the backing of the double-sided interfacing off. You should now have four small pieces of fabric, with the right-side on one side, and the adhesive side on the other.[3]
-
5Fuse two pieces of fabric together. Take two of your fabric scraps, and place them together, right sides facing out. Place the stack on the ironing board, and iron it for a few seconds. Repeat this step with the remaining set of fabric scraps.[4] You should now have two pieces of stiff fabric, with the right side on both sides.
- Follow the manufacturer's instructions for the fusing. Typically, you will need to use the same heat setting, but iron it for a little longer.
-
6Trace your template onto the fabric scraps once they cool. The fabric scraps will be very hot and flimsy at first, but they will stiffen as they cool. Once they cool, trace your template onto them. Use a pen to trace the template if your fabric is light-colored. Use chalk if the fabric is dark-colored. Discard the template when you are done, or save it for another project.
-
7Cut the earrings out using a pair of sharp scissors. Try to cut just inside the lines that you dress. This way, you won't have to worry about the lines showing. Don't worry about the fabric fraying; the fusible interfacing will prevent that from happening.
-
8Use a thumbtack to punch a hole in the top of each earring.[5] If you don't have any thumbtacks at home, you can use a pushpin or a thick needle instead. If you want to make statement earrings, consider making a larger hole, and inserting a small grommet or eyelet into the hole.
- This method is for hook earrings. If you don't like hook earrings, simple glue the top of each earring to a blank post earring.[6]
-
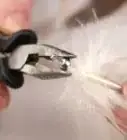
9Twist open an earring hook. Use a pair of needle nose pliers to twist open the loop at the bottom of the earring. Do not pull the loop open, or you will warp it. Think of it as opening a door.
- Consider inserting a jump ring first. Keep the earring hook intact. Instead, open up a jump ring using the same technique. [7]
-
10Slip the earring hook into the hole you just made. Close the loop by twisting it shut with your needle nose pliers. If there is a small gap in the loop, pinch it shut with your needle nose pliers.
- If you are adding a jump ring: slip the jump ring into the hole, then add the earring hook. Close the jump ring using the same technique.


Making Fabric Lace Earrings
-
1Get some embroidered bridal lace fabric or trim. Don't worry about the color; you can always paint it. Instead, look for a thickly-embroidered design that appeals to you. Lace found in the bridal section and in the trim section of a fabric store would be ideal.
-
2Cut the lace down to the shape you want.[8] Most types of lace will have a floral design on it. Some may have a scrolled design instead. Take a look at your lace, and find a section of the design that you use best. Use a pair of fabric scissors to it out.
- Cut through the fine mesh that's around the embroidered design. Avoid cutting right across an embroidered design.
- Cut out two identical designs, one for each earring.
-
3Paint the lace with decoupage or fabric stiffener.[9] Place the pieces of lace on a smooth surface, such as a sheet of wax paper, plastic wrap, or foil. Paint one side with fabric stiffener and let it dry. Flip the lace over, and paint the other side. This will help stiffen the lace and add some "weight" to it.
- If you don't have any fabric stiffener at home, use a decoupage glue instead.
-
4Paint the lace, if desired.[10] You can use fabric paint, acrylic paint, or even spray paint for this. If you are using fabric paint or acrylic paint, consider watering it down first, and applying it in several thin layers. This way, you won't loose the embroidered design.
- Paint one side first, let it dry, then paint the other side.
-
5Let the lace dry completely. Depending on the products you used, this could take only a few minutes to several hours. Refer to the label on your bottle of stiffener and paint for more specific drying instructions.
-
6Open up an earring hook. Use a pair of needle nose pliers to twist open the loop at the bottom of an earring hook. Do not pull the loop open, as this can weaken the metal.
-
7Slip earring hook through top of the lace.[11] Decide where you want the top of your design to be. Slip the loop you just opened through the lace, close to the edge.
-
8Close the earring hook. Use your needle nose pliers to twist the loop back shut, sealing the lace inside. If there is a small gap between the end of the loop and the earring hook, use your needle nose plies to pinch it shut.


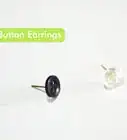
Making Fabric Button Earrings
-
1Get an aluminum cover button kit from the fabric store. Your kit needs to include a button cover tool, or you won't be able to put the buttons together. You can choose any size kit you want.
-
2Use the included template to trace a circle onto your fabric.[12] Most button cover kits have a template printed on the back. Use a pair of scissors to cut the template out, then a pen or pencil to trace it onto your fabric. You will need one circle per button.
- Some kits come with a plastic template inside the package. If your kit is one of those, use that instead.
-
3Cut the fabric circle out. Don't worry if the edges aren't perfectly even—they will be tucked inside the button.
-
4Press the fabric into the tool. Cover button kits come with two parts: a large, squishy part, and a small hard, plastic part. You are looking for the large, squishy part. Set the large, squishy part down, and place the fabric over it.
-
5Press the button down into the tool. Make sure that you are placing the button curved-side-down into the tool. The fabric may shift while you are doing this, so be careful. If the fabric shifts, you will need to adjust it. You want there to be equal amounts of fabric all around the button.
-
6Tuck the edges of the fabric into the button. Don't worry if the fabric crumples or looks bulky. You will likely need to hold the fabric in place with your finger.
-
7Place the back of the button on top of the fabric. Some button cover kits come with two types of backs: a smooth back and a back with a shank on it. Choose the smooth back.
- If your button kit only came with the shanked backings, use a pair of needle nose pliers to pull the shank out.[13]
-
8Use the other part of the button maker to assemble your button. Take the smaller, plastic part of your button maker. Press it on top of the button backing, making sure that the fabric is tucked under it. Push down hard on it. You should feel a slight "thump" as the button comes together.
- If you don't feel the thump, try hitting the plastic part with a hammer or mallet.
-
9Glue an earring post to the back of the button. Place a large glob of glue on the front of a blank earring post, then press the post against the back of the button. Don't worry if some glue leaks out.
-
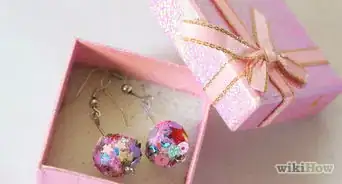
10Make a second earring, then wait for both to dry. Once the earrings are dry, they are ready to wear!


Things You'll Need
Making Scrap Fabric Earrings
- Thin cardboard
- Sharp scissors
- Scrap fabric
- Double-sided interfacing
- Iron
- Ironing board
- Earring hooks
- Needle nose pliers
Making Fabric Lace Earrings
- Embroidered lace
- Fabric scissors
- Decoupage or fabric stiffener
- Paint (optional)
- Paintbrush
- Earring hooks
- Needle nose pliers
Making Fabric Button Earrings
- Aluminum cover button kits
- Fabric
- Earring posts
- Jewelry glue
- Scissors
- Pen or pencil
- Needle nose pliers
References
- ↑ https://www.youtube.com/watch?v=GyNRaZT-uz0
- ↑ https://www.youtube.com/watch?v=GyNRaZT-uz0
- ↑ https://www.youtube.com/watch?v=GyNRaZT-uz0
- ↑ https://www.youtube.com/watch?v=GyNRaZT-uz0
- ↑ https://www.youtube.com/watch?v=GyNRaZT-uz0
- ↑ http://www.momtastic.com/diy/171335-diy-fabric-heart-earrings/
- ↑ http://www.craftychica.com/2013/06/fabric-scrap-earrings/
- ↑ https://liagriffith.com/simple-to-make-diy-lace-earrings/
- ↑ https://liagriffith.com/simple-to-make-diy-lace-earrings/
About This Article