This article was co-authored by wikiHow Staff. Our trained team of editors and researchers validate articles for accuracy and comprehensiveness. wikiHow's Content Management Team carefully monitors the work from our editorial staff to ensure that each article is backed by trusted research and meets our high quality standards.
The wikiHow Video Team also followed the article's instructions and verified that they work.
This article has been viewed 47,870 times.
Learn more...
Beeswax wraps are a great, sustainable alternative to plastic food coverings. To make beeswax wraps, start by cutting cotton fabric to your preferred size, and grating a block of beeswax into small pieces. Then sprinkle the beeswax over the fabric, and place it into the oven until the beeswax melts. Spread the beeswax out using a paintbrush, and then once the wrap dries, it is ready to use.
Steps
Cutting the Fabric and Adding the Beeswax
-
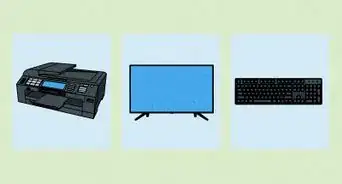
1Get 100% cotton fabric. For a zero waste option, use clean, old sheets or pillowcases, or go thrift shopping to find fabric with bright patterns. Alternatively, purchase new cotton fabric either from a craft store or online.
- The amount of fabric that you will need depends on how many beeswax wraps you want to make. For example, 1 yd (0.9 m) of fabric will be enough to make approximately 3, 12 in × 12 in (30 cm × 30 cm) beeswax wraps. Check that the width of the fabric is at least 1 yd (0.9 m).
- Beeswax wraps require cotton, as when cotton is combined with beeswax, it becomes unbreathable. This is what makes beeswax wraps ideal for storing food.
-
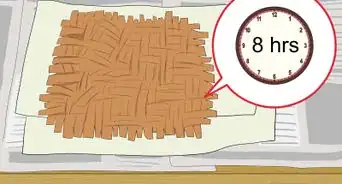
2Preheat the oven to 185 °F (85 °C). Turn the oven on, and set it to the conventional bake setting. Let the oven preheat as you prepare the materials to make the beeswax wraps.
- If the oven temperature is any higher, the beeswax may burn.
- The symbol for the conventional bake setting is 2 lines, with 1 at the top and the other at the bottom of the square. However, other ovens simply have a setting with the label "bake".
Advertisement -
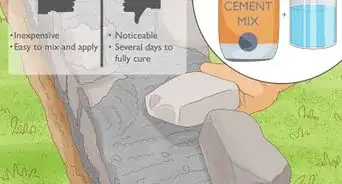
3Measure the fabric to your preferred size. Use a ruler to measure out either a 12 in × 12 in (30 cm × 30 cm) or an 8 in (20 cm) square. Use chalk to mark out the fabric.
- Beeswax wraps come in a variety of different sizes, depending on the type of food that you plan to use them for.
- A 12 in × 12 in (30 cm × 30 cm) beeswax wrap is an ideal size to use for covering a bowl, while a smaller 8 in × 8 in (20 cm × 20 cm) wrap is best for sandwiches, fruit, and vegetables.
-
4Cut out the fabric with pinking shears. Create squares of fabric in your preferred size. You can choose to start with just 1 wrap, or cut out many squares if you want to make multiple wraps at a time.[1]
- Pinking shears will prevent the cut edges of the fabric from fraying.
-
5Grate a packed beeswax block into small pieces. Use a cheese grater to finely grate up the beeswax. You will need around 0.5 ounces (14 g) per 8 by 8 inches (200 mm × 200 mm) wrap that you intend to make.
- You can purchase blocks of beeswax from local beekeepers, at craft stores, or online. Make sure that it is high quality, food-grade beeswax. Ask the maker for more information about what the beeswax is suitable for if you are unsure.[2]
- If you are making 12 in × 12 in (30 cm × 30 cm) beeswax wraps, you will need approximately 0.8 ounces (23 g) of grated beeswax per wrap.
-
6Sprinkle the beeswax over the fabric. Place the fabric on an old baking sheet that is covered with parchment paper, then evenly spread the grated beeswax out over the full surface of the fabric.[3]
- Make sure that you use an old baking sheet, as the beeswax will stick to it and will be very difficult to remove.
- If you are wanting to make more than 1 wrap, make each wrap individually.


Heating the Beeswax
-
1Place the fabric and beeswax into the oven for approximately 5 minutes. Slide the old baking sheet with the fabric topped with beeswax into the oven. Remove the baking sheet from the oven as soon as the beeswax has melted.
- Keep a close eye on the wrap while it's in the oven, as if it is left in there for too long, it may burn.
- The fabric will look wet when the beeswax has melted.
-
2Spread the beeswax out evenly over the fabric using a paintbrush. Make sure that the whole piece of fabric is covered in wax. Check that the whole piece of fabric looks wet, including the corners, as this means that the melted beeswax is in all of the right spots.[4]
- Make sure that the paintbrush you use is clean, is new, and hasn't been around any toxic substances such as paint.
- If the wax begins to harden before you have had time to spread it out properly, simply place it back into the oven until it melts again.
-
3Hang the wrap up on a clothesline to dry. Once the beeswax is covering the full piece of fabric, hang it up with clothes pegs on a clothesline to dry. If you don't have a clothesline, create a makeshift line by hanging a piece of rope or string across a doorway. The drying process won’t take longer than 15 minutes.
- You will be able to tell when the wrap is ready to use as it will have cooled, and it will feel stiff.
- Wipe away any beeswax residue that you see in the wraps with a damp cloth before you use them.[5]
-
4Use the beeswax wrap to mold around food items. To cover bowls, simply lay the wrap flat over the bowl and fold it in at the rim. For items of food, place the item in the center of the wrap, and fold it around the shape. The warmth of your hands will mold the wrap around the shape.[6]
- Use the beeswax wraps for dry foods such as whole fruits and vegetables, nuts, and sandwiches. Foods that contain a lot of moisture such as sliced fruit with a lot of juice, or leftover meals, won’t store well in beeswax wraps, and should be kept in a container instead.


Warnings
- Don’t use beeswax wraps as a food cover for meat, as they cannot be washed in hot water.[7]⧼thumbs_response⧽
Things You’ll Need
- Cotton fabric
- Ruler
- Chalk
- Pinking shears
- Cheese grater
- Block of beeswax
- Baking sheet
- Parchment paper
- Paintbrush
- Clothesline
- Clothes pegs


References
- ↑ https://www.mommypotamus.com/diy-reusable-food-wrap/
- ↑ https://wellnessthroughwildness.com/how-to-make-beeswax-wraps/
- ↑ https://www.growforagecookferment.com/how-to-make-beeswax-food-wraps/
- ↑ https://www.attainable-sustainable.net/zero-waste-kitchen/
- ↑ https://www.attainable-sustainable.net/zero-waste-kitchen/
- ↑ https://www.mommypotamus.com/diy-reusable-food-wrap/
- ↑ https://www.mommypotamus.com/diy-reusable-food-wrap/
About This Article