This article was co-authored by Ryaan Tuttle. Ryaan Tuttle is a Home Improvement Specialist and the CEO of Best Handyman, Inc. in Boston, Massachusetts. With over 17 years of experience, he specializes in building home service businesses, focusing on creating scalable and efficient brands. With the help of his global team, the companies have achieved over 10+ million in sales and received recognition through magazine features, and enjoy partnerships with wikiHow and Jobber field service software. Boston Magazine and LocalBest.com have named Best Handyman Boston the Best Handyman in Boston. Ryaan holds Construction Supervisor and Home Improvement Contractor Licenses.
There are 8 references cited in this article, which can be found at the bottom of the page.
This article has been viewed 45,474 times.
A plinth block is an interior trim accent that widens a section of the baseboards around a wall or doorway, with a look similar to the supports on a classical column. Despite their ornate appearance, plinth blocks are fairly simple to install. After you’ve measured your door frame and chosen a look for the molding, cut your raw materials to the right shape and size, fasten them down and apply a fresh coat of paint so they blend in seamlessly with the rest of the trim.
Things You Should Know
- If the preexisting molding is flat and relatively thin, you can install the plinth blocks directly on top of the existing trim using nails and construction adhesive.
- If the block is really thick or the door’s trim isn’t flat, remove a section of the trim with a utility knife and putty knife before installing the plinth block.
- If the plinth block doesn’t match the surrounding trim, your best bet it to simply repaint the entire area.
- Use spackle to cover any screw holes or gaps between the trim and block; then, paint the trim and block.
- It generally looks better if the plinth blocks are slightly taller than the baseboard and contain some kind of ornamental flourishes that add something visually to the door frame.
Steps
Installing Prepared Blocks
-
1Remove the old trim. Installing plinth blocks will be easiest if there’s nothing to get in the way. Score the edges of the casing where it meets the wall with a utility knife, then pry it up using a pry bar or putty knife. You can either replace the entire casing this way or carve out the lower section of the trim to make room for the blocks.
- If you choose to remove the casing completely, you’ll need to replace it with new trim that lines up properly with the plinth blocks.
- Make your cuts carefully to ensure that the edges of the trim above the plinth block come out even.
-
2Install directly over the existing trim. Alternatively, you can fit blocks over the trim that’s already in place. Just adjust the width and thickness of the paneling accordingly when you measure and saw. In this case, your plinth blocks will be more like a facade, and probably only need to be cut about half as thick as they would be if you were embedding them into the casing.[1]
- You'll have the most success installing plinth blocks over trim that's perfectly flat, without any grooves, contouring or other detailing that will make the blocks difficult to fit.
Advertisement -
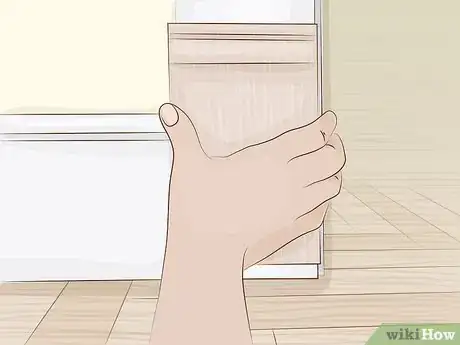
3Use adhesive to hold the blocks in place. Spread a thin layer of construction adhesive to the backside of the block, then carefully line up the edges with the trim. When the blocks are perfectly aligned and in the right position, slide them into the blank slots you cut into the casing. Keep applying pressure to the blocks until they’re glued down securely.[2]
- If you accidentally misalign the blocks on the first attempt, pull them off from the corner and try again with a fresh dab of adhesive.
-
4Fasten the blocks. The adhesive will keep the blocks right where you want them, but it won’t be strong enough to hold them permanently. Once you’re satisfied with the position of your plinth blocks, nail them down gently. It may help to pre-drill the blocks with holes that match the size of the nails you’ll be using.
- If you don't pre-drill holes, blunt the end of the nail on concrete or a metal tool so it's less likely to split the wood.[3]
- It’s important that the nails be slightly recessed so that you’ll have room to plug them later.
- Nail into the solid framing behind the trim whenever possible. This will provide greater security and keep the blocks from coming loose.[4]
-
5Finish the blocks with spackle and paint. Once the blocks have been fitted and fastened, all that’s left to to do is blend them in with the rest of the casing. Fill in the nail holes with a small amount of caulk or spackling, then brush on a coat of primer before painting the blocks to match the trim. Enjoy the sophisticated look of your new molding![5]
- Sand the spackling after it dries to make the surface of the blocks smooth and level.[6]
- Applying a few strips of painter’s tape to the wall around the door jamb will allow you to work your brush all the way into the edges of the blocks.
Making and Detailing Blocks
-
1Cut your raw wood to the appropriate size. Keep in mind that a plinth block is there to offset the rest of the trim around the door, so it needs to be slightly larger overall. Measure (and re-confirm) the trim dimensions and add ½” to 1” (1.25 to 2.5cm) to each. Use a table saw to cut the wood, making sure the edges are clean and precise.[7]
- Materials like 5/4 trim or MDF paneling are typically recommended for molding projects.
- It may be necessary to glue two or more pieces of wood together to achieve the desired thickness.
-
2Rout or add other details to the block. If you have access to a handheld or table-mounted router, you can use it to etch shallow grooves or other embellishments into the upper section of the plinth blocks. Otherwise, a planer or bevel will be useful for creating sleek, angled edges. Feel free to get as elaborate or as minimal with your plinth blocks as you like.[8]
- Hold the blocks firmly in place with a vice or table clamp to avoid making any sloppy mistakes.[9]
- Routing and other decorative elements don’t offer any enhanced function—they’re simply there to improve the look of the molding.
-
3Make any last adjustments as needed. Clean up the edges of the freshly cut panels. It will be helpful to perform a quick mockup with the loose blocks to gauge whether the dimensions are correct in relation to the door jambs. If necessary, saw the blocks down another ⅛” to ¼” (.3 to .6cm) until they match the width of the trim without looking too bulky.
- Smooth out rough spots and imperfections using a sheet of low-grit sandpaper.[10]
- When adjusting the height, always make follow up cuts to the bottom of the block so you don’t interfere with the routing or beveling.
-
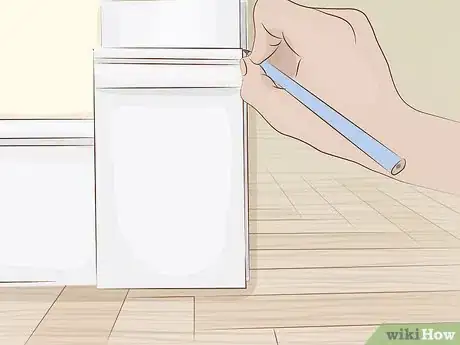
4Mark the edges of the plinth blocks. Notch the blocks with a pencil to indicate the reveal (the small lip that protrudes from the casing), the top and bottom and which side of the doorway they should go on. This will make it easier to keep the separate components organized and assemble everything efficiently when the time comes.[11]
- In most cases, plinth blocks should be wider and deeper than the casing by at least ⅛” (.3cm).
- Don’t worry about marking up the blocks too much—you’ll be painting over them before the project is finished. Make whatever notes will help you install the blocks with precision.
Choosing the Right Blocks for Your Doorway
-
1Measure your door casing. Unless you’re putting in new trim from scratch, the plinth block will fit right over the casing you already have in place with little difficulty. Stretch your tape measure across the bottom of the door jambs horizontally, then measure the depth of the trim to where it meets the wall. Write these dimensions down so you’ll be able to refer to them later during the fitting and installation phases.[12]
- As the old saying goes, “Measure twice, cut once.” If you want your plinth blocks to fit naturally, it’s essential that you take down your measurements as accurately as possible.
-
2Buy precut plinth blocks that fit your trim. Most home improvement stores sell prefabricated plinth blocks that can easily be installed over your door’s existing trim. For many people, purchasing readymade blocks will be the simplest option. These blocks tend to come in standard sizes, so there will be no need to do a lot of guesswork if your home is already outfitted with a conventional trim style.[13]
- Talk to a store representative or contractor if you have any questions about how to install plinth blocks in your home.
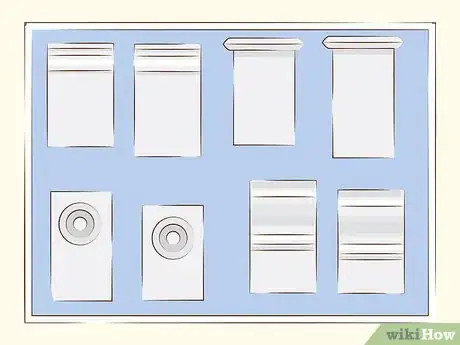
- One downside of using prefab plinths is you’ll be limited in your style selection. Most commercial blocks will either be of Victorian influence or feature basic routing or beveling.[14]
-
3Decide on a style for custom plinth blocks. If you’d rather fashion the plinth blocks yourself, you’ll have more say over the look of the finished product. Think about how subtle or ornate you’d like the moldings to be, then settle on a specific design that matches your sensibilities. Your blocks might utilize smooth, angled edges, a grooved face or simply stand out in relief from the door jamb.[15]
- Ideally, the style of your plinth blocks should go with the rest of your home’s trim and general decor.[16]
- Unless you’re an experienced woodworker, it will probably be a good idea to stick to simple shapes and designs.
Warnings
- Be extremely cautious when working with table saws, skill saws, nails and other dangerous tools. The smallest slip could potentially result in serious injury.⧼thumbs_response⧽
- Try not to leave any gaps between the plinth blocks and the rest of the wall or trim. These may be difficult to conceal later on.⧼thumbs_response⧽
Things You'll Need
- Wood boards (5/4 trim or MDF paneling recommended)
- Tape measure
- Level
- Skill saw
- Router or bevel
- Vice or table clamp
- Hammer
- Nails
- Nailgun (optional)
- Caulk or spackle
- Primer
- Matching paint
- Pry bar or putty knife (for removing existing trim)
- Construction adhesive or wood glue
- Sandpaper
References
- ↑ http://extremehowto.com/plinth-blocks/?page=all
- ↑ http://stonehavenlife.com/simple-door-casing-plinth-blocks/
- ↑ [v161695_b01]. 6 October 2022.
- ↑ http://extremehowto.com/plinth-blocks/?page=all
- ↑ http://www.thehandymansdaughter.com/2015/07/14/add-plinth-blocks-to-door-trim-for-a-finished-look/
- ↑ http://www.home-repair-central.com/sanding-spackle.html
- ↑ http://stonehavenlife.com/simple-door-casing-plinth-blocks/
- ↑ http://stonehavenlife.com/simple-door-casing-plinth-blocks/
- ↑ http://www.homedepot.com/catalog/pdfImages/67/674425c4-12f8-4f13-836d-ca4cc2860c13.pdf
- ↑ http://extremehowto.com/plinth-blocks/?page=all
- ↑ http://extremehowto.com/plinth-blocks/?page=all
- ↑ http://www.ronhazelton.com/projects/how_to_make_fancy_moldings_and_trim
- ↑ http://extremehowto.com/plinth-blocks/?page=all
- ↑ http://www.thejoyofmoldings.com/about-plinth-blocks/
- ↑ http://www.thejoyofmoldings.com/about-plinth-blocks/
- ↑ http://www.ronhazelton.com/projects/how_to_make_fancy_moldings_and_trim

