wikiHow is a “wiki,” similar to Wikipedia, which means that many of our articles are co-written by multiple authors. To create this article, 10 people, some anonymous, worked to edit and improve it over time.
wikiHow marks an article as reader-approved once it receives enough positive feedback. In this case, 90% of readers who voted found the article helpful, earning it our reader-approved status.
This article has been viewed 97,305 times.
Learn more...
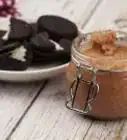
Walnuts are delicious when eaten on their own or when added to a variety of baked goods. Walnuts have multiple layers, including the outer hull and the nutshell.
Steps
Removing the Outer Hull
If your walnuts are fresh from the tree, then you will have to remove the outer hull. Look for mature nuts with yellowish-green hulls. Nuts with black hulls will not have the same quality of flavor.
-
1Place the whole walnut on an asphalt surface. The juices will stain a concrete surface.
-
2Stomp on the walnut with your foot and twist the nut into the asphalt surface.[1]Advertisement
-
3Pick up the nut and place it in a large pail.
-
4Discard the hulls in the garbage or your compost pile.
-
5Spread your walnuts on a large picnic table or another flat area. Make sure that you are wearing rubber gloves to protect your skin from the juices on the nutshells and that you’re working in an area that you can get dirty.
-
6Scrub the exterior of the shells with a wire brush to remove any remaining hull pieces.
-
7Spread the cleaned walnuts in a single layer on a flat surface in a dark, cool, dry and well-ventilated area. Make sure that the surfaces are not touching one another.
-
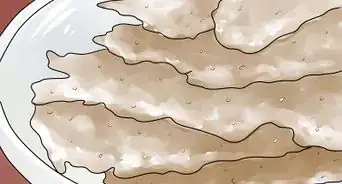
8Cure the walnuts for 5 to 6 weeks. If you crack a fresh walnut, then the meat will be rubbery. Curing them allows the kernel to become firm and crunchy.[2]


Removing the Nutshell
Walnuts are notoriously tough to crack. You can remove the shell with a nutcracker or with a hammer. Soaking the nuts will prevent the kernel from being shattered during the process of removing the shell.
-
1Soak cured walnuts for 24 hours in hot water. This will soften the shell and will make it easier to crack.
-
2Remove the walnut from the water. Place the walnut on a flat surface with the pointed end facing up.
-
3Strike the pointed end with a hammer until the nut cracks along its axis.
-
4Pull the shell apart with your fingers.
-
5Place the pointed end of a nutpick under the kernel. Run the nutpick along the edges of the kernel to loosen it from the shell.[3]
-
6Place the kernel in a separate bowl. Repeat the process until you have shelled all of your walnuts.


Community Q&A
-
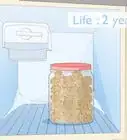
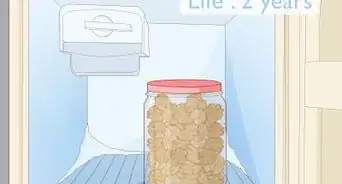
QuestionAre plastic bowls functional in storing walnuts in a freezer?
 Community AnswerYes, as long as the plastic container is non-permeable. A lid would also be helpful.
 -
QuestionHow long can I store walnuts?Community AnswerEnglish walnut meats can be stored in plastic freezer bags in your freezer for at least two years. They are very good eaten straight or used in other products as desired, whole or chopped.
-
QuestionAre black walnuts edible as well?Community AnswerYes. They have a stronger flavor than the cultivated English walnut, and they're wonderful!
Warnings
- Walnut hulls will stain your hands, your clothing, and your work surface. Make sure to wear rubber gloves when you hull walnuts and to protect your work surface from the juices.[4]⧼thumbs_response⧽
Things You'll Need
- Walnuts
- Large pail
- Wire brush
- Hammer
- Nutpick
- Bowl


References
- ↑ https://www.youtube.com/watch?v=mjs8z18vuz4
- ↑ https://ipm.missouri.edu/MEG/2009/10/Black-Walnuts-Pick-Them-and-Clean-Them-Up-Quickly/
- ↑ https://www.farmanddairy.com/top-stories/harvest-process-store-black-walnuts/215439.html
- ↑ https://learningandyearning.com/black-walnuts
- http://www.ipm.iastate.edu/ipm/hortnews/1994/9-16-1994/bnut.html
- http://www.gardenguides.com/91378-shell-store-black-walnuts.html