This article was co-authored by wikiHow staff writer, Hannah Madden. Hannah Madden is a writer, editor, and artist currently living in Portland, Oregon. In 2018, she graduated from Portland State University with a B.S. in Environmental Studies. Hannah enjoys writing articles about conservation, sustainability, and eco-friendly products. When she isn’t writing, you can find Hannah working on hand embroidery projects and listening to music.
This article has been viewed 25,305 times.
Learn more...
Mehndi, or henna tattoos, are a beautiful form of temporary tattoo art. Originating from historic Indian culture, they have also become popular in western cultures in the past 30 years. Mehndi cones are a helpful tool to assist in the application of these temporary tattoos, and by learning how to hold the cone and apply henna correctly, you can create dazzling temporary tattoo art for your friends and family.
Steps
Holding the Cone Like a Pencil
-
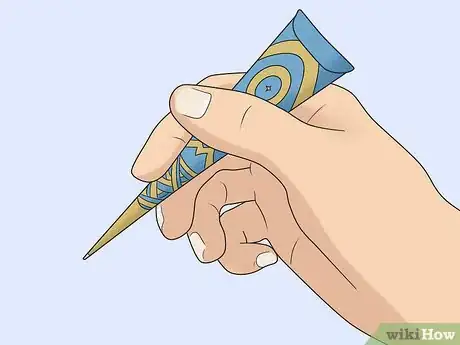
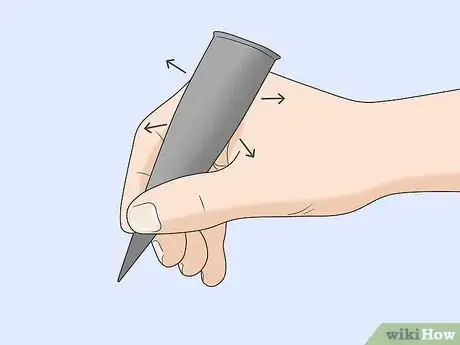
1Grasp the mehndi cone between your pointer and middle finger in your dominant hand. The cone should rest in between your middle finger and your thumb. Try to position the cone like you would a writing utensil.[1]
- Your thumb should be the finger that is controlling the pressure on the cone.
-
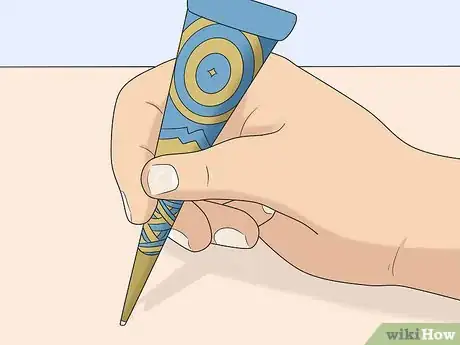
2Rest your wrist on a flat surface to steady the cone. Having your wrist on a flat surface helps with control of the design and also helps keep your hand from tiring out. You will also get a better range of motion this way.[2]
- If you are drawing a design on someone’s body, you can ask them to lay their body part on a table or countertop to create a flat surface for you to work on.
Advertisement -
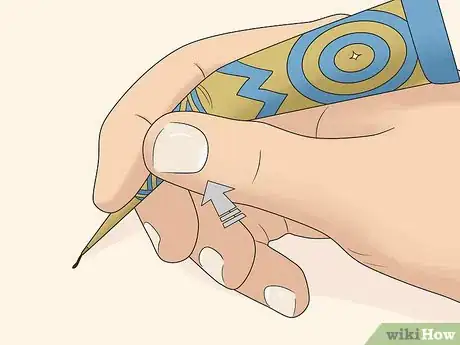
3Squeeze the cone with your thumb against your fingers and palm. Different amounts of pressure will affect the amount and speed of the henna that comes out of the cone. Try using a small amount of pressure at first and slowly increasing it until you get the amount that you like.[3]
- Make sure the pressure is forcing the henna down the cone and out the pinhole end, not the top of the cone.
Gripping the Cone Like a Piping Bag
-
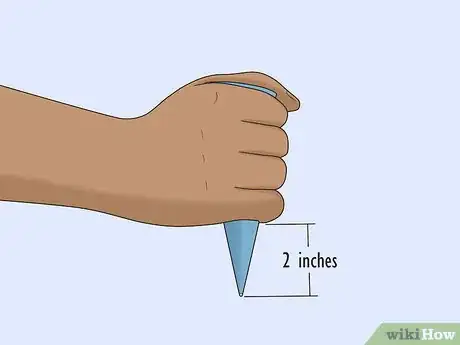
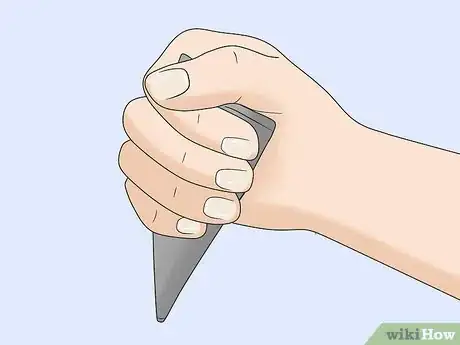
1Hold the mehndi cone in your closed fist in your dominant hand. The pointed end plus an inch or two of the cone should be sticking out of your fist, and the rest of the cone should be hidden in your fingers.[4]
- If you’ve held a piping bag before, this should feel similar.
-
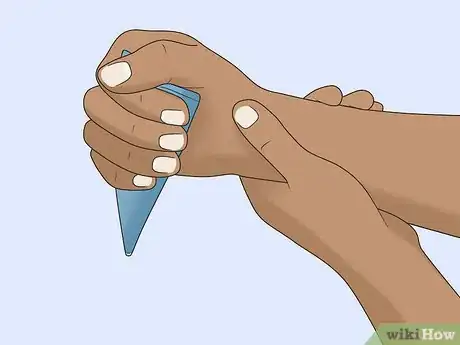
2Steady your wrist with your other hand. If you have a table or countertop to lean on, this may help steady your arms as well. By gripping your dominant wrist with your other hand, you can avoid shaky lines and relieve fatigue from your hand that’s doing the work.[5]
-
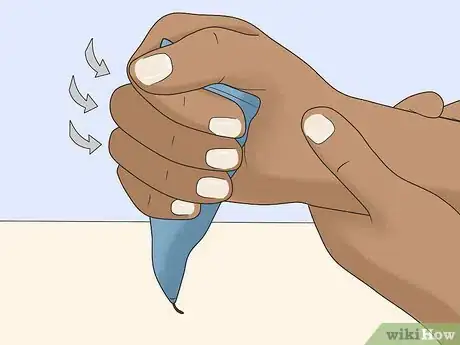
3Apply pressure to the cone by squeezing your fist. More pressure means more henna coming out, and less pressure means less henna. Try out different pressure amounts until you find one that works for your design.[6]
- Your fist can create a lot of pressure, so be sure to start off slow with this technique.
Creating Your Design
-
1Hold the cone like a pencil when your mehndi cone is full. When the cone is full of henna, it is useful to grab it like a pencil so that you can apply less pressure to it. If the cone is full and you apply a lot of pressure, there is a chance that the henna can spill out of the back end of the cone.[7]
- If you are having trouble keeping your cone closed, try using a rubber band or a clip to hold it shut.
-
2Grab the cone like a piping bag if it is not very full. If your cone is less than half full of henna, it may be easier to grab it with a fist and squeeze to push the henna toward the bottom. This method allows you to exert more pressure on your cone, and will make it easier to get your henna out.[8]
-
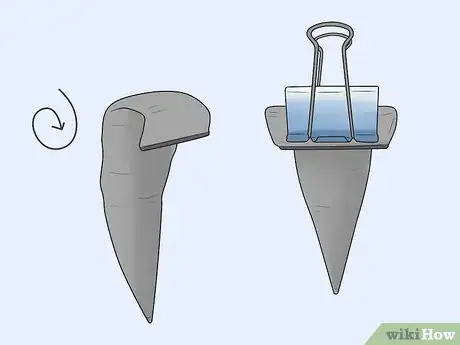
3Roll the cone down as you go to push henna out. As you draw with henna, your cone will get less and less full. To make sure you are using all the henna in your cone, you can roll the top down to push the remainder toward the bottom of the cone.[9]
- A clip can also be helpful in this situation to hold the rolled section of the cone.
References
- ↑ https://gehlotmehandicentre.wordpress.com/2017/10/16/mehndi-cone-how-to-make-hold-and-use-henna-cone/
- ↑ https://gehlotmehandicentre.wordpress.com/2017/10/16/mehndi-cone-how-to-make-hold-and-use-henna-cone/
- ↑ https://dailyasianage.com/news/68920/beautiful-mehndi-designs-to-celebrate-chand-raat
- ↑ https://stylesatlife.com/articles/how-to-make-mehndi-cone
- ↑ https://www.rupalpinto.com/mehndi/five.html
- ↑ https://www.rupalpinto.com/mehndi/five.html
- ↑ https://www.smithsonianmag.com/travel/henna-wedding-india-tradition-art-craft-180958087/
- ↑ https://www.buro247.sg/beauty/trends/henna-hacks-singapore-deepavali.html
- ↑ https://gehlotmehandicentre.wordpress.com/2017/10/16/mehndi-cone-how-to-make-hold-and-use-henna-cone/
