This article was co-authored by Lauren Kurtz and by wikiHow staff writer, Amy Bobinger. Lauren Kurtz is a Naturalist and Horticultural Specialist. Lauren has worked for Aurora, Colorado managing the Water-Wise Garden at Aurora Municipal Center for the Water Conservation Department. She earned a BA in Environmental and Sustainability Studies from Western Michigan University in 2014.
This article has been viewed 78,667 times.
Taro (Colocasia esculenta) is a plant with a starchy root similar to a potato, and it’s used in popular dishes around the world, like Hawaiian poi and many dishes in Southeast Asia, where it probably originated.[1] In addition, taro is popular as a houseplant thanks to its dramatic leaves, which are shaped like elephant ears. Whether you want to grow it for food or decoration, taro prefers a warm, moist environment and plenty of sun. Taro plants rarely flower and produce seeds, so they are most commonly grown by planting a tuber, also known as a corm.
Steps
Growing Shoots on Tubers
-
1Purchase your tubers from a seed supplier or exotic market. A taro tuber is a fleshy bulb that grows underground, similar to a potato. Although you may be able to purchase taro tubers at a garden supply store, they can be hard to find. A specialty market which carries produce may be the better option, since tubers which are sold for food will work fine for planting.[2]
- Try looking for tuber at an Indian, East Asian, or Latin American market.[3]
-
2Choose healthy-looking, large tubers for planting. Different varieties of taro can grow to different sizes, so the size shouldn’t be the only factor, but the tuber you use should be plump, clean, and free from soft spots or mold.[4]
- Although there are more than 100 varieties of taro, the 2 most common are dasheen and eddoe.[5]
- Dasheen is a large tuber with a dry, crumbly flesh.
- Eddoe is a smaller tuber with a creamy texture and less flavor than dasheen.
Advertisement -
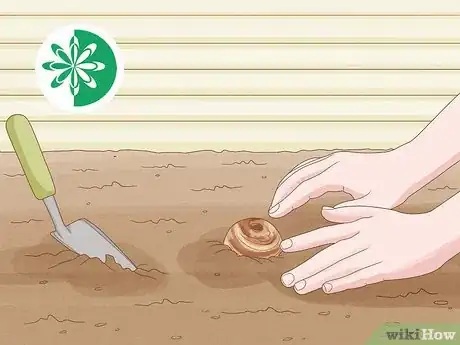
3Place the bottom half of the tuber in sandy soil so shoots start to form. The top half of the tuber should be sticking up above the soil. Keep the plant in a dark, warm place, in temperatures above 80 °F (27 °C) until shoots start to form.[6]
- You can sometimes find taro tubers that are already growing shoots, but in most cases, you will need to sprout them yourself.
-
4Wait a few weeks for the shoots to develop. Whether you are planting your taro in a garden or a container, let the shoots grow to several inches before you transplant it.
- Shoots will usually start to grow within a couple of weeks, but they can sometimes take several months, depending on the dormancy of the plant.
Setting up Your Garden
-
1Plant your taro in spring if you live in an area with frost. Taro plants do not tolerate cold temperatures well, so make sure all threat of frost has passed before you plant your taro outdoors.[7]
- If you live in a frost-free zone, you can plant the taro any time of year.
-
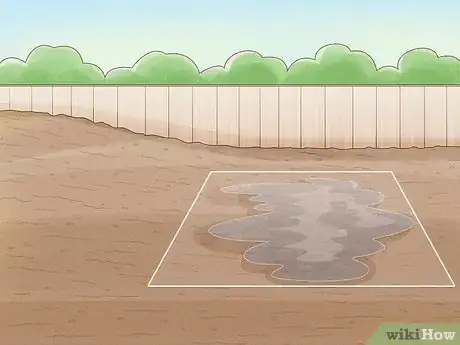
2Choose a location where water will collect. If you have a low area in your garden where water tends to pool, this is the perfect place for your taro. Taro thrives in moist environments, and having plenty of water will help ensure the formation of large, healthy tubers.
- If you don't have a spot where water will collect, you can plant the taro anywhere. Just keep in mind that you will need to water your taro more frequently.
-
3Test your soil pH to ensure it's between 5.5-6.5pH. Taro grows best in a slightly acidic soil. Use pH strips or a commercial test probe to find out the pH of your soil and adjust it if you need to.[8]
- If the pH is too high, or too alkaline, you can add aluminum sulfate to your soil.
- If the pH is too low, or too acidic, add a base like wood ashes or a liming material.
-
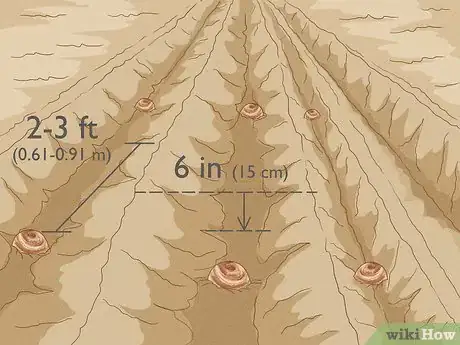
4Place taro in a trench 6 in (15 cm) deep if you’re planting in a garden. The rows should be spaced about 40 in (100 cm) apart, and the plants should be placed 15–24 in (38–61 cm) along the rows. [9]
- Cover the taro with 2-3 inches of soil.
- If you’re planting a small garden, place your taro plants 2–3 ft (0.61–0.91 m) apart so they’ll have plenty of room to grow.
- Keep in mind that taro can grow to be large. Expect it to grow up to 3 feet (0.91 m) tall and 3 feet (0.91 m) wide.
-
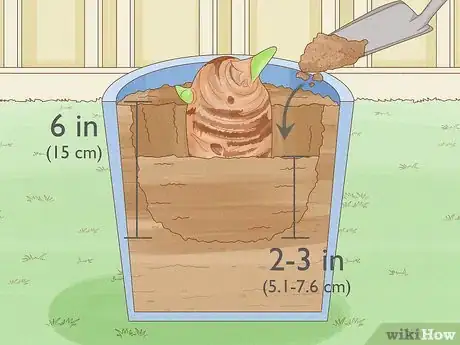
5Plant your taro in a large pot if you don’t have a lot of space. Taro makes a great container plant, whether you’re growing it for the decorative leaves or you want to harvest the tuber at the end of the season. Dig a hole about 6 in (15 cm) deep and place the tuber into the soil. Cover it with 2–3 in (5.1–7.6 cm) of soil.
- Taro is often grown commercially in wet beds, similar to rice, as this often produces larger tubers. If you want to grow your taro plant in water, place the tuber in a bucket or a big jar.
Caring for Your Taro Plant
-
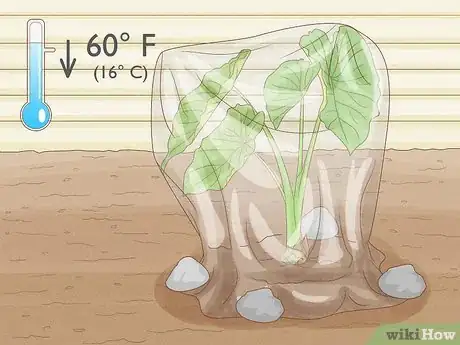
1Keep your taro plant above 60 °F (16 °C). Taro is a tropical plant, and it prefers a warm, moist environment. If the weather turns unexpectedly cold, considering covering your plant with a plastic sheet to help it stay warm.[10]
- Taro can endure temperatures as low as 50 °F (10 °C) for short periods of time, but they will be damaged if it gets any cooler.
-
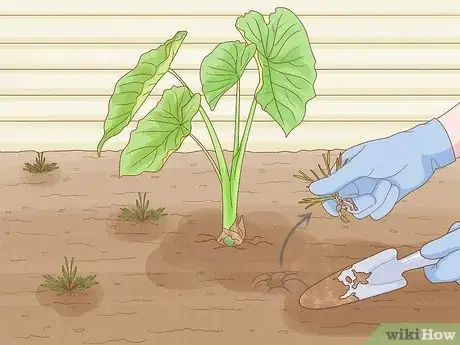
2Remove weeds as they grow. Weeds can decrease a taro yield by as much as half. Pull up any weeds you see as soon as they appear, especially while the taro is taking root.[11]
- Once the taro is established, it will produce its own ground cover that will help prevent weeds from growing. However, this can take several months.
-
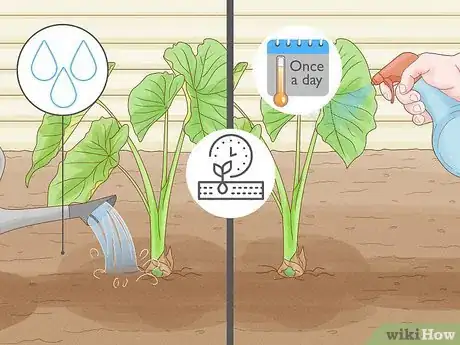
3Keep your taro plant well-watered during the growing period. For the healthiest taro, the soil should stay constantly moist. Touch the soil to see if it feels damp. If it's dry, give it enough water to completely soak the soil. In extremely warm weather, you may need to water the plant as often as once a day.
- Use a spray bottle to mist the leaves of your taro plant at least once a day. This provides the humidity that your plant needs to thrive.
- A container-grown taro plant needs a similar amount of water.
- You can decrease the amount of water you give the plant just before harvest time to force the taro to direct its nutrients to the tuber.
Harvesting the Taro
-
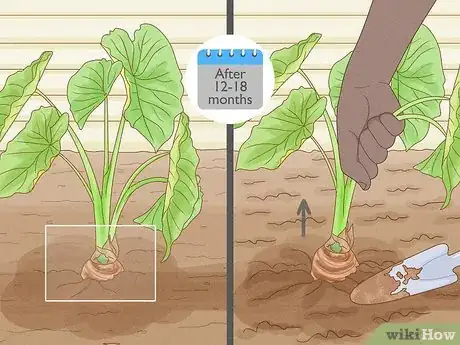
1Harvest when the main corms begin to push out of the soil surface. To harvest the plant, you’ll have to break and loosen the tuber and its suckers manually. Pull the tuber out by hand, then wash it to remove any roots and soil.[12]
- Tubers will take 12-18 months to mature, although you should be able to harvest the leaves 2-3 times a year.
-
2Refrigerate the taro for up to 2 weeks. Taro doesn’t keep well after harvesting, so plan to eat it quickly after you pull it out of the ground. It will keep longer if you refrigerate it.[13]
- It’s best to leave the tuber in the ground until just before you’re ready to eat it. This will prevent it from spoiling.
-
3Experiment with different ways to cook taro root. Taro root can be boiled, steamed, baked, or fried — think of it as similar to cooking a potato. However, taro can be toxic to humans if it's eaten raw, so be sure to cook it thoroughly.[14]
- The leaves and stems of the taro root can be eaten as well, but they must also be fully cooked.
Community Q&A
-
QuestionWhat do the actual seeds look like?
 NinoxTop AnswererTaro seeds are 1 to 1.5 mm long and 4 to 5 mm in diameter. They are yellow or orange with small stripes.
 -
QuestionHow many types of taro are there?
 NinoxTop AnswererThere are 6 types of taro: Colocasia esculenta, Xanthosoma sagittifolium, Xanthosoma violaceum, Amorphophallus paeoniifolius, Alocasia macrorrhizos and Cyrtosperma merkusii.
 -
QuestionHow do I pollinate the flower of a taro plant?
 NinoxTop AnswererTaro flowers are pollinated by insects during the first hours of days following sufficiently hot nights (22°C - 72°F).
Warnings
- Although the root, leaves, and stems of taro are edible, they must be cooked thoroughly; otherwise, chemicals in the plant will cause itching in the mouth and throat.[15]⧼thumbs_response⧽
References
- ↑ https://www.journals.uchicago.edu/doi/abs/10.1086/soutjanth.7.1.3628650?journalCode=soutjanth
- ↑ https://www.gardenorganic.org.uk/sites/www.gardenorganic.org.uk/files/sns/factsheets/FactsheetTaro.pdf
- ↑ https://food52.com/blog/12375-everything-you-need-to-know-about-taro
- ↑ https://www.daf.qld.gov.au/business-priorities/plants/fruit-and-vegetables/vegetables/other-vegetable-crops/commercial-production-of-taro
- ↑ https://food52.com/blog/12375-everything-you-need-to-know-about-taro
- ↑ https://www.gardenorganic.org.uk/sites/www.gardenorganic.org.uk/files/sns/factsheets/FactsheetTaro.pdf
- ↑ https://harvesttotable.com/taro/
- ↑ https://www.daf.qld.gov.au/business-priorities/plants/fruit-and-vegetables/vegetables/other-vegetable-crops/commercial-production-of-taro
- ↑ https://harvesttotable.com/taro/
- ↑ https://www.daf.qld.gov.au/business-priorities/plants/fruit-and-vegetables/vegetables/other-vegetable-crops/commercial-production-of-taro
- ↑ https://www.daf.qld.gov.au/business-priorities/plants/fruit-and-vegetables/vegetables/other-vegetable-crops/commercial-production-of-taro
- ↑ https://www.daf.qld.gov.au/business-priorities/plants/fruit-and-vegetables/vegetables/other-vegetable-crops/commercial-production-of-taro
- ↑ https://www.daf.qld.gov.au/business-priorities/plants/fruit-and-vegetables/vegetables/other-vegetable-crops/commercial-production-of-taro
- ↑ https://plants.usda.gov/plantguide/pdf/cs_coes.pdf
- ↑ https://www.gardenorganic.org.uk/sites/www.gardenorganic.org.uk/files/sns/factsheets/FactsheetTaro.pdf
About This Article
To grow taro, plant a tuber about halfway in sandy soil until it begins to grow shoots. Move the plant to a sunny, warm location once all threat of frost has passed. Make sure your taro gets plenty of water. It can take 12-18 months for the taro tuber to mature, but you can harvest the leaves 2-3 times a year. For tips on picking the perfect tuber, keep reading!


