This article was co-authored by Maggie Moran. Maggie Moran is a Professional Gardener in Pennsylvania.
There are 9 references cited in this article, which can be found at the bottom of the page.
wikiHow marks an article as reader-approved once it receives enough positive feedback. In this case, 96% of readers who voted found the article helpful, earning it our reader-approved status.
This article has been viewed 158,570 times.
Hibiscus syriacus, more commonly known as “Rose of Sharon,” is a flowering shrub that produces lush pink, purple, or white blooms. It’s remarkably low-maintenance, but occasional pruning can help it flourish and lend it a more attractive appearance. Get in the habit of cutting back your shrubs during their dormant season in late winter or early spring. Remove dead or damaged wood first, then deal with criss-crossing offshoots or out-of-control growth threatening to spoil the plant’s tidy appearance.
Steps
Stimulating New Growth
-
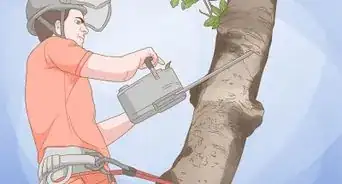
1Wait until winter or early spring to prune Rose of Sharon. Generally speaking, Rose of Sharon is an exceptionally self-sufficient plant, and doesn’t require much upkeep. If you decide that your shrubs are in need of touching up, however, do it during the colder months while they’re still in their dormant stage. Doing so will help stimulate new growth once the weather warms up.[1]
- As a rule, the best time to prune your Rose of Sharon is anywhere from March to early May, before the blooms begin to open.[2]
- Cutting back your Rose of Sharon too early or too late can “shock” the plant, leaving it vulnerable to the elements and stunting healthy new growth.
-
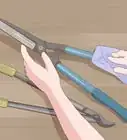
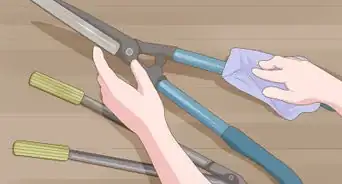
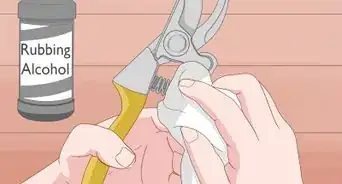
2Clear out dead or damaged wood. Pay close attention to any branches that appear rotted, brittle, or colorless, leaving only the strongest, healthiest sections behind. Try to shear each offshoot as close to the larger connecting branch as possible. You should be able to use your pruning shears to tackle most of the trimming.[3]
- For thick or stubborn branches, you may need to grab a pair of heavy-duty loppers or a handheld pruning saw.[4]
- If you’re not sure whether a particular branch is actually dead, try scraping off a little bit of the bark. If the wood underneath has a greenish tinge to it, leave it be.
Advertisement -
3Eliminate criss-crossing branches. Inspect the interior of the shrub for offshoots that overlap or wind around each other. Clip off the more crooked of the 2 branches at its base—it’s not necessary to remove them both. Don’t forget to check for tangled or twisted stems near the outer part of the plant, as well.[5]
- In addition to making your shrubs look better, getting rid of criss-crossing branches will also open them up in the middle, proving airflow essential for keeping pests and diseases at bay.
-
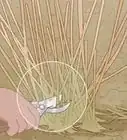
4Remove any visible suckers from the base of the plant. Suckers are slender stalks that grow vertically out of the roots of woody shrubs like Rose of Sharon. They most often appear along the lower portion of the main branches or on the ground directly beneath the plant. The best way to deal with suckers is to snip each stalk as close to the base as possible, as this destroys their connection with the plant's roots and makes them slower to grow back.[6]
- Once they begin sprouting, suckers will typically return within a few months. This means you may need to cut them back 2-3 times a year.[7]
- Not only are root suckers an eyesore, they can also sap vital nutrients from the soil if they're not removed right away.
-
5Cut your shrubs back by up to two thirds of their total size. If your Rose of Sharon isn’t faring well (or it’s grown to colossal proportions), it’s okay to remove quite a bit more growth than you leave. As long as the hardy living wood at the base of the plant is intact, it will return to produce eye-catching blooms year after year.[8]
- The practice of significantly reducing a plant's overall size is referred to as "hard" or "rejuvenation" pruning. Hard pruning is useful for promoting healthy new growth in old or failing plants.
- It’s safe to prune Rose of Sharon down to bare stubs that are only 2–3 feet (0.61–0.91 m) in length while it’s still dormancy.
- Keep in mind that the more branches you cut, the fewer flowers there will be when the shrub finally blooms. However, the flowers that are there will be much bolder and more vibrant since the plant will be able to devote more of its resources to the remaining growth.


Controlling the Size of Your Shrubs
-
1Remove developing seed pods before they open. Look for seed pods near the center of large leaf clusters. When you find them, snip them below the stem using a pair of sharp pruning shears. Be sure to dispose of the seed pods where they won’t come into contact with the soil.[9]
- Handle the seed pods carefully to keep them from splitting open accidentally.
- If the seed pods are allowed to reach maturity, they’ll eventually fall off and scatter tiny seeds all over your yard or garden. This could leave you with a small forest of unwanted Rose of Sharon plants.
-
2Reduce the plant’s height. As Rose of Sharon grows, it has a tendency to expand upwards rather than outwards. You can solve this problem by focusing on branches that protrude well beyond the others at the upper sections of the shrub. To ensure that your plant looks its best, cut it into a shallow ‘V' shape or gently round it off at the top rather than hacking it straight across.[10]
- For a more natural appearance, trim the individual branches so that they’re slightly different heights.[11]
- If left untended, an average-sized Rose of Sharon can grow to heights of up to 8–12 feet (2.4–3.7 m).
-
3Shape your Rose of Sharon to its environment. Trim excess growth from the bottom and sides of your shrubs to make them a better fit for the area in which they’re situated. Remember, you can trim up to two-thirds of the plant’s overall size without harming it, so don’t be afraid to get heavy-handed if necessary.[12]
- Strategic shaping can make thriving plants that are outgrowing their plots, blocking off walkways, or overtaking neighboring species more manageable.
- Any flowering branches you cut will soon rebloom come the start of the next growing season.
-
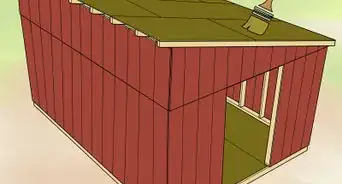
4Prune your shrubs into a tree shape. Identify the point at the base of the shrub where the largest lower branches intersect. Then, use your loppers or pruning saw to take off all smaller branches around it up to about half the height of the new trunk. When you’re finished, the once-bushy shrub will have a neat, upright form similar to a Crape myrtle or Japanese maple.[13]
- Remove new offshoots on the central branch as soon as they begin popping up to preserve the plant’s new shape.[14]
- While Rose of Sharon is technically a flowering shrub, many gardening enthusiasts prefer to raise them as small trees, which makes them easier to maintain.
- Giving your Rose of Sharon a tree shape can be useful if space in your yard or garden is at a premium and you don’t have room for a full-sized shrub.


Expert Q&A
Did you know you can get expert answers for this article?
Unlock expert answers by supporting wikiHow
-
QuestionDo you deadhead Rose of Sharon?
 Maggie MoranMaggie Moran is a Professional Gardener in Pennsylvania.
Home & Garden SpecialistYes, you deadhead a Rose of Sharon plant. Do it just after the shrub has finished blooming.
Support wikiHow by unlocking this expert answer.
-
QuestionHow do you take care of a Rose of Sharon plant?Maggie MoranMaggie Moran is a Professional Gardener in Pennsylvania.
Home & Garden SpecialistTill in the spring, add compost, and top off the compost with about a 2-inch layer of mulch. After that, give it a deep watering each week.Support wikiHow by unlocking this expert answer.
-
QuestionHow do you prune a rose of Sharon tree?Maggie MoranMaggie Moran is a Professional Gardener in Pennsylvania.
Home & Garden SpecialistFor best results, prune in late fall once the leaves drop. The next best time is in early spring, before any buds form.Support wikiHow by unlocking this expert answer.
Things You’ll Need
- Pruning shears
- Long-handled loppers (for thicker branches)
- Handheld pruning saw (optional)
- Gardening gloves


References
- ↑ http://balconygardenweb.com/pruning-rose-of-sharon-how-to-prune-rose-of-sharon/
- ↑ http://www.tlehcs.com/question%20of%20the%20week/Archive%20Questions/Pruning%20Questions/pruning%20roseofsharon.htm
- ↑ http://mikesbackyardnursery.com/2011/12/pruning-rose-of-sharon/
- ↑ http://www.tlehcs.com/question%20of%20the%20week/Archive%20Questions/Pruning%20Questions/pruning%20roseofsharon.htm
- ↑ http://balconygardenweb.com/pruning-rose-of-sharon-how-to-prune-rose-of-sharon/
- ↑ https://www.loveyourlandscape.org/expert-advice/tree-care/insects-and-disease/dealing-with-tree-suckers/
- ↑ https://www.finegardening.com/article/removing-root-suckers#
- ↑ http://balconygardenweb.com/pruning-rose-of-sharon-how-to-prune-rose-of-sharon/
- ↑ https://savvygardening.com/pruning-a-rose-of-sharon/
- ↑ http://balconygardenweb.com/pruning-rose-of-sharon-how-to-prune-rose-of-sharon/
- ↑ http://www.tlehcs.com/question%20of%20the%20week/Archive%20Questions/Pruning%20Questions/pruning%20roseofsharon.htm
- ↑ https://www.youtube.com/watch?v=PSomg0ObQ9A&feature=youtu.be&t=104
- ↑ http://freeplants.com/free-article-training-trees-into-shrubs.htm
- ↑ http://mikesbackyardnursery.com/2014/04/how-to-grow-train-flowering-hydrangea-shrubs-into-tree-hydrangeas/
About This Article

Roses of Sharon require little maintenance, but occasional pruning can help them flourish and look more attractive. To help your roses of Sharon grow, prune them in the Winter or early Spring. Trim any rotten, brittle, or colorless branches. If any branches are criss-crossing or overlapping, clip off the more crooked branch to improve airflow to your roses. Shear each offshoot as close to the larger connecting branch as possible to help them grow back. For thick branches, you may need heavy-duty loppers or a handheld pruning saw. If you only want to reduce the size of your roses, cut away up to ⅔ of the branches. During growing season, you can also remove developing seed pods before they open. Just snip them below the stem with shears. For more tips from our Gardening co-author, including how to remove suckers from around your roses, read on!