This article was co-authored by Art Fricke. Art Fricke is a home renovation and repair specialist and the owner of Art Tile & Renovation based in Austin, Texas. With over 10 years of experience, he specializes in bathroom and kitchen renovations. Art focuses on a single contractor approach to customized renovation work, and performs projects such as installing custom tile showers, fixing tiled shower leaks, replacing cracked tiles, and installing floor and wall tile.
wikiHow marks an article as reader-approved once it receives enough positive feedback. This article received 19 testimonials and 93% of readers who voted found it helpful, earning it our reader-approved status.
This article has been viewed 697,103 times.
After tile is installed, the next step is grouting the gaps between tiles. This task is less time-consuming and labor intensive than installing tile, but it's even more important than making sure all your tiles are straight and look nice. Doing a proper grout job will ensure that the floor under the tile stays safe from moisture. You will still be working on your knees for an extended period of time, so it's not a job to take lightly.
Steps
Choosing and Mixing Grout
-
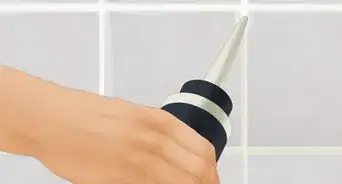
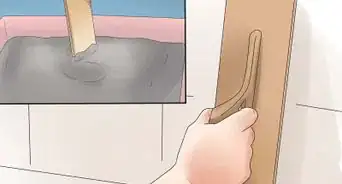
1Remove the old grout. If you're re-grouting an old tile surface, remove the old grout. You can remove the old grouting compound with a grout saw or a grout removal bit in a rotary tool.[1] Make sure this is fully removed before proceeding.
- Make sure that the joints are free of any dirt, dust, or debris before you start as well.
-
2Pick a color of grout. The color of the grout will affect whether people notice the beauty of the individual tiles, or the overall pattern of the tiles. Light grout tends to accentuate the individual tiles by blending in, becoming "invisible," while dark grout tends to accentuate the pattern of the tiles, their overall structure on the floor.[2]
- Choose a color that matches the tile if you want the floor to have a continuous appearance. If you installed the tile yourself and the grout lines aren't perfectly straight, a matching color of grout can help conceal these imperfections.
- Choose a color of grout that contrasts the tile color if you want the individual tiles to stand out. If you installed tiles with an irregular edge, a contrasting color of grout will enhance this feature of the tile.
- Choose a dark color for high traffic areas. White or light-colored grout will be difficult to keep clean.
Advertisement -
3Choose between sanded or unsanded grout. Sanded grout is stronger than unsanded grout. Sanded grout is needed when the grout lines are greater than 1/8-inch (3-mm) wide to add strength. Unsanded grout is liable to crack on wider joints.[3]
-
4Wait for the thinset mortar to cure. Thinset is used to adhere the tiles to the floor during installation. The exact drying time varies by brand, so read and follow the thinset packaging carefully.[4] You usually have to wait at least a day to grout a tile floor.
-
5Mix the grout according to the package directions. You only want to mix as much as you can apply in about a half hour, as it will begin to dry out.[5]
- Dump the powder into a large bucket, and add only 3/4 of the recommended water, mixing thoroughly with a trowel. Afterwards, mix in the remaining 1/4 of water and mix again. It should be the consistency of thick batter or slightly looser than smooth peanut butter; too much water will prevent it from spreading and hardening properly.
Applying the Grout
-
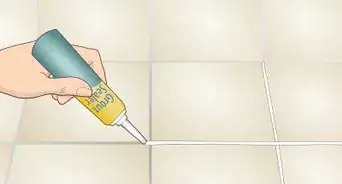
1Scoop some grout onto the tile floor with a trowel. Begin in the corner farthest from the doorway and work backwards.
-
2Spread the grout over a small joint. Hold a grout float at a 45-degree angle to the floor to press the grout into the joint. Move the grout float at a diagonal angle to the grout lines for a smooth finish. If you wipe parallel to the lines, the edge of the grout float can end up gouging out the grout.
-
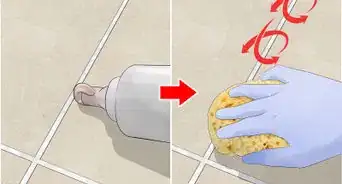
3Remove excess grout. Your floor is full of muddy grout, which isn't a lovely sight. After applying, wait about 15 to 30 minutes for the grout in the joints to set. Then start cleaning:
- Fill two buckets with the water.
- Dip a large grout sponge with rounded corners into the first water bucket and wring it out.
- Wipe in a circular motion or at a diagonal to the grout lines to remove excess grout from the surface of the tiles.
- Rinse the sponge in the second bucket and repeat until all grout is removed from the surface of the tile.
- Wait three hours before repeating the process again. However, don’t wait too long or you have a harder time buffing out the grout haze.
- Make a final pass along the grout lines with the damp sponge to make sure the grout lines are smooth.
- Don't worry if the excess grout has dried. You can remove it with some basic tools, such as a plastic chisel or putty knife.
-
4Verify the grout color is what you want. Use a hairdryer to quickly dry this small area of grout, so you see how the color looks against the installed tile. Now is the time to make a last-minute change, as grout is nearly impossible to remove once it's dried.
-
5Continue with grouting if you are satisfied with the color. Keep working in small areas at a time, so you can remove the excess grout before it has a chance to dry. If you have a helper, one can grout and the other can remove the excess.
-
6Clean up the grout haze once everything is dry. No matter how effectively you cleaned the excess grout from the tiles, you're likely to have a "grout haze" covering your tiles after your job is done. To clean up the grout haze:
- Use a sponge and a bucket of clean water. Rinse the sponge often.[6]
- Take a dry towel or used rag and wipe at the haze until it begins to cake off. An old sock will work well: you can wear the sock on your hand while you scrub.
- Brush up the residue with a broom.
-
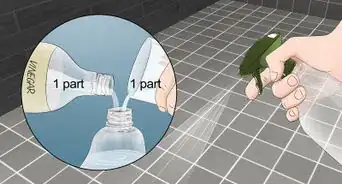
7Wait for the grout to cure before sealing it. Read the manufacturer's directions to determine how many days to wait. To seal grout:
- Crack the windows to get good ventilation in your room.
- Pour a small amount of sealant on the grout and work it in with a sponge, using small, circular motions.
- Wipe the sealant off after about 5 to 10 minutes, although the time may vary. Check the sealant label to be sure.
- Re-seal the grout every six months to a year if possible.


Things You'll Need
- Grout
- Buckets
- Trowel
- Grout float
- Large grout sponge
- Kneepads
- A drill with a mixer attachment (paint mixers work well)
- Gloves
- Protective glasses or goggles


References
- ↑ http://www.bobvila.com/blogs/how-to-grout-tile/
- ↑ http://www.apartmenttherapy.com/a-primer-on-cho-146878
- ↑ http://www.tilecleaning.org/sanded-vs-unsanded-grout.htm
- ↑ http://www.hometime.com/Howto/projects/ctile/tile_13.htm
- ↑ http://www.hometime.com/Howto/projects/ctile/tile_13.htm
- ↑ http://www.hometime.com/Howto/projects/ctile/tile_13.htm
About This Article

To grout a tile floor, start in the farthest corner of the room, scoop some grout on the floor with a trowel, and use a grout float to spread the grout over a small joint. Then wait 15-30 minutes for the grout to set before wiping off excess grout with water and a grout sponge. You should wait another 3 hours before going over the tiles once more. Continue working backwards toward the door like this, in small areas, cleaning up the excess grout as you go. When you’re done, use a dry towel to go over the whole floor. To learn more from our Contractor co-author, like how to choose and mix grout, keep reading the article!