This article was co-authored by wikiHow staff writer, Amy Bobinger. Amy Bobinger has been a writer and editor at wikiHow since 2017. She especially enjoys writing articles that help people overcome interpersonal hurdles but frequently covers a variety of subjects, including health and wellness, spirituality, gardening, and more. Amy graduated with a B.A. in English Lit from Mississippi College in 2011 and now lives in her hometown with her husband and two young sons.
There are 7 references cited in this article, which can be found at the bottom of the page.
This article has been viewed 26,645 times.
Learn more...
If your plants are low in iron, you may notice that the leaves start to take on a yellow, spidery look. Luckily, there are a number of different ways to treat this, depending on the severity of the problem. For a temporary way to treat smaller plants and shrubs, you can spray iron directly on the leaves. If you'd prefer to treat the soil, you can use chelated iron for an inexpensive fix, or ferrous sulfate for a longer-lasting treatment.
Steps
Spraying the Leaves
-
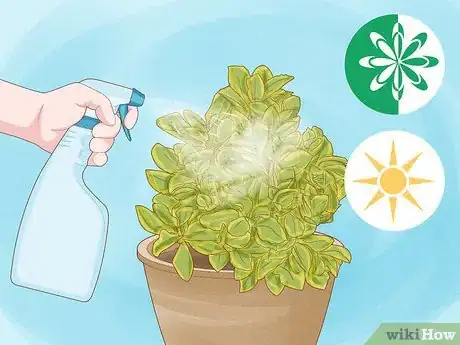
1Buy a chelated iron spray or make your own solution. Chelated iron sprays are available at most well-stocked garden centers and home stores. However, if you'd like to make your own inexpensive version, you can dissolve 2 fluid ounces (59 ml) of ferrous sulfate in 3 US gal (11 L) of water. This will create a 0.5% solution, which is safe to apply to plants. Pour it into a pump sprayer, like the kind you'd use to spray liquid fertilizer or insecticide.[1]
- If you buy a commercial product, be sure to carefully follow the application instructions on the label.
- If you're making your own spray, choose ferrous sulfate that is 20-22% iron.
- Try adding 2-3 drops of dishwashing soap for every 1 US gal (3.8 L) of either commercial or homemade spray. This will help the spray adhere to the plant's leaves.
-
2Do this treatment during the spring or summer so it will be effective. In order for an iron spray to improve your plant's health, you have to use it during the growing season. You can spray new growth starting in the early spring, all the way through full foliage in the late summer.
- Once the fall hits, the plant will start to become dormant, and it will remain dormant through the winter. During this time, the iron won't have much effect, even if the plant retains its leaves through the winter.[2]
Advertisement -
3Choose an evening or cool day so you don't burn the leaves. If you apply chelated iron to the plant's leaves at mid-day when it's hot out, you could burn the plant's foliage. Instead, wait for a cool, cloudy day to spray the iron. If the weather is warm and isn't forecast to cool down anytime soon, wait until the evening, when it should be a little cooler out.[3]
- If the iron burns the leaves, the edges will start to curl and turn brown.
-
4Coat the leaves of the plant generously with the mixture. If only part of the plant seems affected, focus mostly on that area. However, since this is a mild treatment, it's okay if some of the spray gets on leaves that aren't showing signs of iron deficiency.[4]
- It's fine if some of the spray gets onto the ground around the plants. However, since the solution isn't strong, it's not likely to have much of an effect on the iron content of the soil.
- You'll likely notice results in just a few days.
-
5Repeat the treatment in a week or two if you need it. Iron sprays are just a temporary fix for your plants. The yellowing might improve after a few days, but if you notice it returning, or if new leaf growth looks yellow, you'll need to spray the plants again.
- Even though this isn't a long-lasting fix, it can help keep your plant healthy while you work to improve the soil.
Treating the Soil with Chelated Iron
-
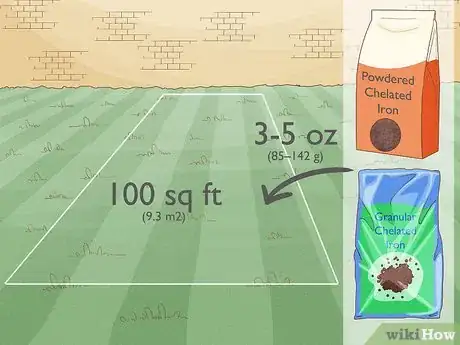
1Purchase powdered or granular chelated iron. You'll need about 3–5 oz (85–142 g) of iron fertilizer for every 100 sq ft (9.3 m2) of soil you're treating. Just be sure the chelate you choose contains FeEDDHA. Other options won't be as effective, especially in soils with an elevated pH level.[5]
- Both powdered and granulated iron will be easy to mix into the soil, and they'll be readily absorbed by the plants. You can find chelated iron at many big box stores, lawn and garden stores, or online.
- Make sure the label indicates that all of the iron in the supplement is chelated. Some iron supplements will say "chelated" on the label even some of the iron is in a different form.[6]
- Also, if the supplement you're using contains a fertilizer, be sure it doesn't have phosphorus in it. Too much phosphorus in the soil can contribute to iron deficiency.[7]
-
2Apply the treatment in the fall or the spring. It's best to either treat the soil in the spring, right at the start of the growing season. However, you can also use chelated iron in the fall just before the plant goes dormant. In the spring, the plant will be pulling nutrients from the soil as it prepares to bud. If you apply it in the fall, the iron will be able to gradually absorb into the plant's roots throughout the winter.[8]
- Either way, you'll probably have to reapply the treatment once a year, so just pick the time of year that will be most convenient for you every year.
-
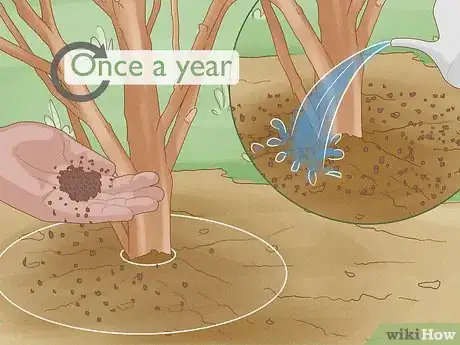
3Sprinkle the iron around the roots of the plants, then water them. Following the application instructions on the container, simply shake the chelated iron directly around the base of each of the plants you need to treat. Then, water the ground thoroughly.[9]
- If you'd prefer, you can also dissolve the iron in water, then spray that around the base of the plant.
- This is a good option for treating shrubs, smaller gardens, or individual trees, but since chelated iron can be expensive, it's not ideal for treating larger areas.
-
4Repeat the treatment once a year or as needed. Treating the soil with chelated iron will usually help correct and prevent iron deficiency for about a year. However, if you treat the plant in the spring and it's still showing symptoms, you may need to treat the plant again later in the growing season.[10]
Adding Ferrous Sulfate to the Soil
-
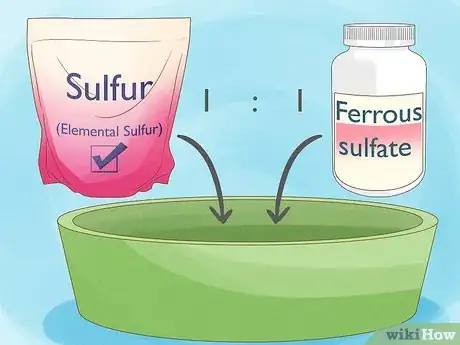
1Mix equal parts elemental sulfur and ferrous (iron) sulfate. Purchase both of these ingredients from a lawn and garden store. Then, pour an equal measure of each into a large bucket or bin.[11]
- Don't mix these ingredients in any pots or bowls that you plan to prepare food in later on.
- Read the label to make sure you're choosing a ferrous sulfate product that contains a high concentration of iron.
- Wear gloves and eye protection when you're working with iron sulfate. Also, work in a ventilated area, and consider wearing a respirator if you'll be working with large amounts.
-
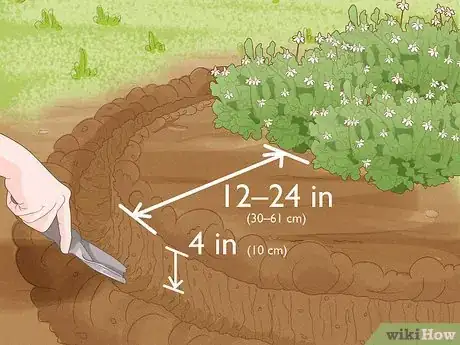
2Dig a trench around the plant's base if you're treating a shrub. For larger shrubs, measure about 12–24 in (30–61 cm) away from the base of the plant. Then, use a handheld hoe to dig a hole about 4 in (10 cm) deep, going all the way around the base of the plant.
- Be sure not to dig so deep that you damage the plant's roots.[12]
- Check with your local utility companies before you dig in an area that might have utility lines.
-
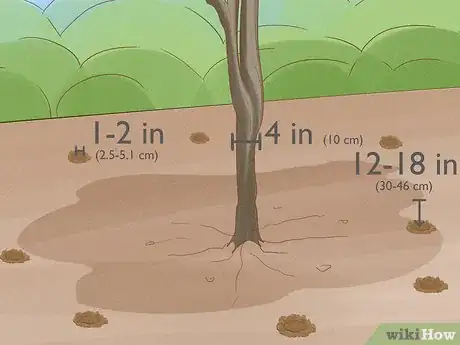
3Dig holes along the crown line if you're treating a tree. The crown line, also known as the drip line, is where the outer edge of the plant's leaves stop. Use an augur to make holes that are 1–2 in (2.5–5.1 cm) wide and about 12–18 in (30–46 cm) deep. Space the holes about 18–24 in (46–61 cm) apart. The amount of holes you'll need depends on the diameter of the plant's trunk:[13]
- 4 holes for a 1 in (2.5 cm) diameter
- 6 holes for a 2 in (5.1 cm) diameter
- 8 holes for a 4 in (10 cm) diameter
- 12 holes for a 6 in (15 cm) diameter
- 16-24 holes for an 8 in (20 cm) diameter
- 25-30 holes for a 10 in (25 cm) diameter
- 30-40 holes for a 15 in (38 cm) diameter
- 40-50 holes for a 20 in (51 cm) diameter
-
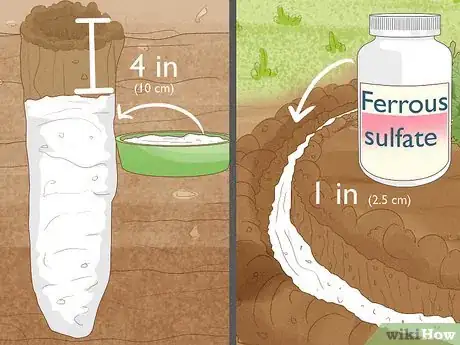
4Fill the holes or trench with the ferrous sulfate mixture. If you dug holes to treat a tree, pour in enough of iron to fill the hole up to about 4 in (10 cm) from the top If you dug a trench, pour 1 in (2.5 cm) of ferrous sulfate into the bottom.[14]
- Be careful not to get the iron on your skin or in your eyes, and avoid breathing it in.
-
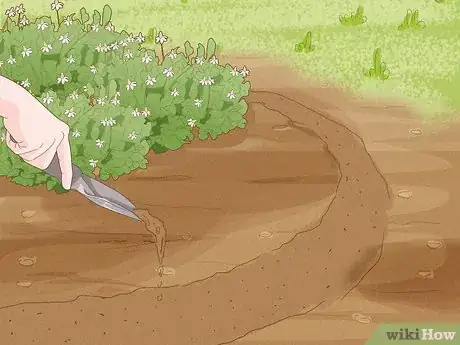
5Top the holes or trench with the remaining dirt. If you dug holes, fill in the last 4 in (10 cm) with some of the dirt that you removed. If you dug a trench, loosely pack it all the way up to the top with the dirt. If you'd like, you can then water the area.[15]
- If you used an augur to make your holes, it should have removed the dirt, rather than just compacting it. That will ensure you have the excess soil you need to fill the holes back in.
- This treatment will typically last up to 2-4 years, so you shouldn't have to repeat the treatment until the next time the plant shows symptoms.
Expert Q&A
-
QuestionHow do I make my soil healthier?
 Jeremy YamaguchiJeremy Yamaguchi is a Lawn Care Specialist and the Founder/CEO of Lawn Love, a digital marketplace for lawn care and gardening services. Jeremy provides instant satellite quotes and can coordinate service from a smartphone or web browser. The company has raised funding from notable investors like Y Combinator, Joe Montana, Alexis Ohanian, Barbara Corcoran and others.
Lawn Care Specialist Aeration is a helpful practice, as compacted soil can affect your lawn's ability to absorb nutrients. Lawn aeration is the professional practice of punching holes throughout your lawn.
Warnings
- Overwatering your plants can cause iron deficiency or make it worse.[20]⧼thumbs_response⧽
- When you're working with iron supplements, be careful not to spill it on your sidewalks or other surfaces, as it could leave a stain. [21]⧼thumbs_response⧽
- Some folk remedies recommend burying scrap iron under a tree to fix an iron deficiency. However, it's not a good idea to bury sharp, rusted metal in your lawn.[22]⧼thumbs_response⧽
- If you'll be working with iron (ferrous) sulfate or chelated iron, wear gloves and safety goggles, and work in a ventilated area or wear a respirator. If either of these substances gets into your eyes, flush them with water for at least 15 minutes. If they get on your skin, wash it thoroughly with water.⧼thumbs_response⧽
References
- ↑ https://forestry.usu.edu/trees-cities-towns/tree-care/preventing-iron-chlorosis
- ↑ https://forestry.usu.edu/trees-cities-towns/tree-care/preventing-iron-chlorosis
- ↑ https://extension.arizona.edu/sites/extension.arizona.edu/files/pubs/az1415.pdf
- ↑ https://forestry.usu.edu/trees-cities-towns/tree-care/preventing-iron-chlorosis
- ↑ https://forestry.usu.edu/trees-cities-towns/tree-care/preventing-iron-chlorosis
- ↑ https://extension.arizona.edu/sites/extension.arizona.edu/files/pubs/az1415.pdf
- ↑ https://todayshomeowner.com/how-to-treat-iron-deficiency-in-plants/
- ↑ https://www.hobbyfarms.com/a-quick-way-to-boost-iron-in-your-soil/
- ↑ https://forestry.usu.edu/trees-cities-towns/tree-care/preventing-iron-chlorosis
- ↑ https://www.hobbyfarms.com/a-quick-way-to-boost-iron-in-your-soil/
- ↑ https://forestry.usu.edu/trees-cities-towns/tree-care/preventing-iron-chlorosis
- ↑ https://forestry.usu.edu/trees-cities-towns/tree-care/preventing-iron-chlorosis
- ↑ https://forestry.usu.edu/trees-cities-towns/tree-care/preventing-iron-chlorosis
- ↑ https://forestry.usu.edu/trees-cities-towns/tree-care/preventing-iron-chlorosis
- ↑ https://forestry.usu.edu/trees-cities-towns/tree-care/preventing-iron-chlorosis
- ↑ https://todayshomeowner.com/how-to-treat-iron-deficiency-in-plants/
- ↑ https://forestry.usu.edu/trees-cities-towns/tree-care/preventing-iron-chlorosis
- ↑ https://forestry.usu.edu/trees-cities-towns/tree-care/preventing-iron-chlorosis
- ↑ https://forestry.usu.edu/trees-cities-towns/tree-care/preventing-iron-chlorosis
- ↑ https://forestry.usu.edu/trees-cities-towns/tree-care/preventing-iron-chlorosis
- ↑ https://todayshomeowner.com/how-to-treat-iron-deficiency-in-plants/
- ↑ https://www.hobbyfarms.com/a-quick-way-to-boost-iron-in-your-soil/

