This article was co-authored by wikiHow Staff. Our trained team of editors and researchers validate articles for accuracy and comprehensiveness. wikiHow's Content Management Team carefully monitors the work from our editorial staff to ensure that each article is backed by trusted research and meets our high quality standards.
There are 10 references cited in this article, which can be found at the bottom of the page.
This article has been viewed 56,829 times.
Learn more...
Sometimes parents find it difficult to get rid of sentimental baby clothing, such as coming-home outfits or clothing worn in religious ceremonies. Usually, these items are tucked away in boxes and never seen again until years later. However, you can easily and inexpensively show off your child's beautiful outfits in your home by framing them. All you need is the outfit, a frame, and some decorative elements to make a pretty and creative display.
Steps
Choosing and Preparing the Baby Clothes
-
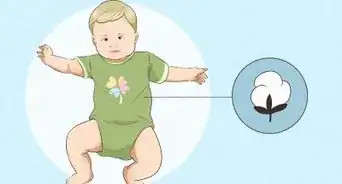
1Select clothing that holds sentimental value for you or your child. It can be clothes in which the baby was baptized, the clothes in which they left the hospital, or just a favorite piece of clothing that reminds you of your little one when they were a certain size.[1]
- You could also frame antique baby clothes—maybe from a grandparent or from your own childhood.
- It's easiest to choose small, thin clothing that will lay flat in the frame. Bulky sweaters, winter coats, and large clothing items will be difficult to work with.
-
2Pick out some accessories to dress up the display. Gather any baby-specific items you'd like to include, such as sonograms, hospital bracelets, footprints, or baby hats. You could also include items like silk flowers, rhinestones, trinkets, or a wooden cut-out of the baby's initial. This is optional, but including accessories will create a much more polished look. [2]
- Try to select items in colors that match or are complementary. It will look more polished and neat when it's displayed on your wall.[3]
Advertisement -
3Wash the baby clothes to remove any dirt or stains. It is very important that the baby clothes be thoroughly washed and dried before they are framed. Small stains or discolorations, such as perspiration marks, will darken over time.[4]
- Dry-cleaning is the best option for antique or delicate clothing—items with a lot of lace, for example— or anything that has stains you have not been able to remove yourself.
-
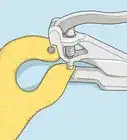
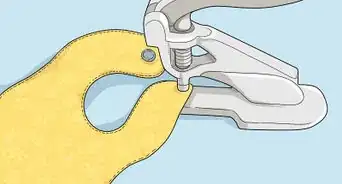
4Iron out all the wrinkles after washing and drying. Take some time to press out all the wrinkles so that the outfit looks great in the frame. Not only will it look nicer, it will lay flatter and be easier to arrange in the frame if it's wrinkle-free.[5]
- When pressing the clothes, do not use any chemicals, as these could cause the clothes to become discolored over time. Instead, a light spritz of water can be used to remove stubborn wrinkles.
- Optionally, you can use a steamer to release the wrinkles or you can apply a spray starch while ironing for a crisp look.


Selecting the Frame
-
1Select a shadow box with a glass front for most cases. A shadow box is a deep frame that will allow you to add thick or folded articles of clothing or 3-dimensional objects such as the baby's first pacifier. Using a shadow box will allow you to frame almost anything of the baby's that you want to display.[6]
- Shadow boxes come in many colors and styles. For a minimalist look, you can choose a shadow box that is only a glass case, with no framing. To match your decor and create a bigger statement-piece, look for a shadow box that has a thicker, more ornate frame around the edge.
-
2Use a regular picture frame with the glass removed for shoes or large 3-D objects. Using a regular picture frame without glass creates a fun effect when you hang the frame on the wall. For example, if you mounted your baby's first shoes to a glassless frame, it would look like framed shoes from the front, but look like the shoes were emerging from the wall when viewed from the side.[7]
- Aside from shoes, you could also frame toys in a glassless frame—sentimental items such as a ball or stuffed animal that your child really loved would be great options.
- You can choose a frame that is as simple or ornate as you like. Decide where you want to hang the clothes before you buy the frame. Then, choose a frame style and color that matches the rest of your decor in that space.
- If you are just framing a t-shirt or something that folds or lays very flat, you can also choose to leave the glass in.
-
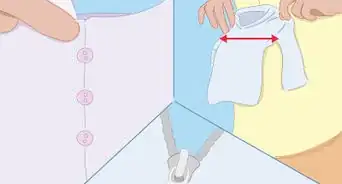
3Pick a frame that's an appropriate size and depth for your items. To determine what size frame you will need, lay out your outfit and accessories on the table in roughly the way you want them to look in the frame. Then, use a tape measure to find the length, width, and depth of the items. Finally, select a frame that is as close to those measurements as you can find.[8]
- If a frame of the exact size is not available, it is better to choose one that is slightly larger. If you go smaller, you may not be able to include all the objects you want.


Framing the Clothes
-
1Plan out exactly how you want the finished display to look. Either draw it out on paper or lay the items out in front of you. Move the items around until you get the look you want. If you have empty space you want to fill, add in more decorative pieces such as little flowers or sewing embellishments.[9]
- Play around with displaying both the front and back of the outfit. Depending on the embellishments and the pattern of the clothing, you may find you really like one side more than the other.
- If an entire outfit is being displayed, you can leave spaces between the pieces to mimic where the baby's head or other body parts would be if the outfit was being worn.
-
2Cover the backing board with fabric, wallpaper, or scrapbooking paper. The backing board of the frame will show through in your display, so choose a color or pattern that really makes your items pop. Use hot glue or fabric glue to adhere the cover on the board and let it dry before proceeding.[10]
- Choose a patterned background to make solid-colored items pop and opt for a solid background if your items are mostly patterned.
-
3Attach the clothing and accessories to the backing board. Following your plan, attach the items to the backboard. Begin with the largest—most likely the outfit itself—and then fill in the accessories and embellishments around and on top of the outfit. To stick them on, you can use flat decorative tacks, hot glue, or even velcro.
- It's important to attach them well so that they don't shift downward when you hang the frame. Don't skimp on the glue or tacks! when choosing deep-colored papers—such as dark reds, blues, or purples—because over time, the dye from the paper may bleed onto the clothing. Instead, go for lighter pastels and shades of white or off-white.
- If you are concerned about damaging the items—especially if they are antique—choose a less permanent adhesive such as double-sided tape. However, because the tape will likely lose its stickiness over time, you may have to open the frame and replace the tape after a few years.
-
4Close the frame and inspect your work. After the glue has dried, place the backing board with all the attached items into the frame and securely close it up. Gently shake the frame up and down to make sure the items are attached well and everything looks just as you want it.[11]
- If anything seems loose, open the frame up and add more glue or tacks to secure them into place.
- At this point, the items that you glued down are stuck into place, but you can still open the frame and add more embellishments or other baby items if you feel your display is too plain.


Things You'll Need
- Baby clothes
- Accessories
- Embellishments, such as silk flowers, rhinestones, wooden letters
- Frame
- Decorative paper, wallpaper, or fabric to cover backing board
- Adhesive—hot glue, fabric glue, tacks, double-sided tape, or velcro


References
- ↑ http://redtri.com/bump-baby/diy-baby-shadow-box/
- ↑ http://redtri.com/bump-baby/diy-baby-shadow-box/
- ↑ https://www.youtube.com/watch?v=J2l_21qADo8&feature=youtu.be&t=104
- ↑ https://thrivinghomeblog.com/how-to-get-yellow-stains-out-of-stored-baby-clothes/
- ↑ https://sg.theasianparent.com/ironing-baby-clothes
- ↑ https://www.youtube.com/watch?v=J2l_21qADo8&feature=youtu.be&t=32
- ↑ https://www.youtube.com/watch?v=7rNGn_yoQ3s&feature=youtu.be&t=105
- ↑ https://www.youtube.com/watch?v=7rNGn_yoQ3s&feature=youtu.be&t=120
- ↑ https://www.youtube.com/watch?v=Wg7vLq-xoF4&feature=youtu.be&t=185
About This Article