wikiHow is a “wiki,” similar to Wikipedia, which means that many of our articles are co-written by multiple authors. To create this article, 27 people, some anonymous, worked to edit and improve it over time.
The wikiHow Video Team also followed the article's instructions and verified that they work.
This article has been viewed 314,724 times.
Learn more...
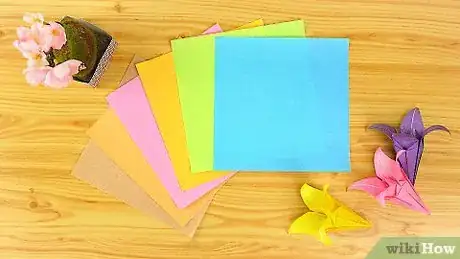
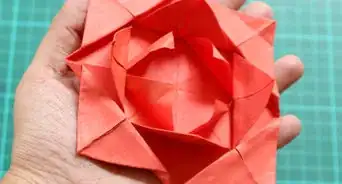
Origami lilies are a more advanced origami fold but are popular and rewarding to make. When completed, the lily becomes an ideal decoration and can be used for table centerpieces, gift packaging and craft work.
Steps
Making the Initial Folds
-
1Start with a square piece of paper. In order to fold your origami lily, or any origami shape, you need to use a square piece of paper. If you don’t have origami paper you can take A4 printer paper and make it a square.
- Lay your A4 paper horizontally and fold the top left corner down to make it even with the bottom of your paper. You should now have a folded triangle shape with a rectangle shape on the right.
- Cut or rip the rectangle portion off. Unfold your paper, and you’ll have a square.
- If you are using origami paper, start with the colored side of the paper facing up.
-
2Fold your paper in half. Place your paper on a flat surface and position it so it resembles a diamond. Fold it in half both ways diagonally.
- Take the top corner and fold it down to meet the bottom corner. Then make a crease on the fold.
- Open the paper back up and repeat this fold with the other end of the paper, folding from left to right.
- Open the paper back up and rotate it 90 degrees. Now fold the top down on a horizontal fold and crease. Repeat folding one more time with a vertical book fold.[1]
Advertisement -
3Fold you paper again to form a triangle with the base at the bottom. Fold your triangle in half on a vertical fold from left to right. You should now have a triangle with two flaps at the right corner and one at the left.
- Your paper should look like a right-angled triangle with the left crease and base forming a right angle.
-
4Grab the top layer from the bottom right point of your triangle. Collapse the top layer, pressing it down. This is called a squash fold.[2]
- The trick is to hold the bottom right layer down with one hand, while folding down and creasing the balloon flap with your other hand.
- The portion of paper you just folded should look like a diamond.
Making the Advanced Folds
-
1Flip your paper over. Now you’re going to repeat the squash fold on this side of the paper. Your paper will look like a square with a triangle attached to it on the left.
- Pick up the top left flap of the triangle that’s sticking out. It should look like a shark fin when standing up with the points of your diamond on each side.
-
2Flatten the squash fold so you have a diamond shape with one crease at the bottom, and four flaps at the top.
- This is a variation of what’s called a balloon fold.[3]
-
3Rotate your diamond 180 degrees. You should now have the single crease of your paper at the top with the open end at the bottom.
- There should be two flaps at the top and bottom of your paper, with two other folded flaps sandwiched in the middle.
-
4Fold the left and right top flaps inward toward the center line. Your top layer should resemble a long diamond shape. This diamond shape is made from two folded isosceles triangles on top of an equilateral triangle pointing downward.
- Once you have creased the folds, then unfold fold the corners back.
-
5Pick up the top flap on the right side of your diamond. Perform another squash fold. This squash fold will look slightly different with two flaps sticking out at the bottom. Use the creases you made in the previous step to guide your squash fold.
- Open the pocket up with your finger and fold, creasing the edges. Use your free hand to keep your paper in place.
- You should now have a kite shape.
-
6Flip the paper over and repeat the folds you just performed. You’ll have to repeat these steps three more times with the other three layers. This part can be difficult so take it one fold at a time starting with the opposite side of the paper from your first fold.
- Once both side of your paper have the same kite fold, grab the top flap that you haven’t squash folded on the left side of your paper.
- Pull it up and squash fold it, creating another kite fold.
- Once you have folded the left side over. Flip the paper over again and repeat.
-
7Fold your paper down on a horizontal fold. You should now have a solid crease point at the top of your paper with four points at the bottom. Two on each side. Your paper should look like an upside down kite. Fold the tip of the kite down so it meets the four points at the bottom, then unfold.
- If you don’t have two points on each side of your paper, fold the flaps over until they are evenly divided.
Completing Your Lily
-
1Fold the top flaps inward. Fold the sides to the middle to form a diamond shape instead of an upside down kite shape. Crease and unfold to reveal your kite shape once again.
-
2Flip base of your triangle up. You should see an opening at the base of your triangle which is forming your upside down kite shape. Lift the mouth of the are up and fold it back, using the creases you’ve just make.
- This is sort of like the squash fold from before.
- You should now have another kite shape on as the top layer. This one should be right side up.
-
3Flip your paper over to the other side. Once again, you should see an upside down kite shape with the base of a triangle triangle flap opening downward. Repeat the previous sets of folds on this side.
- You should end up with another right side up kite shape like you had on the other side of your paper.
- Repeat these folds on all the sides of your paper that have the triangle opening and upside down kite.
-
4Even out your flaps and folds. Rotate your paper so you now have one point at the bottom of your paper and four flaps at the top, two on each side.
-
5Flip the triangle flaps of your kite shapes up. Then fold the top layer of each flap inward towards the center line.
- repeat this step on each side of your paper with the triangle flaps.
-
6Fold your flaps over so that you hide the sides with flaps you just folded to the middle. You should have one creased point on the bottom of your paper with four open points at the top.
- You should only see two smooth, flat sides now on the side of the paper facing you, and facing the table.
-
7Fold the tops of the smooth flaps over. Use a pencil or your finger to curl these flaps down.
- Once you have folded down the first two flat-sided flaps, fold your paper over to reveal the second two flat-sided flaps. Repeat the process.
- You may have to play with the already curled flaps when you fold the sides over to prevent these flaps from flattening.
Community Q&A
-
QuestionHow can you use these for decoration?
 Community AnswerYou can use it as a wall decoration or give it as a gift. Once, I put it on my friend's Christmas gift and kept it and put it on her wall.
 -
QuestionCan I make fridge magnets with these?
 Community AnswerYes, they will work if you buy magnets and superglue them on the back of the paper. Any magnet will work, I suggest buying some that are cheap.
 -
QuestionAre there any videos or clips on how to do this?
 Community AnswerGo on origamiinstructions.com, origami club.com, origami-make.org and look at the videos they have for you. Also, look on YouTube, there are loads of videos on there.
Things You'll Need
- Piece of origami paper
- Pencil (optional)
- Tape (optional)
References
About This Article
To fold an origami lily, first, fold a square piece of paper in half diagonally. Open it back up, then fold it diagonally in the other direction. Fold your paper again to form a triangle, then grab the corner and fold it back to the center so it forms a diamond shape. To make the smaller folds, flip your paper over and repeat the last step so that your entire paper is diamond-shaped. Then, take the 2 widest corners of the diamond and fold them into the center. Unfold them, then pick up the top flap on the right side of your diamond and fold it to the center. Flip the paper over and repeat the last 2 steps. To complete the lily, fold the top flaps inward, then flip the base of the triangle up. Then, fold the flaps over so you hide the sides and flaps you just folded to the middle. Finally, fold the tops of the smooth flaps over and use your finger to curl them downward so they look like petals. For more advice on folding origami, read on!


-Step-19-Version-4.webp)


