This article was co-authored by Tom Eisenberg. Tom Eisenberg is the Owner and General Manager of West Coast Tires & Service in Los Angeles, California, a family-owned AAA-approved and certified auto shop. Tom has over 10 years of experience in the auto industry. Modern Tire Dealer Magazine voted his shop one of the Best 10 Operations in the Country.
There are 15 references cited in this article, which can be found at the bottom of the page.
This article has been viewed 124,950 times.
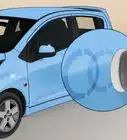
When rust isn’t caught early, it can eat all the way through the metal of your car. As long as these rust holes go untreated, they will continue to expand. Fixing a rust hole in your car requires first removing the rust and any affected metal, and then filling the hole with a fibreglass body filler. From there, it’s just a matter of giving the repaired area a finish that you’re happy with.
Steps
Removing the Rust
-
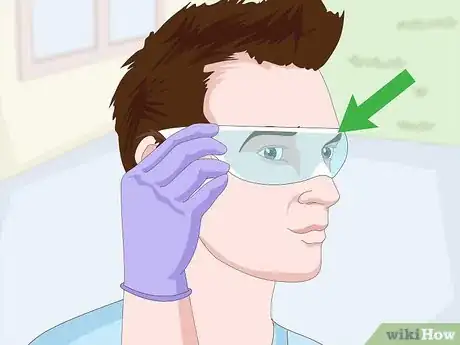
1Put on work gloves and eye protection. Rust is highly likely to flake as you grind it off of the metal. Those flakes can get into your eyes and wreak havoc. You also run the risk of being scratched or cut by jagged metal while you work. Avoid both concerns by wearing work gloves and eye protection.[1]
- Goggles offer the most protection, but regular safety glasses will suffice.
- Leather work gloves will give you the most protection from scratches and cuts.
-
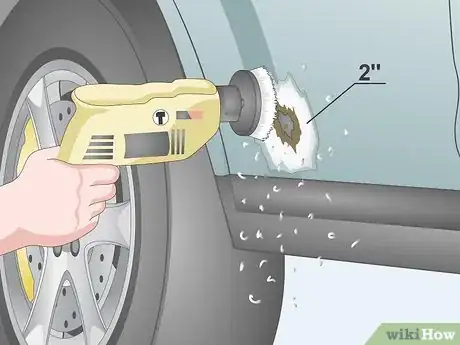
2Remove the paint 2 inches (5 cm) around the rust with a drill fitted with a wire brush. The filler won’t adhere to paint, so you have to remove it from all around the hole. A wire brush attachment for a power drill will make short work of the paint on the metal and can even be used to remove some of the rust, if not all of it.[2]
- A flapper disc for an angle grinder will also work well for removing the paint.
- You can purchase a wire brush attachment for your drill at your local auto parts or hardware store.
- You can also purchase flapper discs for angle grinders at your local hardware store.
Advertisement -
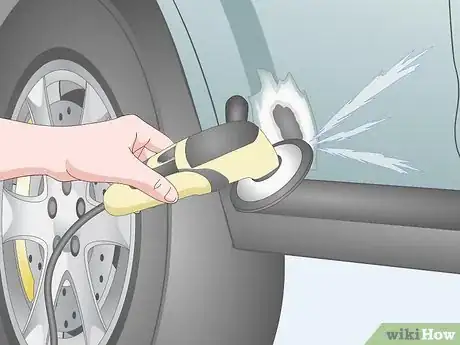
3Cut the affected metal away from the hole with tin snips or a grinder. All of the rust needs to be removed from the hole and the metal surrounding it. If you don’t have a grinder or angle-grinder, you can use heavy duty tin snips to cut the rust and rusting metal out of the hole. If you do have a grinder, use it to quickly grind away all of the rust and any rusting you see on the metal surrounding the hole by pressing the grinding wheel directly into the rusty metal until it’s gone.[3]
- A grinder is the faster and preferred method of removing all of the rusted metal, but snips will work in most situations.
- You can purchase an angle grinder or tin snips from your local hardware store.
-
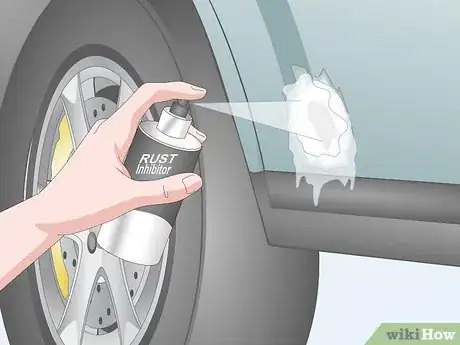
4Treat the exposed metal with a rust inhibitor. With all the rust removed, the exposed metal that’s left is still susceptible to rusting. Spray the entire area liberally with the rust inhibitor to stop the spread of any new rust before moving on.[4]
- Rust inhibitor tends to dry quickly. Wait a minute or two for it to dry before moving on.
- Follow the instructions on the spray can of rust inhibitor you choose to make sure you apply it correctly.
- You can get rust inhibitor at any hardware or auto parts store.
-
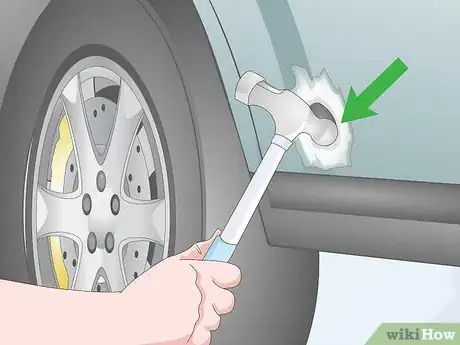
5Use a ball-peen hammer to tap the edges of the hole inward. There may be jagged edges left over from grinding or snipping away at the metal. Use the back end (rounded end) of a small ball-peen hammer to bang any edges into the hole so they don’t interfere with applying the fibreglass mixture later.[5]
- Tapping the edged inward will allow you to make a flat, even finish in the fibreglass.
- Be careful not to dent any of the good metal on the body of the car while you bang in the edges of the hole. Don’t hit any part of the car with the hammer except those edges.
Mixing the Filler and Hardener
-
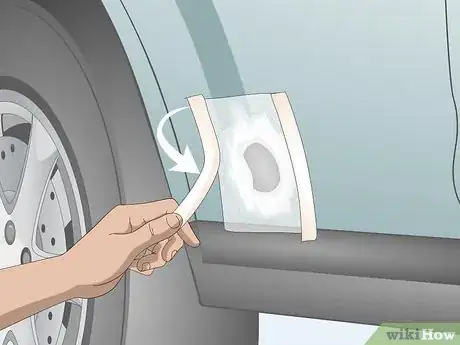
1Tape a sheet of wax paper over the hole using masking tape. The wax paper is going to serve as the start of your fibreglass patch. Place it over the hole so the hole itself is near the centre of the paper. Use one or two pieces of masking tape to secure the wax paper over the hole.[6]
- It’s best to do this in direct sunlight or in a well-lit area because you’ll need to be able to see the hole through the wax paper.
- Use masking tape rather than duct or some other kind of tape because it won’t leave an adhesive residue.
-
2Trace the hole with a marker on the wax paper. Use a permanent marker to trace the outline of the hole by looking at it through the paper itself. The outline does not have to be perfect but should approximate the size and shape of the hole.[7]
- Press the paper against the body of the car with your non-dominant hand as you trace to help you to see the hole better.
-
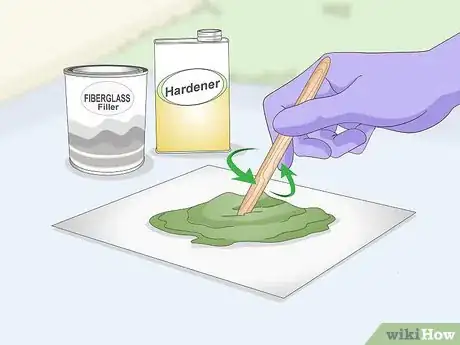
3Mix the fibreglass filler mixture with the hardener with a dowel. Squeeze out or pour some fibreglass filler onto a paper plate or piece of cardboard, then add hardener and mix the two together with a wooden dowel or tongue depressor. Different brands of fibreglass patch material utilize different chemical concentrations, so make sure to read the instructions carefully to know how much have the hardener to add to the filler.[8]
- Mix the filler and hardener quickly and thoroughly. You only have about 5 minutes to apply the mixture once you make it.
- The filler and hardener are usually different colours, so it’s easy to tell if they still need to be mixed. Keep mixing the ingredients until the mixture becomes one solid colour.
-
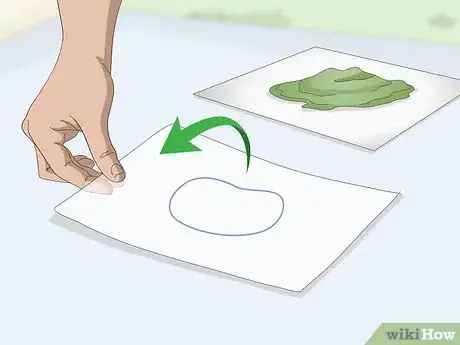
4Lay the wax paper on the table so you can see the traced hole. Place the paper down in front of you with the traced hole facing up. You’ll need to be able to see the size and shape of the hole as you add the mixture to the paper.[9]
- It doesn’t matter which side of the wax paper you used to trace the hole (shiny or flat side) just as long as you can clearly see its dimensions.
-
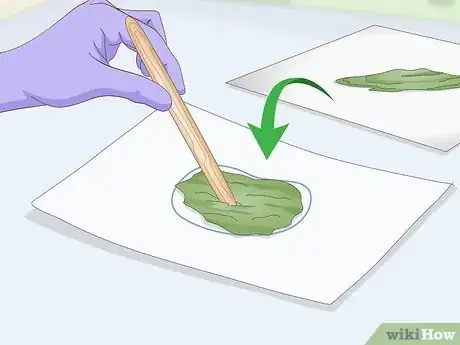
5Dab the mixture onto the drawn hole on the wax paper. Keep stirring the mixture as you scoop it up with your wooden dowel and apply it to the wax paper liberally in the centre of the hole you traced. Spread it around so it fills the entire circle you drew.[10]
- Keep stirring the mixture and adding it to the wax paper so it creates an even patch out of the fibreglass.
-
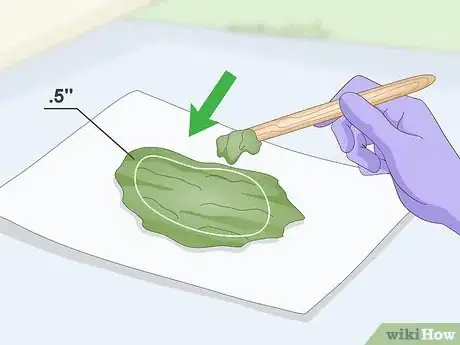
6Keep adding the mixture until it extends .5 inches (1.3 cm) beyond the hole. That extra area will allow the patch to bond to the metal you exposed with the wire brush that surrounded the hole. It doesn’t have to be exact, just make sure the patch extends beyond the outer perimeter of the hole all the way around.[11]
- Keep adding the mixture until the patch itself is about .25 inches (0.64 cm) thick and mostly even.
- Remember to move quickly because the mixture is already starting to dry.
Applying the Mixture to the Vehicle
-
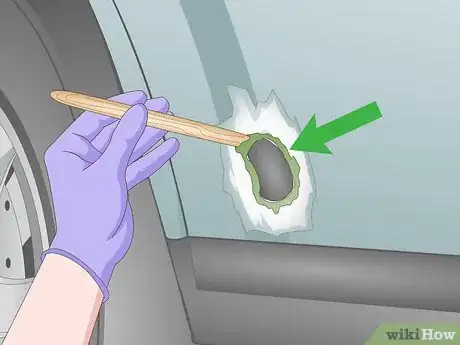
1Use the dowel to apply the mixture directly to the edges of the hole. This will give your patch a better chance at adhering to the car’s body. Apply the fibreglass mixture lightly around the edges of the hole by scooping it up with the dowel and then running the dowel along the edge.[12]
- It doesn’t need to be much. Just add a thin layer of the fibreglass mixture to help your patch stick.
-
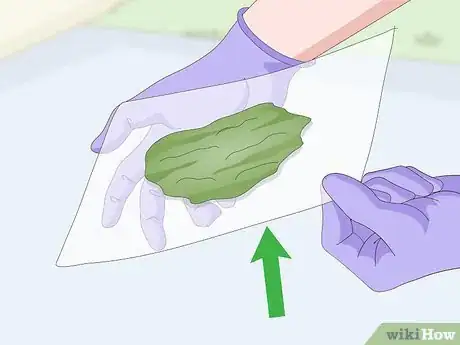
2Pick up the wax paper with the mixture facing outward. Pinch the edges of the wax paper with the thumbs and index fingers on both hands and hold it up in the air so the mixture is facing the car and away from you.[13]
- It may help to reposition your hands so one is pinching a top corner and one is pinching a bottom one.
- Be careful not to let the paper fold so the mixture comes into contact with itself or you’ll have to start over.
-
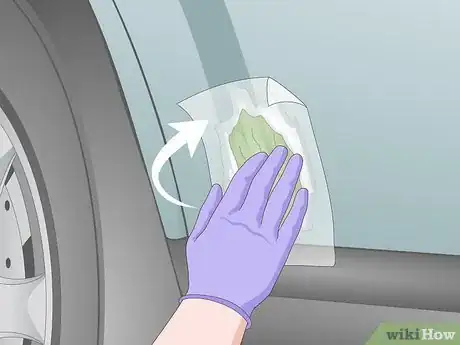
3Press the mixture directly into the hole so it’s flat against the vehicle. Pull the corners tight so the patch is flat as you first apply it to the vehicle. Then press the palm of your hand firmly over the patch to adhere it to the vehicle.[14]
- Press the patch into the hole firmly. Then use your fingers to make sure it’s attached to the metal all the way around the hole.
- Use your fingers to flatten and smooth the patch against the area of the car so it follows the contour lines of the vehicle.
-
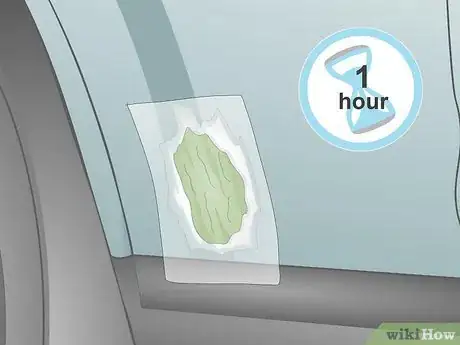
4Wait an hour for the mixture to dry. These fibreglass mixtures dry very quickly. On small holes, it may only take a few minutes for the mixture to dry enough to work with. However, it’s better to be safe than sorry. Give the patch plenty of time to dry before attempting to do any more work on it.[15]
- The patch will dry faster with good airflow. Open the garage door if you’re working indoors and the weather permits.
Sanding and Finishing the Fiberglass
-
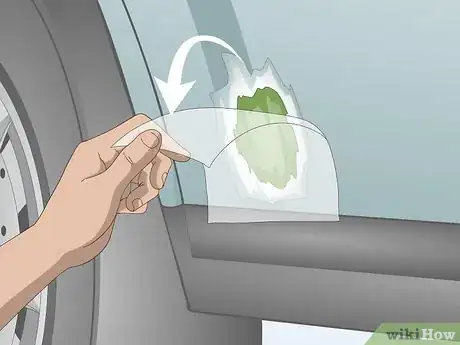
1Peel the wax paper away from the vehicle. Pinch one corner of the wax paper with your thumb and index finger, then peel it away from the patch slowly. If the patch appears to be disrupted by you pulling on the wax paper, it’s not dry yet. Give it another hour, then attempt to peel it off again. Otherwise, remove the wax paper completely.[16]
- The fibreglass patch will stay in place with the wax paper gone.
- The patch is now secured onto the vehicle.
-
2Sand any imperfections out with 220-grit sandpaper and water.[17] If there are any imperfections in the patch, you can remove them by pouring water over it as you sand it with 220-grit sandpaper. Keep pouring water over the patch as you sand it until the fibreglass is as smooth as you want it.[18]
- Be careful not to press too hard into the middle of the patch as you sand or you may break through it.
- If you accidentally sand too much away, you can mix more fibreglass and add it to the patch, let it dry, and start sanding again.
-
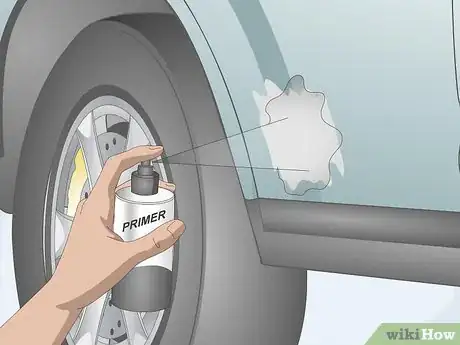
3Add a spray-on primer to prevent further rust.[19] Once the fibreglass patch has a nice, even finish, apply an even coat of automotive primer from a spray can. Shake the can well, then hold it about 12 inches (30 cm) away and swipe the can from left to right as you spray it. Be sure to cover the patch and any exposed metal.[20]
- Let the primer dry overnight before doing any more work to it.
- At this point, the hole is repaired and won’t start rusting again.
-
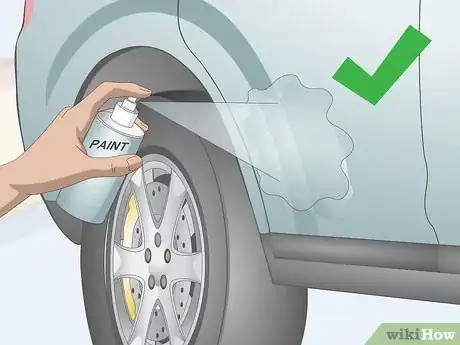
4Paint the repair if you desire a professional finish.[21] You can purchase automotive paint matched exactly to your vehicle by contacting the dealership and giving them your VIN (Vehicle Identification Number). While painting a car is a difficult and complex process, applying a layer of matched touch up paint to small repairs can make them pretty inconspicuous. Simply spray it on the same way you did the primer.[22]
- Hold the can about 12 inches (30 cm) away from the area you’re painting and swipe it from left to right as you spray.
- For larger repairs, you should treat and paint the entire panel of the car if you want it to blend with the rest of the vehicle perfectly. That may be a job for a certified body shop if you don’t have the tools and expertise required.
Expert Q&A
Did you know you can get expert answers for this article?
Unlock expert answers by supporting wikiHow
-
QuestionHow can I get rid of rust on my car?
 Tom EisenbergTom Eisenberg is the Owner and General Manager of West Coast Tires & Service in Los Angeles, California, a family-owned AAA-approved and certified auto shop. Tom has over 10 years of experience in the auto industry. Modern Tire Dealer Magazine voted his shop one of the Best 10 Operations in the Country.
Auto Technician
-
QuestionHow can recurring rust be prevented?
 Tom EisenbergTom Eisenberg is the Owner and General Manager of West Coast Tires & Service in Los Angeles, California, a family-owned AAA-approved and certified auto shop. Tom has over 10 years of experience in the auto industry. Modern Tire Dealer Magazine voted his shop one of the Best 10 Operations in the Country.
Auto Technician
Things You’ll Need
- Eye protection
- Work Gloves
- Power drill or grinder
- Wire brush drill bit
- Tin snips
- Fiberglass patch kit
- Wax paper
- Permanent marker
- Automotive primer
- 220-grit sandpaper
- Automotive paint
- Wooden dowels or tongue depressors
References
- ↑ https://www.osha.gov/laws-regs/regulations/standardnumber/1926/1926.102
- ↑ https://youtu.be/HyyRibUxfBw?t=49
- ↑ https://www.familyhandyman.com/tools/how-to-remove-rust/view-all/
- ↑ https://www.familyhandyman.com/tools/how-to-remove-rust/view-all/
- ↑ https://www.howacarworks.com/bodywork/patching-rust-holes
- ↑ https://www.howacarworks.com/bodywork/patching-rust-holes
- ↑ https://www.howacarworks.com/bodywork/patching-rust-holes
- ↑ https://youtu.be/HyyRibUxfBw?t=64
- ↑ https://www.howacarworks.com/bodywork/patching-rust-holes
- ↑ https://youtu.be/VMhoRnBIEE8?t=116
- ↑ https://youtu.be/iPhf77j7WSY?t=340
- ↑ https://www.howacarworks.com/bodywork/patching-rust-holes
- ↑ https://youtu.be/VMhoRnBIEE8?t=159
- ↑ https://youtu.be/VMhoRnBIEE8?t=164
- ↑ https://youtu.be/VMhoRnBIEE8?t=310
- ↑ https://www.howacarworks.com/bodywork/patching-rust-holes
- ↑ Tom Eisenberg. Auto Technician. Expert Interview. 26 July 2019.
- ↑ https://youtu.be/HyyRibUxfBw?t=164
- ↑ Tom Eisenberg. Auto Technician. Expert Interview. 26 July 2019.
- ↑ https://youtu.be/HyyRibUxfBw?t=146
- ↑ Tom Eisenberg. Auto Technician. Expert Interview. 26 July 2019.
- ↑ https://www.popularmechanics.com/cars/how-to/a3110/a-diy-guide-to-painting-your-car-15998013/
About This Article
To fix rust holes on your car, you’ll need to get rid of all the rust first. Remove all of the paint around the hole with a wire brush attachment on your drill. You’ll also need to cut away the affected metal with a grinder or tin snips. Once you’ve cut away the metal, cover the hole with a piece of wax paper and apply a mixture of fiberglass filler and hardener. Let the mixture dry for about an hour, then pull away the wax paper. You can also sand down the patch with 220 grit sandpaper to remove any imperfections. For tips on how to prevent the spot from rusting again, keep reading!
