This article was co-authored by Jen Webber. Jen Webber is a Knitting Specialist and the Manager of The Quarter Stitch, a crafting store based in the French Quarter of New Orleans, Louisiana. With over 17 years of knitting and crafting experience, Jen helps educate customers and the public on best knitting practices for their DIY projects.
wikiHow marks an article as reader-approved once it receives enough positive feedback. In this case, 100% of readers who voted found the article helpful, earning it our reader-approved status.
This article has been viewed 233,802 times.
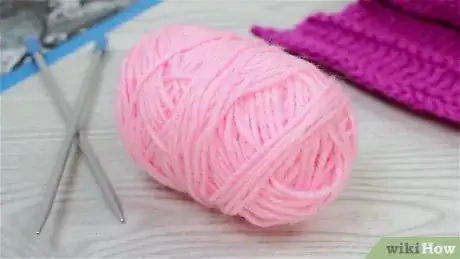
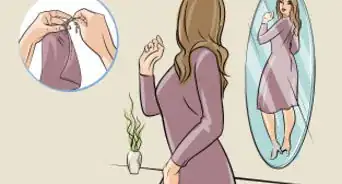
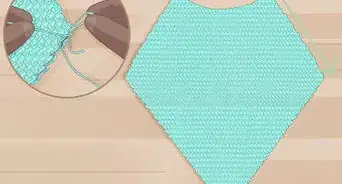
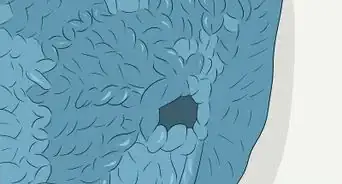
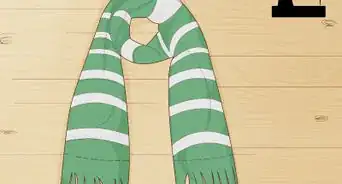
If you are new to knitting, then you may not know what to do to finish knitting your first scarf! There are some simple techniques that you will need to learn to complete your scarf. First, you will need to bind off your stitches. You may also want to weave in any loose ends to make your finished scarf look neat and polished. Then, if you want to add a decorative touch to your scarf, you can also add some fringe.
Steps
Binding Off a Scarf
-
1Finish your last row of stitches. Complete the last row of knitting for your scarf before you begin binding off. Then, turn your work around to begin a new row. Switch the needle with all of the stitches on it into your left hand and hold the empty needle with your right hand.
-
2Knit the first 2 stitches. Knit the first 2 stitches of your new row as you normally would. Do not knit more than 2 stitches.[1]Advertisement
-
3Lift the first loop over the second loop. Use your left needle to lift the first stitch on your right needle up and over the second stitch on the right hand needle. Allow the first stitch to slip off of the end of the right hand needle.[2]
-
4Knit 1 stitch. Only knit 1 new stitch.[3]
-
5Lift the first loop over the second loop again. Take your left hand needle again and use it to lift the first stitch on your needle up and over the second stitch. Then, let the stitch you lifted up and over slide off of the end of the right hand needle.[4]
-
6Repeat the bind off sequence to the end of the row. Continue to repeat the process of knitting 1 stitch and lifting a stitch up and over the new stitch all the way to the end of the row. You will notice that your finished scarf edge will continue to get longer as you bind off the stitches.[5]
- It can help to use a larger needle to bind off with to make sure you don't do it too tightly. Otherwise, the the end of your knitting could pucker up.[6]
-
7Tie off the last stitch. When you get to your last stitch, so you only have one single loop left, cut the yarn with a few inches left. Then, pull the yarn through the loop that anchors it, then sew a few inches of that yarn through the stitches of the scarf to anchor it. Then, cut off the excess.[7]
- Make sure to leave the strand about 8 inches (20 cm) or longer to ensure that you will be able to weave it into the edges.
Weaving in Loose Yarn Strands
-
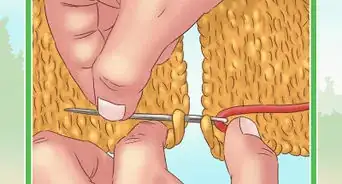
1Thread a yarn needle with the strand. After you finish binding off, you will need to weave in any loose ends of yarn. Take the loose strand of yarn that you want to weave into the edge of your scarf, and then thread it through the eye of your yarn needle. Hold the strand near the eye of the needle with your thumb and index finger to ensure that it stays put while you sew.
-
2Insert the needle into a nearby stitch. Locate a nearby stitch to weave the yarn into and then insert the yarn needle through that stitch. Then, insert the needle into the next stitch from the opposite side of the scarf.
- Keep weaving the yarn in and out of the stitches along the edge of your scarf until the strand is too short to weave any further.
-
3Tie off and cut the yarn. When you can no longer weave the yarn in and out of a stitch, pull the end of the strand out of the eye of the yarn needle. Then, tie the end of the yarn strand through the last stitch that you wove it through to secure it. Cut the excess yarn about 0.25 inches (0.64 cm) from the stitch.
Adding Fringe
-
1Choose the yarn for fringe. Adding fringe is a decorative way to end knitting a scarf. You can add fringe in the same color you used to knit your project, or you can use different colors of yarn. Opt for a texture that is similar to the texture of your yarn.
- For example, if your scarf is made from a medium worsted weight wool yarn, then choose the same type of yarn for your fringe.
-
2Cut a piece of cardboard that is the same length as the fringe you want to make. Wrapping the yarn around cardboard will help to ensure that all of your fringe is the same length. Get a piece of cardboard and cut it so that it is 0.5 inches (1.3 cm) wider than the length you would like your fringe to be.[8]
- For example, if you want your fringe to be 4 inches (10 cm) long, then the cardboard will need to be 4.5 inches (11 cm) wide.
- Make sure the cardboard piece is long enough to wrap a significant amount of yarn around it as well. The piece should be at least 10 inches (25 cm) long.
-
3Wrap the yarn around the cardboard. Take your yarn and begin winding it around the cardboard as if you are wrapping thread around a spool. Keep wrapping the yarn around the cardboard until you have somewhat covered it from one end to the other. Don’t wrap the yarn around just 1 area of the cardboard piece.[9]
- Make sure to wrap the yarn around the cardboard width-wise, which is the part of the cardboard that you have measured for your fringe.
-
4Cut along the bottom edge of the cardboard. Use a pair of sharp scissors to cut along the bottom edge of the yarn that is wrapped around the cardboard. Insert the scissors under the yarn at the bottom of the cardboard and then cut across the yarn in a straight line. Do not cut along the top edge of the cardboard as well![10]
- Keep in mind that the yarn strands will be twice as long as you want them to be, but this is because you will be doubling them up along the edge of your scarf.
-
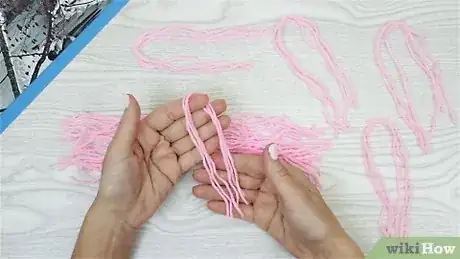
5Gather the yarn into bundles of 2, 3, or 4 strands. Divide the yarn into bundles of 3 to 4 strands, depending how thick you want the tassles to be. Keep the bundles separate from each other so that it will be easy to grab them as you work.[11]
-
6Use a crochet hook to pull the middle of the strands through a stitch. Grab a bundle and fold it in half. Then, insert your crochet hook through the first stitch on the end of your scarf. Hook the yarn bundle in the center and pull 1/3 of the folded bundle through the stitch.[12]
- Do not pull the yarn all the way through the stitch.
- Use a crochet hook that is small enough to easily fit through the stitches on the end of your scarf.
-
7Pull the ends of the strands through the loop. Keep the hook through the loop that the folded bundle has made and use the end of the hook to grasp the ends of the bundle on the other side of the stitch. Pull these strands through the loop.[13]
-
8Tug the ends to tighten the loop. To keep the fringe bundle in place, tug on the ends of the stands. This will close the loop around the stitch and secure the fringe in place.[14]
- Keep repeating this process until you have added a fringe bundle to every stitch on the end of your scarf.
-
9Trim the ends if desired. If the ends of your fringe look uneven, then lay the end of the scarf on a flat surface and straighten out the fringe. Then, use a pair of scissors to trim the ends of the fringe. Only trim off enough yarn to even out the ends of the fringe.[15]
Expert Q&A
Did you know you can get expert answers for this article?
Unlock expert answers by supporting wikiHow
-
QuestionHow do you finish the end of knitting a scarf?
 Jen WebberJen Webber is a Knitting Specialist and the Manager of The Quarter Stitch, a crafting store based in the French Quarter of New Orleans, Louisiana. With over 17 years of knitting and crafting experience, Jen helps educate customers and the public on best knitting practices for their DIY projects.
Knitting Specialist Knit one stitch, then knit a second stitch. Then, move the loop of the first stitch over the loop of the second stitch, so the needle only has a single stitch left on it. Then, knit one more stitch and move the loop over that stitch. That way, you're reducing the stitches you have all the way down to the end.
Things You’ll Need
Binding Off a Scarf
- Knitting needles
- Yarn
- Scissors
Weaving in Loose Yarn Strands
- Yarn needle
- Scissors
Adding Fringe
- Cardboard
- Ruler
- Scissors
- Crochet hook
References
- ↑ http://newstitchaday.com/knitting-101-the-basic-knit-bind-off-for-beginners/
- ↑ http://newstitchaday.com/knitting-101-the-basic-knit-bind-off-for-beginners/
- ↑ http://newstitchaday.com/knitting-101-the-basic-knit-bind-off-for-beginners/
- ↑ http://newstitchaday.com/knitting-101-the-basic-knit-bind-off-for-beginners/
- ↑ http://newstitchaday.com/knitting-101-the-basic-knit-bind-off-for-beginners/
- ↑ Jen Webber. Knitting Specialist. Expert Interview. 4 August 2020.
- ↑ Jen Webber. Knitting Specialist. Expert Interview. 4 August 2020.
- ↑ https://feltmagnet.com/textiles-sewing/Knitting-Hints-How-to-Make-and-Attach-Fringe-Tassels-to-a-Scarf-Shawl-or-Sweater
- ↑ https://feltmagnet.com/textiles-sewing/Knitting-Hints-How-to-Make-and-Attach-Fringe-Tassels-to-a-Scarf-Shawl-or-Sweater
- ↑ https://feltmagnet.com/textiles-sewing/Knitting-Hints-How-to-Make-and-Attach-Fringe-Tassels-to-a-Scarf-Shawl-or-Sweater
- ↑ https://feltmagnet.com/textiles-sewing/Knitting-Hints-How-to-Make-and-Attach-Fringe-Tassels-to-a-Scarf-Shawl-or-Sweater
- ↑ https://thecraftymummy.com/2016/07/how-to-add-a-fringe-to-a-scarf/
- ↑ https://thecraftymummy.com/2016/07/how-to-add-a-fringe-to-a-scarf/
- ↑ https://thecraftymummy.com/2016/07/how-to-add-a-fringe-to-a-scarf/
- ↑ https://thecraftymummy.com/2016/07/how-to-add-a-fringe-to-a-scarf/
About This Article
To end a scarf by binding off, finish your last row of stitches, then knit the first 2 stitches of the next row as normal. Next, use your left-hand needle to lift the first stitch over the second stitch on your right-hand needle. Knit another stitch, then lift the first loop over the second again. Continue by repeating this process until you reach the end of the row. To finish, weave the remaining yarn into your work before tying off the end. For tips on how to add a fringe to your scarf, read on!


