This article was co-authored by wikiHow staff writer, Travis Boylls. Travis Boylls is a Technology Writer and Editor for wikiHow. Travis has experience writing technology-related articles, providing software customer service, and in graphic design. He specializes in Windows, macOS, Android, iOS, and Linux platforms. He studied graphic design at Pikes Peak Community College.
This article has been viewed 292,035 times.
Learn more...
Photos and other graphical images add interest to web pages and printed materials with a minimum of effort. Embedding pictures into your written text is quick and easy, although the process differs greatly depending on the application you are using. It is possible to embed pictures and other graphical images in Word, PowerPoint, Wordpress and HTML. This wikiHow teaches you how to embed an image in HTML.
Steps
Using Word and PowerPoint
-
1Decide what type of image you want to embed. You can add a picture, graphic, clip art, or chart. You can also create a shape or graphic.
-
2Open Microsoft Word or PowerPoint. Word has an icon that resembles a blue sheet of paper with a "W" over it. PowerPoint has an icon that resembles a red pie chart with a "P" over it. Click either icon in your Windows Start menu or Applications folder on Mac to open Word or PowerPoint. Both PowerPoint and Word require a subscription to Microsoft Office to be able to insert pictures or save your word.
- A free version of Microsoft Office is available online at https://www.office.com/. You can insert images into documents using the online version of Word. You can also use Google Docs.
Advertisement -
3Click the Insert tab. It's the third tab at the top of the page. This displays all the options for inserting external media, such as graphics, shapes, spreadsheets, links, videos, and more in your document.
-
4Click where you want to insert the image in your document. This places the text cursor in the document. When you insert an image in Word or PowerPoint, it will insert where the text cursor is currently at.
-
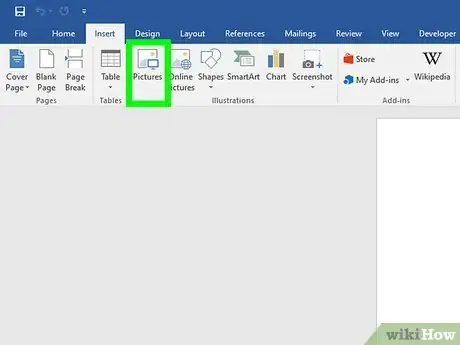
5Click the icon for the image type you want to insert. All the options to insert an image are in the box labeled "Illustration." You can insert a picture, shape, smart art, chart, or screenshot.
- Pictures: This displays a drop-down menu that allows you to select an image from your computer (This device), stock images, or online image. Select the option that is appropriate for the image you want to insert. Select the image you want to insert and click Insert.[1]
- Shapes: To insert a shape into your documents, click Shapes in the toolbar at the top. Then click the shape you want to insert. Click the Format tab at the top and use the options in the Format toolbar to change the color, border, color, text color, etc.[2]
- SmartArt: SmartArt allows you to insert a variety of customizable charts into your document. Click SmartArt to open the SmartArt selection box. Click the SmartArt you want to insert and click Ok. Click where it says "[text]" in the SmartArt and type to enter your own text. When you click SmartArt inserted in the document, you can use the tools under the Design and Format tabs to customize the look of the SmartArt.[3]
- Chart: The Chart option allows you to insert a graph into your document. To insert a chart, click Charts at the top and then click a chart type in the column to the left. Then click a chart and click Ok. Use the spreadsheet window to edit the data and labels in the graph.
- Screenshot: This option allows you to take a screenshot of a window or area of the screen. To insert a screenshot, click Screenshot and then click the thumbnail of the Window you want to insert a screenshot of. To take a screenshot of an area of the screen, click Screen clipping and then click and drag a box over the area of the screen you want to take a screenshot of.[4]
-
6Adjust the size of the image. To adjust the size of the image, click the image to select it. Then click and drag the frame around the image or the corners of the frame to adjust the size of the image.
Using Wordpress
-
1Log in to the WordPress admin area. By default, the way you open the WordPress admin area is to go to your website's URL and type "/admin" at the end (i.g www.example.com/admin). Then enter the admin username and password and click Log In.
-
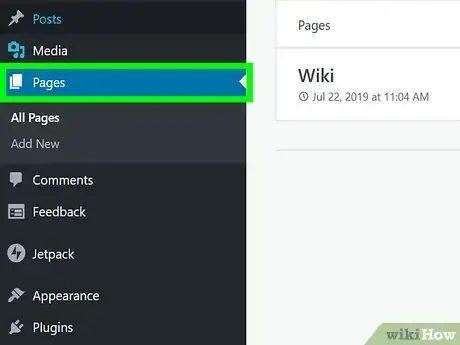
2Go to the page you want to embed an image in. Click Pages in the panel to the left and then click the page you want to edit. You can also click Add new page to create a new page.
-
3Click where you want to insert an image. This places a text cursor in your blog or web page. You will see a bar with different icons appear above the cursor.
-
4Click the Add media icon. It's the icon that resembles a camera and a pair of music notes. It's in the bar above the text cursor.
-
5Select an image and click Continue. You will see all the images you have uploaded to your library displayed on the screen. Select the image you want to embed and click Continue in the lower-right corner.
- If the image you want to embed is not already uploaded, click Add new in the upper-left corner. Select the image you want to upload and click Choose. Alternatively, you can click the drop-down menu to the left and click Add via URL. Copy and paste the URL of the image you want to upload and click Upload.
- If you want to edit the caption, description, title, or alternate text, click Edit. Then enter the text you want to edit in the appropriate field to the right of the image.
-
6Adjust the size of the image. To adjust the size of the image, click the image to select it. Then click and drag the small square handles in the corner to adjust the size of the image.
-
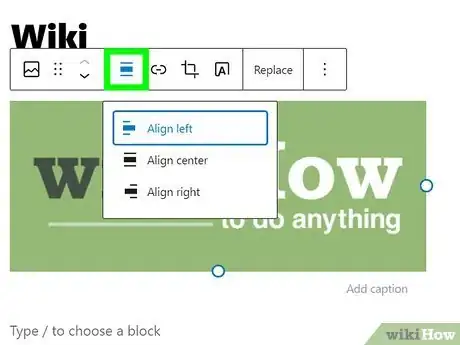
7Adjust the alignment of the image. When you have the image selected, you can click the icons that resemble lines aligned to the left, right, or center to adjust the alignment of the image. You can also click the boxes that resemble a square with lines around them to adjust how the text will wrap around the image.
Using HTML
-
1Upload the image you would like to embed to your web server. You can upload your image using an FTP client. Some web servers allow you to upload files directly using cPanel.
-
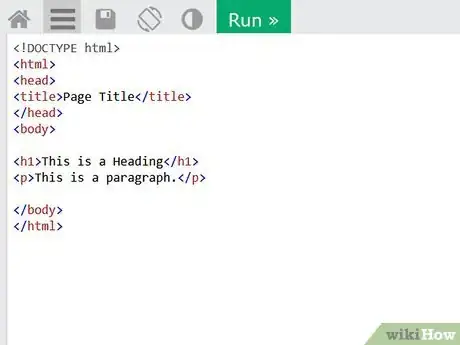
2Open the HTML page you want to insert an image in. If the HTML document is already uploaded to your server, you can edit the HTML file on the server in the cPanel. You can also [[Edit-HTML-Files}edit HTML files]] saved to your computer using a text editor like Notepad or TextEdit, or you can use an HTML editor like Adobe Dreamweaver or Kompozer.[5]
-
3Click where you want to insert the image. This places a text cursor on the HTML page. This is where the image will be inserted.
-
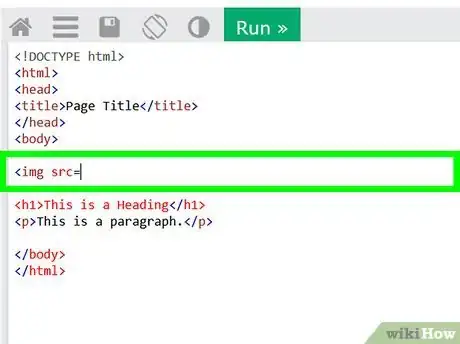
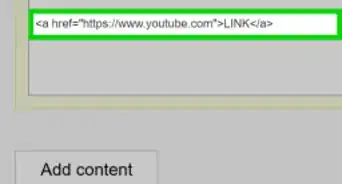
4Type <img src=. This is the start of the HTML tag used to insert an image.
-
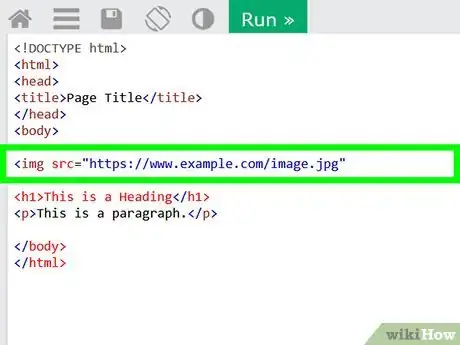
5Copy and paste the URL of the image in quotation marks. You'll need to get the URL of the image you uploaded to your server. Paste the URL in quotation marks after the equals sign in the HTML tag (i.g <img src="https://www.example.com/image.jpg").
-
6Add alt="alternate text" to the tag (optional). Alternate text is the text that will appear if the viewer cannot view the image for whatever reason. If you want to add alternate text to the image, type "alt=" followed the the alternative text in quotation marks (i.g <img src="https://www.example.com/image.jpg" alt="image text").
-
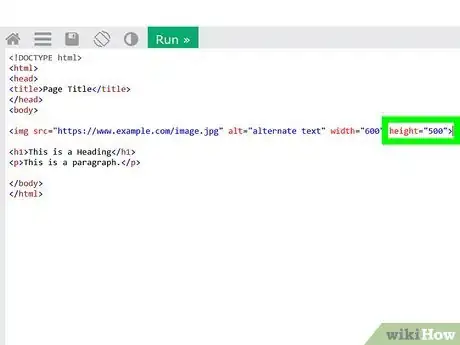
7Change the size of the image (optional). If you want to adjust the size of the image, you can do so by typing "width=" or "height=" followed by the width or height number in pixels in quotation marks (i.g <img src="https://www.example.com/image.jpg" alt="image text" width="600" height="500"). Alternatively, you can type a percentage (i.g. "75%") instead of a pixel number.
-
8Type > at the end of the HTML tag. This closes the HTML tag. The entire tag should look something like the following:[6]
- <img src="https://www.example.com/image.jpg" alt="image text" width="600" height="500">
-
9Upload the HTML document to the server. Once you have completed the HTML page, upload it to the server using an FTP client, or by uploading it in cPanel.
Community Q&A
-
QuestionI add the photo and send the document as an attachment or copy/paste, but the text goes and the photo doesn't. What do I do?
 Community AnswerReload and try again until you get the desired results.
 -
QuestionWhy is my picture not showing on my web page when my code is correct?
 Free EagleCommunity AnswerOften the URL for the image is missing the h-t-t-p, or h-t-t-p-s. Double check that and double check for missing quote marks or some times a missing < or > sign. Often it's just a very small thing missing in the code.
 -
QuestionHow do I embed a photo to my Facebook post?
 Waqas AhmadCommunity AnswerTo embed a photo in a Facebook post, follow these steps: Go to your Facebook profile or page and click on the "Create Post" button. Click on the "Add Photo/Video" button to open the photo uploader. Select the photo you want to embed from your computer or mobile device. You can also drag and drop the photo into the photo uploader. Once the photo has been uploaded, it will appear in the post composer. You can add a caption or other text to the post if you like. When you're ready to post the photo, click on the "Post" button. The photo will be embedded in the post and will be visible to your friends or followers.
Warnings
- Only insert graphic images that are expressly yours, or that are designated free for personal use. Using someone else's images without permission and attribution is theft of intellectual property.⧼thumbs_response⧽
References
- ↑ https://www.youtube.com/watch?v=DxEj2-XxDg0
- ↑ https://www.youtube.com/watch?v=AAYIjxDNvx4
- ↑ https://www.youtube.com/watch?v=O-AtmfhCbJQ
- ↑ https://www.howtogeek.com/369365/how-to-use-microsoft-words-built-in-screenshot-tool-2/
- ↑ https://www.inmotionhosting.com/support/website/how-to-edit-a-file/
- ↑ https://www.w3schools.com/html/html_images.asp
About This Article
1. Open an HTML document.
2. Type "".
7. Upload the HTML file to your server.


