This article was co-authored by wikiHow Staff. Our trained team of editors and researchers validate articles for accuracy and comprehensiveness. wikiHow's Content Management Team carefully monitors the work from our editorial staff to ensure that each article is backed by trusted research and meets our high quality standards.
There are 8 references cited in this article, which can be found at the bottom of the page.
The wikiHow Video Team also followed the article's instructions and verified that they work.
This article has been viewed 252,658 times.
Learn more...
Many avid gardeners like to harvest pumpkin seeds from their crops or public patches. This simple task provides seeds for next year's patch or food for a tasty snack. Luckily, pumpkins are one of the easiest crops to gather seeds from because the seeds are large and there are plenty in each pumpkin. But before pumpkin seeds can be planted or roasted, you need to clean them and properly dry them.
Steps
Obtaining and Cleaning Your Seeds
-
1Cut open your pumpkin to access its seeds. Place the pumpkin upright onto a flat surface. Insert the tip of a large kitchen knife into the top of the pumpkin. Push the knife in slowly while applying downward pressure and wiggling the knife side to side to widen the cut. Continue working down the side of the pumpkin. Once you cross half of the pumpkin, repeat this process from the other side.[1]
- After making a cut around the entire pumpkin, make one final cut through the whole pumpkin. Afterward, rip it open with your hands.
- Hold the pumpkin steady with your non-dominant hand. However, be very careful to never put it in front of the knife.
-
2Scoop the seeds out of your pumpkin with a large serving spoon. Most of the seeds will come out easily with a quick scoop. For the tougher seeds, drag the spoon along the sides of the pumpkin to detach them. If you don't mind getting messy, use your hands for the seeds that your scoop can't get to.[2]
- If you have one, use an ice cream scoop and drag it along the sides of the pumpkin.
Advertisement -
3Remove the flesh from the seeds. The easiest way to remove the flesh is by tearing it off with your hands. If you're drying your seeds to roast and want some additional flavor, don't worry too much about removing all of the flesh. But if you're going to plant your seeds, be sure to remove all of it.[3]
- Dip the tough seeds in a bowl of water to wet the flesh and make it easier to tear off.
-
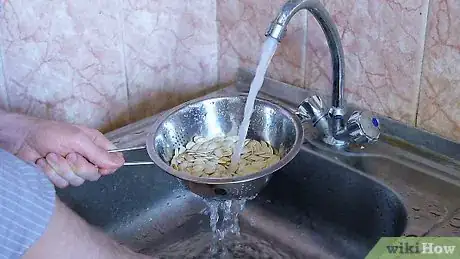
4Rinse the seeds in a colander with cool water. Place a colander into a sink and dump all your seeds into it. Run cool water over the colander and move it around in a circle so that it covers all of the seeds. Afterward, place the colander down and mix the seeds around with your hands as the tap runs to expose their entire surface to water.[4]
- Remove any excess pumpkin flesh that you find stuck to the seeds.
- Don't worry if the seeds feel slimy—this doesn't mean they aren't clean!
-
5Blot your seeds dry for about 5 to 10 minutes using paper towel. Place 2 to 3 pieces of paper towel onto a flat surface. Now, blot them dry by pressing them with a paper towel. After 5 to 10 minutes, dump the seeds into a clean bowl, taking care not to squeeze the paper towel.[5]
- Be sure to remove any flesh or debris from the pumpkin that was left behind.
Air-Drying Your Seeds
-
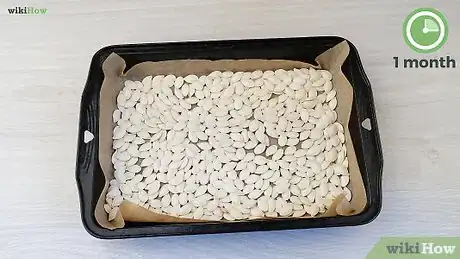
1Spread your pumpkin seeds on a cookie or baking sheet. Dump the clean seeds onto the sheet and spread them apart evenly in a single layer. Make sure no seeds are touching or resting on each other.[6]
- If you can't fit all of the seeds onto a single sheet, spread them across multiple.
-
2Air-dry your seeds in a cool, dry place for at least 1 month. Find a location where there is no danger of dampness. An indoor location like a shed or hayloft or shaded outdoor region works. Avoid areas with little airflow, such as garages, and never dry them in a basement.[7]
- Check your drying pumpkin seeds daily and turn them so they dry evenly on both sides.
- Do not leave your seeds in clumps. They will not dry thoroughly and this might cause mold to develop.
- Air-drying is the most effective and safest method of drying, but also the most time-consuming.
-
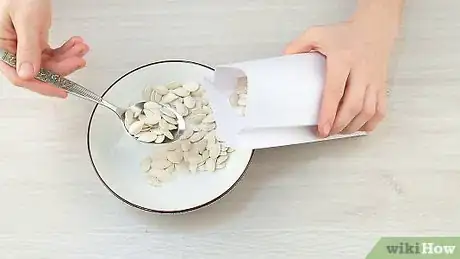
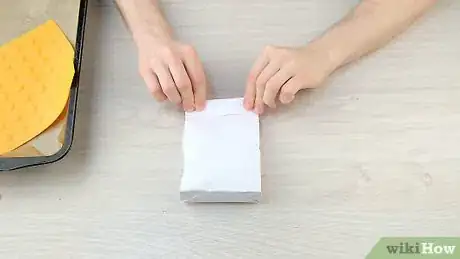
3Store your dried seeds in a paper bag or envelope until roasting or planting. Pour all of your seeds in an envelope or paper bag and store them somewhere cool and dry. If you can't find a suitable location, place in them in the refrigerator.[8]
- Discard any seeds with mold and mildew.
Using a Dehydrator
-
1Place your seeds onto a drying rack in a single layer. Make sure that no seeds overlap each other. If your dehydrator rack has holes in it, cut some pieces of parchment paper small enough to fit it and line the rack to prevent your seeds from falling.[9]
- Limit your seeds to one dehydrator rack per batch to avoid uneven dehydration.
-
2
-
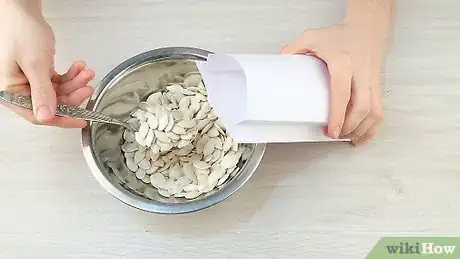
3Store your seeds in an envelope or paper bag in a cool, dry place. Avoid areas with moisture to avoid rehydration. If you can't find a suitable area, put them in the refrigerator. Use them when you're ready to roast them or during planting season.[11]
- Discard seeds with mildew or mold before storing your batches.
Baking Your Seeds
-
1Preheat your oven to the lowest possible temperature. For most ovens, this is 200 °F (93 °C). If you're using an electric oven, you will probably need to wait 10 to 15 minutes for preheating. For gas ovens, it will take about 5 to 10 minutes. Position the oven rack into the lowest position.[12]
- For increased accuracy, use an oven thermometer to track temperature.
-
2Bake your seeds in your oven for 3 to 4 hours. Spread your pumpkin seeds over a cookie or baking sheet. Make sure that they're arranged in a single layer with no overlap. Place the oven rack at the lowest position and place your baking sheet on top. Set your oven to the lowest temperature—this is typically 200 °F (93 °C)–and wait for 3 to 4 hours.[13]
- Stir your seeds every 20 to 30 minutes with a spoon to avoid scorching them.
- If you plan to plant your seeds, be careful not to scorch or burn them, as they will not grow if damaged by the heat.
- Baking your seeds is the most risky method of drying your seeds as it is more likely to damage them.
-
3Place your dried seeds in an envelope or paper bag until planting or roasting. Take all of your dry seeds and place them in an envelope. From here, you can wait to plant them next year or roast them when you feel like it![14]
- If you notice any seeds with mildew or mold, discard them before storing them.
- Always store dried pumpkin seeds in a cool, dry place. If you like, you can keep them in the refrigerator or freezer until planting season arrives.
Community Q&A
-
QuestionIs it safe to eat pumpkin after it's been used for decoration on Halloween?
 Adele OrrTop AnswererYou shouldn't eat a pumpkin that has been used for decoration, especially if it's been carved. Having the pumpkin sit outside for days is a sure way to invite mold and rotting. Also, you have no idea what has touched it, crawled through it, nibbled on it, sneezed on it, etc. It's best to compost the decoration pumpkin after use.
Warnings
- Eating too many pumpkin seeds can lead to a B6 overdose, which can lead to death. Consume with care!⧼thumbs_response⧽
- When spreading pumpkin seeds on a cookie or baking sheet to dry, do not leave them in clumps. They will not dry thoroughly and this might cause mold to develop on them.⧼thumbs_response⧽
- If your dried pumpkin seeds develop mold, throw them away.⧼thumbs_response⧽
Things You'll Need
- Pumpkin
- Knife
- Colander
- Paper towel
- Cookie or baking sheet
- Envelope or paper bag
References
- ↑ https://www.thekitchn.com/how-to-cut-a-pu-33684
- ↑ https://www.theprairiehomestead.com/2015/10/how-to-roast-pumpkin-seeds.html
- ↑ https://www.thekitchn.com/how-to-roast-pumpkin-and-squash-seeds-4687
- ↑ https://www.myfearlesskitchen.com/how-to-clean-pumpkin-seeds/
- ↑ https://www.thekitchn.com/how-to-roast-pumpkin-and-squash-seeds-4687
- ↑ https://www.foodnetwork.com/recipes/food-network-kitchen/pumpkin-seeds-recipe-2105941
- ↑ https://www.foodnetwork.com/recipes/food-network-kitchen/pumpkin-seeds-recipe-2105941
- ↑ https://www.gardeningknowhow.com/edible/vegetables/pumpkin/saving-pumpkin-seeds-how-to-store-pumpkin-seed-for-planting.htm
- ↑ https://food.unl.edu/drying-and-roasting-pumpkin-seeds
- ↑ https://food.unl.edu/drying-and-roasting-pumpkin-seeds
- ↑ https://www.gardeningknowhow.com/edible/vegetables/pumpkin/saving-pumpkin-seeds-how-to-store-pumpkin-seed-for-planting.htm
- ↑ https://www.youtube.com/watch?v=QvJ4_Xe30wU
- ↑ https://food.unl.edu/drying-and-roasting-pumpkin-seeds
- ↑ https://www.gardeningknowhow.com/edible/vegetables/pumpkin/saving-pumpkin-seeds-how-to-store-pumpkin-seed-for-planting.htm
About This Article
To dry pumpkin seeds, start by tearing off any flesh stuck to the seeds with your hands and then rinsing the seeds off in a colander. Next, blot the seeds with paper towels for 5-10 minutes to dry them off. Once the seeds are dry, spread them out on a baking sheet and bake them for 3-4 hours at your oven's lowest possible temperature, stirring the seeds every 20-30 minutes. You can also air dry the seeds by storing them in a cool, dry spot for 1 month. To learn how to dry pumpkin seeds using an air dehydrator, scroll down!
