This article was co-authored by Marta Nagorska. Marta Nagorska is a Nail Technician and Nail Art Blogger based in London, UK. She runs the blog, Furious Filer, where she gives tutorials on nail care and advanced nail art. She has been practicing nail art for over 5 years and graduated from Northampton College with distinction with a Nail Technician and Manicurist degree in 2017. She has been awarded the top spot in the OPI Nail Art Competition.
There are 8 references cited in this article, which can be found at the bottom of the page.
This article has been viewed 62,870 times.
Ever wanted to try doing some nail art on top of your manicure? Letter nails are a chic way to turn a plain manicure into something truly unique. There are lots of ways in which to do letter nails, from hand-painting them on, to using newspaper prints, to making and using decals. Each one will give you a slightly different look, but are quite simple to do.
Steps
Painting the Letters by Hand
-
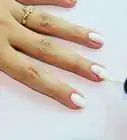
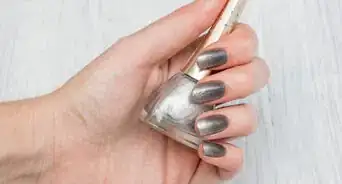
1Start with painted nails. Apply a base coat and 1 to 2 coats of your choice of nail polish. Let the first coat dry before applying a second one.[1] Don't worry about applying a top coat just yet.
- This method is great if you want a handwritten font, such as cursive.
-
2Choose a 4 to 5-letter word. You will paint one letter on each nail. If you are using a 4-letter word, you can paint a simple image, like a heart, on one of your nails.Advertisement
-
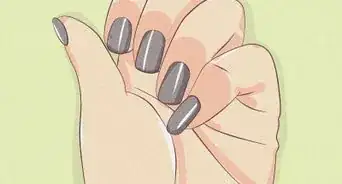
3Carefully paint the letters onto your nails using a striper brush or a thin, pointed paintbrush. If this is your first time doing nail art like this, consider practicing first on a sheet of paper. For best results, use a color that contrasts with your background color. For example, if you painted your nails pink, white or black letters would look great on it! If you painted you nails a metallic color, consider making the letters a non-metallic color.
- Do the letters one stroke at a time.
-
4Let your nails dry, then make any touchups, if needed. Once you have your letters painted, take a close look at them. Are there any uneven areas? If there are, you can fill them in using your striper/thin brush and letter color. If there are any jagged or rough edges, you can paint over them using a striper/thin brush and your background nail polish color.
-
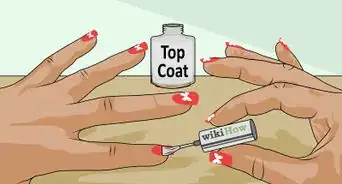
5Apply a top coat to seal your work. Let your nails dry completely before showing them off. You can do this by sitting in front of a fan for about 20 minutes, or by dipping them in icy-cold water for 2 to 3 minutes. Be careful with your nails for the first hour or sore, however; the polish will still be soft and easily dented!
-
6Finished.


Using Newspaper and Rubbing Alcohol
-
1Start with painted nails. Apply a base coat first, then 1 to 2 coats of nail polish. Let the first coat dry before putting on another one. Do not apply the top coat just yet. Let your nails dry completely before moving on.
- Use a light or neutral color for your polish, such as: beige, pale pink, light grey, or white.
- This method is great if you want text that looks like a printed page from a book.
-
2Cut ten 1 by 2-inch (2.54 by 5.08 centimeters) strips out of newspaper.[2] These strips will create the letters on your nails, so choose texts that you find visually interesting. Avoid images, large fonts, or titles.
-
3Dip your finger nail into 70% rubbing alcohol for about 5 to 10 seconds.[3] Alternatively, you can also dip the newspaper rectangle into the rubbing alcohol instead. You only need to do one or the other, not both.
-
4
-
5Peel the newspaper off and clean up any smudges around your nail with a q-tip dipped in rubbing alcohol. After you pull the newspaper off, you may notice that the ink has transferred onto your skin as well. To clean it off, simply dip a q-tip in rubbing alcohol, and wipe the ink away.
-
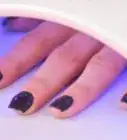
6Let your nails dry for 5 minutes, then finish off with a top coat. This will give your nails a nice glossy finish and protect your work.[6] Let your nails dry completely before showing them off. You will want to be careful with your nails for the first hour or so, as the polish will still be soft.
- If you'd like, you can also add some designs on top of the newspaper imprint, such as a heart. Do this before adding the top coat.
Making and Using Nail Decals
-
1Start with painted nails. If you have not already done so, apply a base coat and 1 to 2 coats of your favorite nail color. Let each coat dry before applying another. Don't add a top coat just yet.
- This method is great if you want a specific type of font, such as block letters.
-
2Print out the letters you want onto a sheet of paper. You will be using these letters as a stencil, so the color does not matter. You can use any font you want, but the letters need to be small enough to fit onto your fingernails.[7]
-
3Place a plastic sandwich bag over the letters. If your sheet of paper is small enough, you can even tuck it inside the bag.
-
4Paint squares of top coat over the letters. This will give the nail polish something to stick to. You will be peeling this off the plastic bag, so the thicker the top coat layer, the better.[8]
-
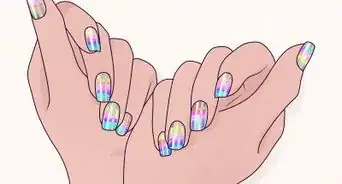
5Paint over the letters using your desired nail polish color. You can use a striper brush or a very thin, pointed paintbrush. These letters will be going directly onto your nails, so try to be as precise as possible; use the printed letters under the bag as a guide.[9]
-
6Wait for the letters to dry, then peel them off with a pair of tweezers. Grip the letters by the top coat, then carefully peel them away from the plastic bag.[10] Carefully trim away any excess top coat with a pair of scissors. Use the tweezers to hold the letters while you cut them.
-
7Paint your nails with a top coat, then carefully press the letter cutouts onto your nails. It might be a good idea to do this one nail and letter at a time so that the top coat does not dry out too fast. The top coat will "glue" the letter to the nail.[11]
-
8Make any touch-ups, if needed. Paint over the letters again using your striper brush or thin paintbrush to make the letters more opaque. Use the background color (what you painted your nails with) to clean up any uneven edges.
-
9Finish off with a final top coat. This will seal your work and make your manicure last longer. Let your nails dry completely before doing anything with them. Be careful with them for the first hour or so. The polish will still be soft, and it can get nicked easily.


Expert Q&A
-
QuestionWhat is the easiest way to achieve letter nails at home?
 Marta NagorskaMarta Nagorska is a Nail Technician and Nail Art Blogger based in London, UK. She runs the blog, Furious Filer, where she gives tutorials on nail care and advanced nail art. She has been practicing nail art for over 5 years and graduated from Northampton College with distinction with a Nail Technician and Manicurist degree in 2017. She has been awarded the top spot in the OPI Nail Art Competition.
Nail ArtistStickers or water decals are a great way to create letter nails. Plus, they come in a variety of colors and sizes. You can also use a thin striper brush to paint them on.
Warnings
- Don't get discouraged if your nails don't turn out perfect the first time. When it comes to manicures, practice really does make perfect!⧼thumbs_response⧽
Things You'll Need
Painting the Letters by Hand
- Base coat
- Top coat
- Nail polish
- Striper brush or thin, pointy paintbrush
Using Newspaper and Rubbing Alcohol
- Base coat
- Top coat
- Nail polish (light color)
- Newspaper
- 70% rubbing alcohol
- Q-tip
Making and Using Nail Decals
- Base coat
- Top coat
- Nail polish
- Printed letters
- Plastic sandwich bag
- Scissors
- Tweezers

References
- ↑ http://www.totalbeauty.com/content/blog/diy-manipedi-guide-youll-need
- ↑ https://www.beautylish.com/a/vmswn/newspaper-nails
- ↑ https://www.youtube.com/watch?v=sr3vREdkZwU
- ↑ https://www.youtube.com/watch?v=2kcdt4_5Ncc
- ↑ https://www.youtube.com/watch?v=sr3vREdkZwU
- ↑ https://www.beautylish.com/a/vmswn/newspaper-nails
- ↑ https://www.youtube.com/watch?v=rv-294SScYo
- ↑ https://www.youtube.com/watch?v=7AfyobJ1dNg
- ↑ https://www.youtube.com/watch?v=rv-294SScYo
- ↑ https://www.youtube.com/watch?v=7AfyobJ1dNg
- ↑ https://www.youtube.com/watch?v=rv-294SScYo
- ↑ http://www.makeupandbeautyblog.com/nails/7-steps-to-a-perfect-diy-manicure/
- ↑ http://www.makeupandbeautyblog.com/nails/7-steps-to-a-perfect-diy-manicure/
- ↑ http://www.totalbeauty.com/content/blog/diy-manipedi-guide-youll-need
- ↑ http://www.cosmopolitan.com/style-beauty/beauty/advice/a6317/nail-art-hacks/
About This Article