This article was co-authored by wikiHow staff writer, Darlene Antonelli, MA. Darlene Antonelli is a Technology Writer and Editor for wikiHow. Darlene has experience teaching college courses, writing technology-related articles, and working hands-on in the technology field. She earned an MA in Writing from Rowan University in 2012 and wrote her thesis on online communities and the personalities curated in such communities.
This article has been viewed 16,058 times.
Learn more...
When you perform a search with the search feature in Windows 10, you'll see results including apps and programs locally installed on your computer as well as search results from the web. This wikiHow will teach you how to disable web results in a Windows 10 search using the registry. However, before you change anything in the registry, you should make a backup since any changes have the chance to cause your computer serious damage.
Steps
-
1Click the Start Menu icon . You can also press the ⊞ Win key to open your Start Menu.
- Make sure your computer is up-to-date with the latest software updates.
-
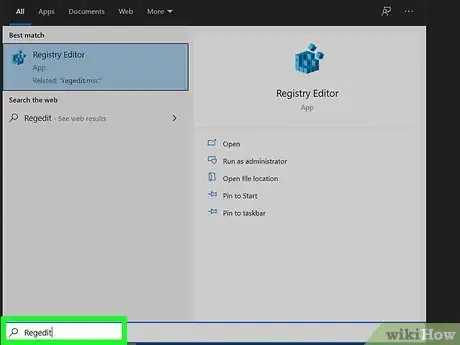
2Search "Regedit" in the search bar. You might need to click the search icon to open the search bar first.
- As you type, you'll see search results populate.
Advertisement -
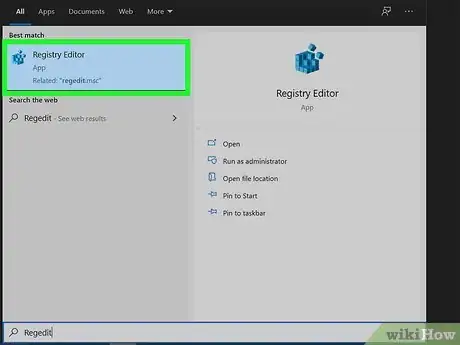
3Click regedit. It's labeled as "Registry Editor" and an executable app.
-
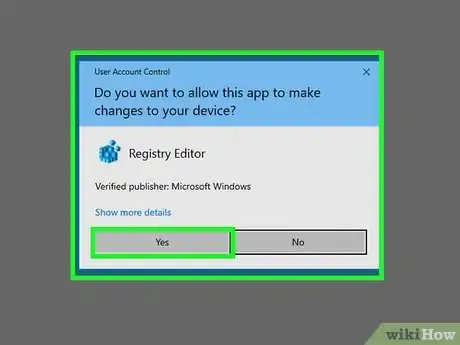
4Click Yes when prompted. Before the app runs, you'll get a pop-up asking if the program "Registry Editor" can make changes to your device. You'll need to allow this by pressing Yes to continue.
-
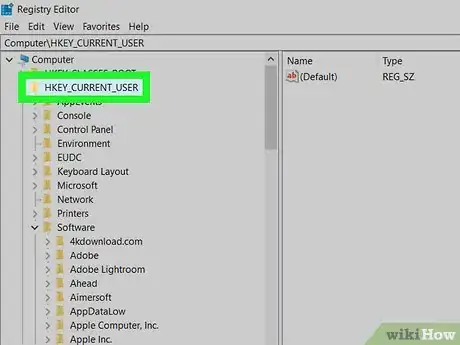
5Click HKEY_CURRENT_USER. You'll see this folder in the panel on the left side of the window. When you click it, you'll see a list of folders that are inside "HKEY_CURRENT_USER."
-
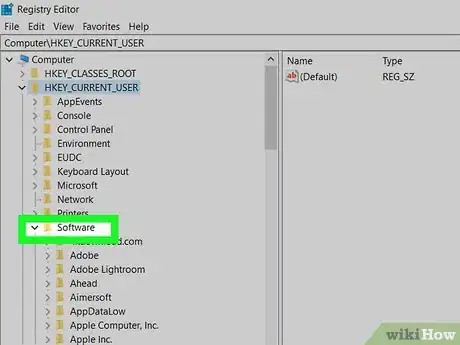
6Click SOFTWARE. A list of folders inside "SOFTWARE" will expand down.
-
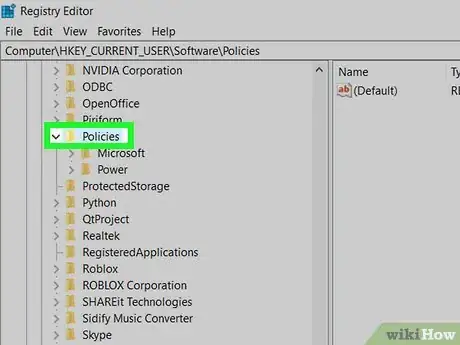
7Click Policies. A list of folders inside "Policies" will expand down.
-
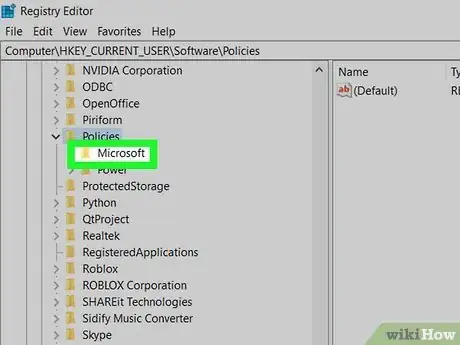
8Click Microsoft. You'll find this by scrolling down, and a list of folders inside "Microsoft" will expand down.
-
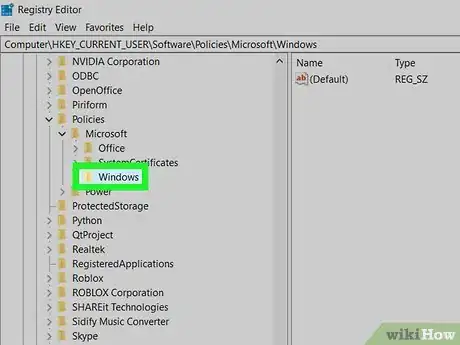
9Click Windows. A list of folders inside "Windows" will drop down and the navigation text will show: "
Computer\HKEY_CURRENT_USER\SOFTWARE\Policies\Microsoft\Windows".- You might navigate to "
Computer\HKEY_CURRENT_USER\SOFTWARE\Microsoft\Windows\CurrentVersion\Search"instead.
- You might navigate to "
-
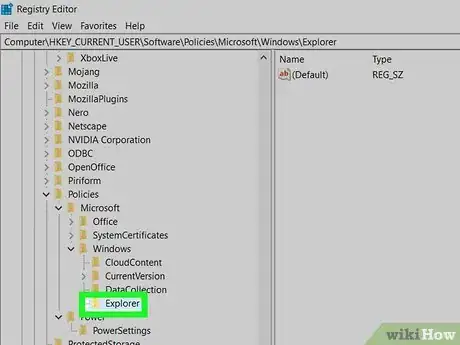
10Double-click Explorer (if it's there). This should be listed in the panel on the left side of the window under the "Windows" key.
- If "Explorer" is not listed, create a new key for it. To do this, right-click the key "Windows" then select New > Key and name it "Explorer." Press Enter on your keyboard to create the key.[1]
-
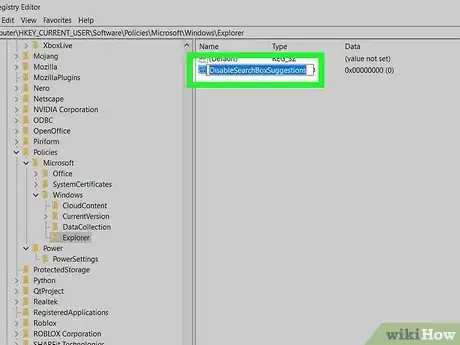
11Create a value named "DisableSearchBoxSuggestions." To do this, right-click an empty area in the folder, select New > DWORD (32-bit) Value, and name it "DisableSearchBoxSuggestions."
-
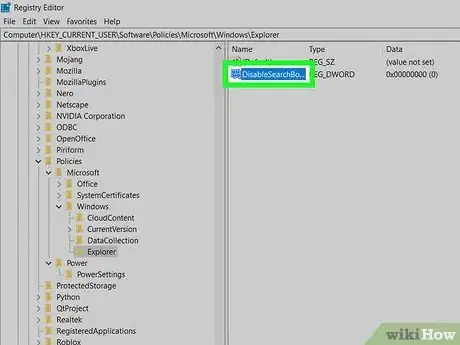
12Double-click DisableSearchBoxSuggestions. Its value window will pop up.
-
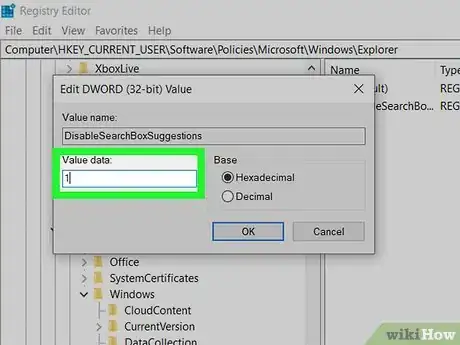
13Change the "Value data" to "1" and click OK. Alternatively, you can press Enter on your keyboard to close the value window.
-
14Close Registry Editor and restart your computer. Close the current window by clicking the x in the top right corner of the window, then go to the Start Menu and press the power icon to select to restart your computer. After your computer restarts, you can search locally and offline and Windows search will stop showing Bing web results.[2]
References
About This Article
1. Click the Start Menu icon and search "regedit" in the search bar.
2. Click regedit and click Yes.
3. Click HKEY_CURRENT_USER.
4. Click SOFTWARE.
5. Click Policies.
6. Click Microsoft.
7. Click Windows.
8. Click Explorer (if it's there).
9. Create a value named "DisableSearchBoxSuggestions" and set the value data to 1.
10. Close the registry and restart your computer.






-Step-17.webp)










-Step-17.webp)


