This article was co-authored by Ross Canter. Ross Canter is a Professional Baker and the Co-Founder of Cookie Good in Santa Monica, California. Originally a screenwriter, Ross decided to pursue his passion for baking and opened Cookie Good in 2007 with his wife, Melanie. Ross and Melanie opened their brick and mortar bakery in 2014. With over 15 years of experience, Ross specializes in creating high quality cookies with unique flavor options and helping people feel “cookie good” one cookie at a time.
This article has been viewed 24,795 times.
Sugar cookies are a delicious treat; with a little effort you can make them both tasty and beautiful. You can use a simple royal icing and some food coloring to make unique designs, or you can decorate them with things like sprinkles or edible glitter. This could be a fun family project where everyone gets to let their artistic side shine!
Ingredients
Royal Icing[1]
- 1.5 teaspoons (7.4 ml) vanilla extract
- 4.5 cups (1,100 ml) sifted powdered sugar
- 1⁄3 cup (79 ml) butter or margarine
- 1⁄4 cup (59 ml) milk
Steps
Making the Icing
-
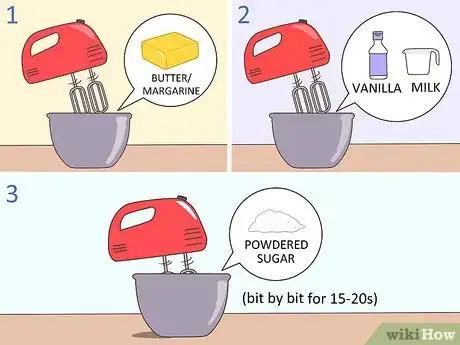
1Mix your ingredients together. You can do this in a large bowl, using an electric mixer.
- Put the butter or margarine in the bowl and beat it with the mixer until it is smooth and fluffy.
- Then add the vanilla and the milk to the butter, while you continue to mix.
- Gradually add the powdered sugar, while continuing to use the mixer. Add it bit by bit, over the course of about 15-20 seconds. That way it doesn’t clump as you try to stir it. [2]
-
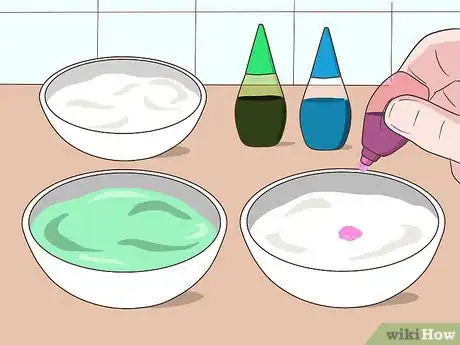
2Add food coloring to the icing. If you want to use several different colors with your decorations, spread your icing out in several different bowls. You can keep one batch plain white, and add colors to the other batches. To make sure you get the color you want, add the food coloring gradually. Remember that the icing will often dry darker than it looks when it is wet.
- Start with a few drops of color then stir to see the new color of the icing.
- Continue to add the food coloring, a few drops at a time, until the shade is what you want.
- Darker, bolder colors will require more food coloring. In some cases, you may need as much as half a bottle of food coloring. [3]
Advertisement -
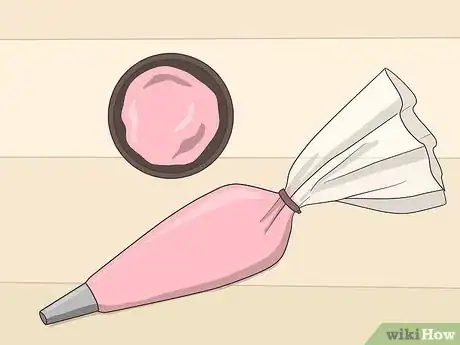
3Place the icing into piping bags. In order to apply the icing to the cookies, you’ll need piping bags. You can purchase bags and metal piping tips, or you can just make your own using a plastic sandwich bag.
- Spoon the icing into the sandwich bag, and cut a small hole in the corner of the sandwich bag.
- Cut a very small piece of the corner to start, because you can always expand it if you need to. If you cut too much, the icing will pour out too quickly.
- Use one bag for each color, including the plain white icing. [4]
Applying the Base Icing
-
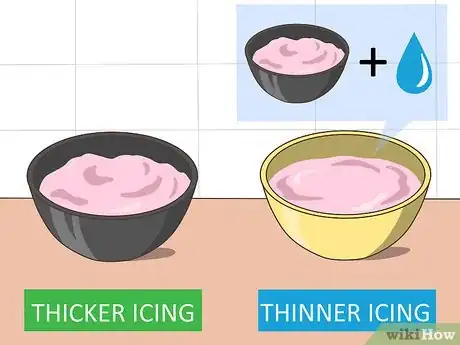
1Create a thinner icing for covering your cookies. When you are applying icing to the cookie, there are two different textures you can use. One is a bit thicker, while the other is a bit runnier, almost like the consistency of syrup.
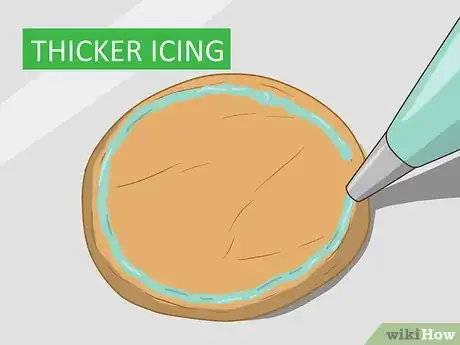
- The thicker icing is the one you already created. It can be used for detailing, or drawing lines with frosting on your cookies.
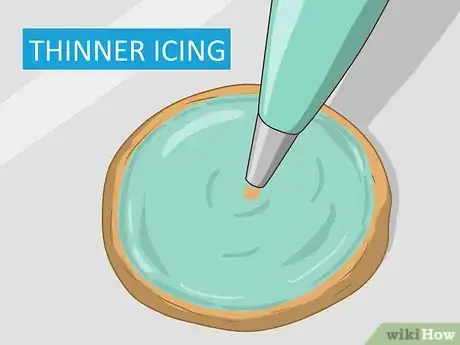
- You can make the thinner icing by adding water to your icing, a little bit at a time. This runnier version can be used in a "flooding" technique, where you cover the entire surface of your cookie with a smooth, flat icing. [5]
-
2Create a border around the edge of the cookie. With the thicker icing, you’ll want to carefully draw a thin line around the outer edge of the cookie. This creates a border for the rest of the icing, or a potential design. [6]
-
3Fill in the rest of the cookie with icing. Using the thinner icing, gently squeeze the icing into the space within the border you drew around the cookie. This gives your cookie a smooth, icing surface in the color of your choice. [7]
-
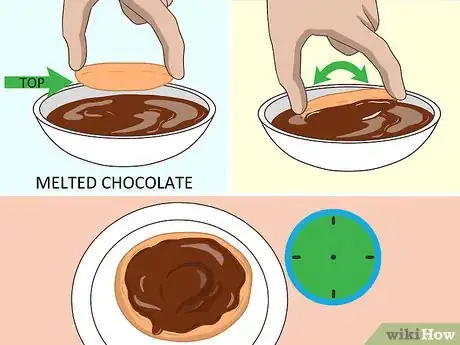
4Cover your cookie with chocolate instead of icing. If you don't want to use icing on your cookies, you could also coat the top of your cookie with melted chocolate. This can add a little pop of chocolate flavor to your cookies as well as a contrasting color. To do this, you'll have to:
- Get a bowl of melted chocolate.
- Holding the edge of the cookie, turn it upside down so just the top dips into the melted chocolate.
- Twist the cookie a bit, left to right, to make sure that the entire top is covered in a thin layer of chocolate.
- Let the chocolate dry completely, it will take about an hour.
Adding the Details and Designs
-
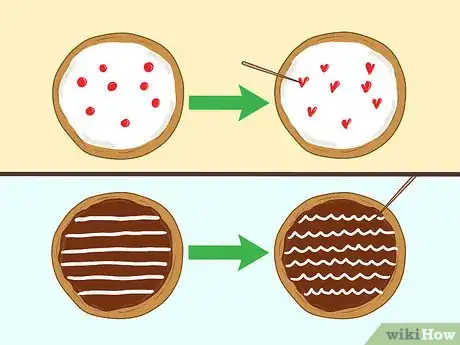
1Paint simple pattern designs on the cookie. If you want to paint some simple pattern designs on your cookies, there are several things you can make inside of the border edge you drew.
- One easy design is to paint polka dots. You just squeeze small drops of icing out of your piping bags and drop them across the top of your cookie.
- The polka dots could easily be turned into hearts. With a toothpick, just shape the polka dots into the shape of hearts while they’re still wet.
- You can make stripes on the cookies that could easily be converted to zig zags. After drawing stripes across the top of your cookies, use a toothpick to turn the stripes into zig zags while the icing is still wet. [8]
-
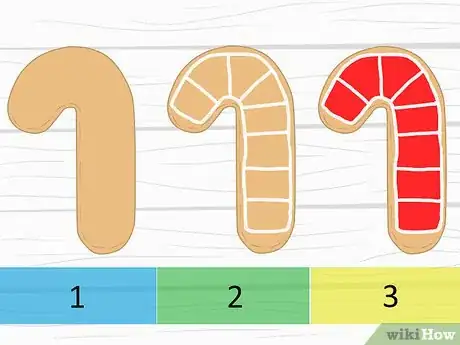
2Design a candy cane with color blocking. The color blocking technique uses a combination of the thicker and thinner icings you created. For example, this technique works great if you want to make a candy cane design.
- With the white, thicker icing, draw rectangles on top of the cookie. These will serve as the white stripes of your candy cane.
- Using the thinner icing, fill the spaces between the white lines with red icing. [9]
-
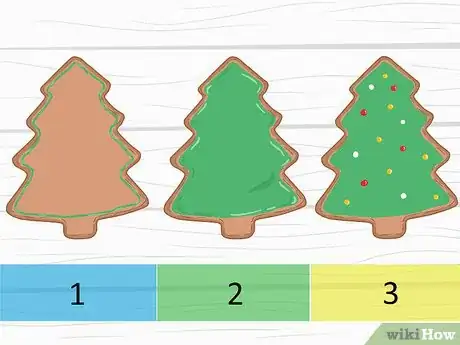
3Design a Christmas tree cookie with icing and "decorations." Draw a border around the cookie with thicker icing, and then use the thinner icing to coat the surface of the cookie and paint it green. Then you can add "decorations" to your tree.
- With different colors of icing, you could add dots to the surface of the cookie that are "ornaments."
- You could add sprinkles to the surface of the tree, or even edible glitter and crystallized sugar.
-
4Experiment with your own designs. Now that you know how to draw with icing, and use the flooding technique, you can get creative with your cookie design. Use a mix of different colors, you can paint different designs on the tops of the cookies. You could also use a combination of icing and things like sprinkles or edible glitter. [10]
Community Q&A
-
QuestionDo sugar sprinkles go on before or after baking?
 Community AnswerYou should put the sprinkles on before you bake the cookies.
Warnings
- Make sure your cookies are completely cooled before you start to add the icing. If the cookies are still warm, the icing may not set properly.⧼thumbs_response⧽
- The icing should be completely dry before you stack the cookies in a container, or place them in plastic bags. It should take about an hour for it to fully dry.⧼thumbs_response⧽
References
- ↑ https://www.allrecipes.com/video/1402/decorating-sugar-cookies/
- ↑ https://www.allrecipes.com/video/1402/decorating-sugar-cookies/
- ↑ https://cooking.nytimes.com/guides/39-how-to-make-sugar-cookies
- ↑ https://www.southernliving.com/food/how-to/wet-on-wet-technique-video
- ↑ https://toriavey.com/how-to/how-to-decorate-sugar-cookies-with-royal-icing/
- ↑ https://www.foodnetwork.com/recipes/food-network-kitchen/sugar-cookies-with-royal-icing/how-to-decorate-sugar-cookies
- ↑ https://www.foodnetwork.com/recipes/food-network-kitchen/sugar-cookies-with-royal-icing/how-to-decorate-sugar-cookies
- ↑ https://www.seriouseats.com/2016/12/decorating-cookies-with-royal-icing-tutorial.html
- ↑ https://www.seriouseats.com/2016/12/decorating-cookies-with-royal-icing-tutorial.html
About This Article
To decorate sugar cookies, first make icing by mixing together butter, vanilla extract, milk, and powdered sugar in a large bowl with an electric mixer. If you want your icing to be different colors, separate it into several bowls and add a few drops of food coloring to each. Once your icing is ready, spoon each color into a separate plastic sandwich bag and cut a small hole in the corner of each to make piping bags. With your piping bags, you can squeeze the icing onto your cookies. It's up to you if you want to cover the whole surface or just make patterns and designs! For example, you can paint polka dots, hearts, or zig zags. Along with your icing, you can add sprinkles or edible glitter for a special touch. For more tips, including how to decorate your cookies with chocolate instead of icing, read on.
