wikiHow is a “wiki,” similar to Wikipedia, which means that many of our articles are co-written by multiple authors. To create this article, 11 people, some anonymous, worked to edit and improve it over time.
This article has been viewed 75,398 times.
Learn more...
The terminology man-in-the-middle attack (MTM) in internet security, is a form of active eavesdropping in which the attacker makes independent connections with the victims and relays messages between them, making them believe that they are talking directly to each other over a private connection, when in fact the entire conversation is controlled by the attacker. For example, an attacker within reception range of an unencrypted Wi-Fi wireless access point, can insert himself as a man-in-the-middle. You'll come to terms with what this attack involves and how to deal with it by reading through this article.
Virtual Private Network (VPN)
-
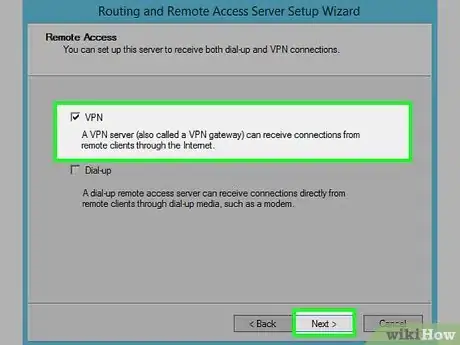
1To take the advantage of VPN, you should have a remote VPN server set up and configured first. You can do it yourself or just employ some reliable VPN service.
-
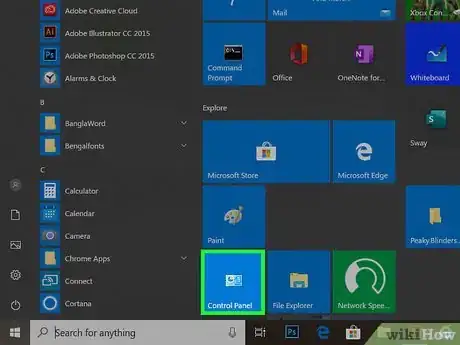
2Click "Control Panel" in the startup menu.
-
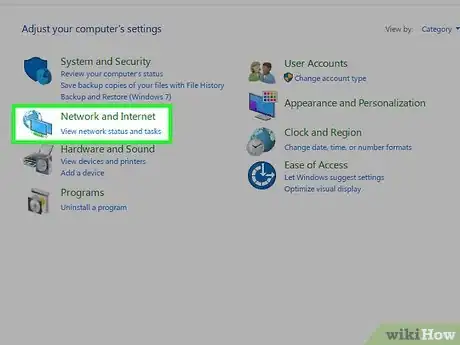
3In Control Panel, select "Network and Internet".
-
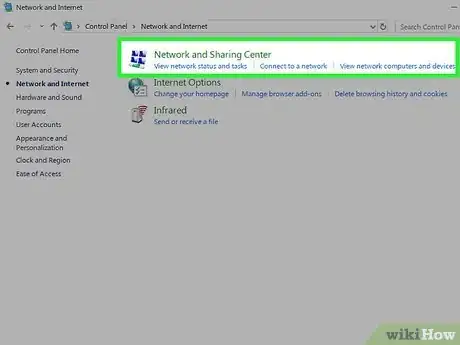
4Click "Network and Sharing Center".
-
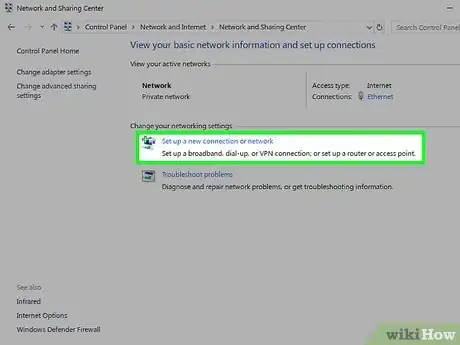
5Click "Setup a new connection or network".
-
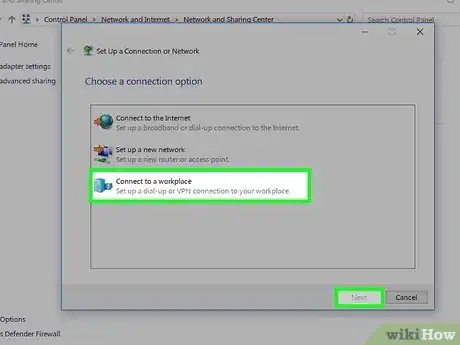
6In the "Setup a new connection or network" dialog, select "Connect to a workplace" and then press "Next".
-
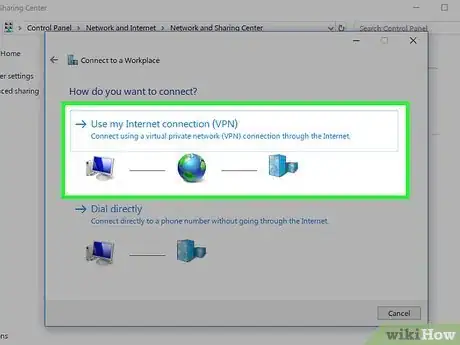
7In the "Connect to a Workplace" dialog, click "Use my Internet connection (VPN)".
-
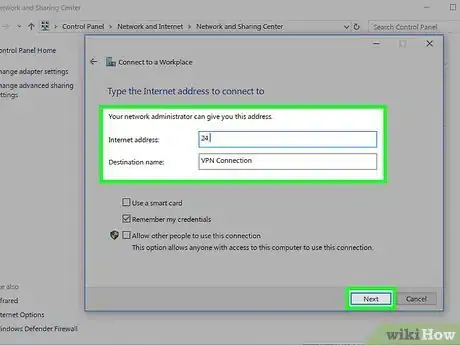
8Input the IP address of the VPN server and press "Next".
-
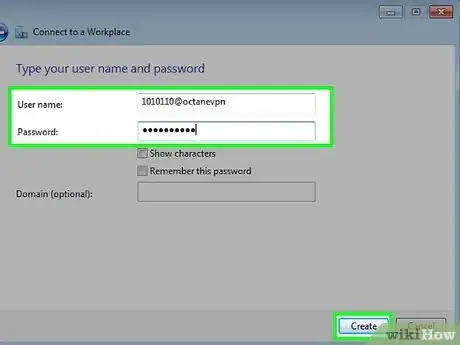
9Input your username and password, then press "Create".
-
10Click "Connect Now".
Proxy Server with Data Encryption Features
-
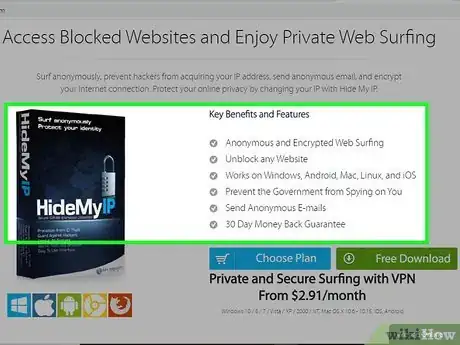
1Utilize a reliable proxy server and encrypt the transmission between you and the proxy. Some privacy software such as Hide My IP provides proxy servers and the option of encryption. Download it.
-
2Run the installation. When finished, double-click to launch the program.
-
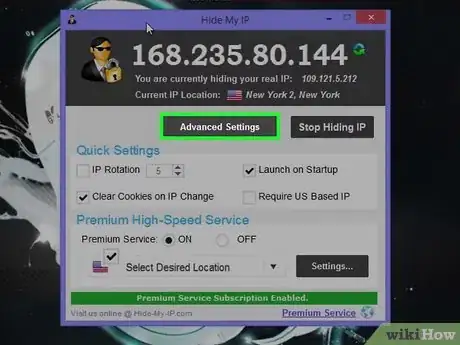
3In the main interface, click "Advanced Settings...".
-
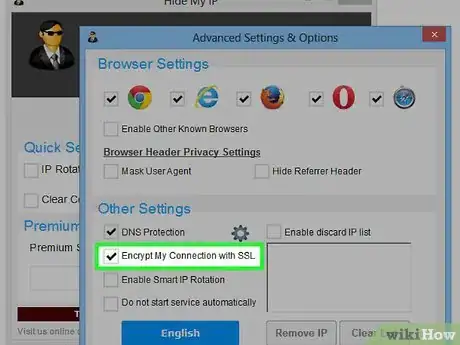
4In the "Advanced Settings and Options" dialog, check the option "Encrypt My Connection with SSL". This means that your data traffic to the sites you are visiting will be always encrypted, in just the same way as a https connection.
-
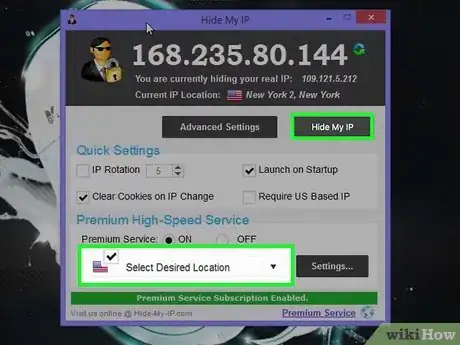
5Select a server you want to connect to, and then press "Hide My IP".
Secure Shell (SSH)
-
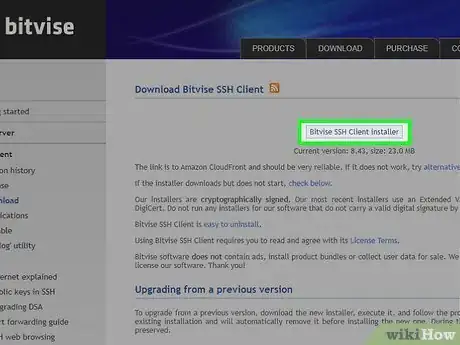
1Download Bitvise SSH Client from here. After installation, double-click the shortcut to launch the program.
-
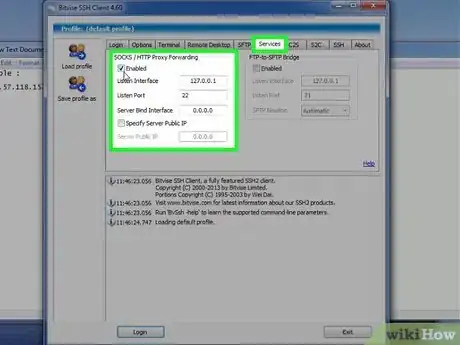
2Select the "Services" tab in the main interface, in the SOCKS/HTTP Proxy Forwarding Section, check to Enable forwarding feature, then fill in the IP address of Listen Interface, 127.0.0.1, which means the localhost. Listen Port could be an arbitrary number ranging from 1 to 65535, but to avoid conflicts with the well-known port, a port number between 1024 and 65535 is suggested here.
-
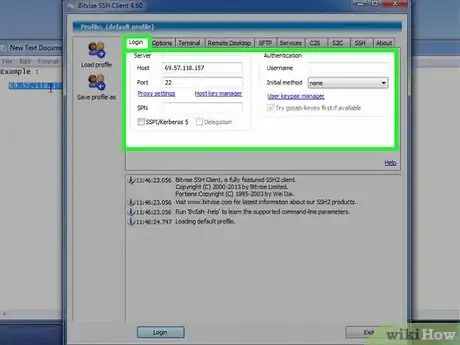
3Switch to the "Login" tab. Fill in the information of the remote server and your account, then click the "Login" button below.
-
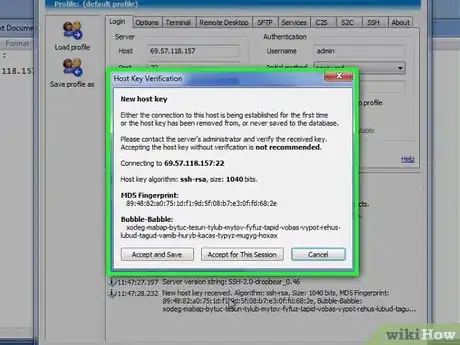
4When connecting to a server for the first time, a dialog containing the MD5 fingerprint of the remote server will pop up. You should check the fingerprint carefully to authenticate the real identity of the SSH server.
-
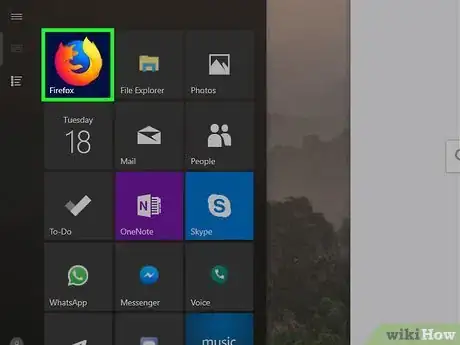
5Open a browser (for example, Firefox). Open menu, then click "Options".
-
6Select "Advanced" in "Options" Dialog. Click "Network" tab, then click "Settings...".
-
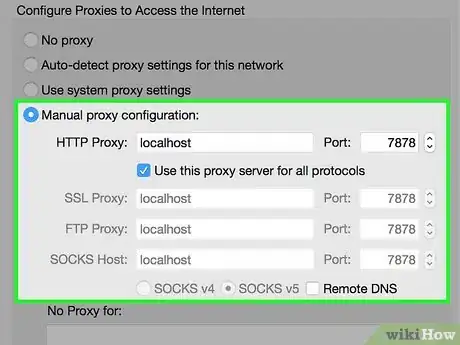
7In the "Connection Settings" dialog, select "Manual Proxy Configuration" option. Choose the proxy type "SOCKS v5", and fill in the IP address and port number of the proxy server, then press "OK". Since you are running SOCKS proxy forwarding using Bitvise SSH client in the same computer, the IP address should be 127.0.0.1 or localhost, and the port number must be the same as we set in #2.






-Step-7.webp)


