This article was co-authored by wikiHow Staff. Our trained team of editors and researchers validate articles for accuracy and comprehensiveness. wikiHow's Content Management Team carefully monitors the work from our editorial staff to ensure that each article is backed by trusted research and meets our high quality standards.
There are 15 references cited in this article, which can be found at the bottom of the page.
The wikiHow Video Team also followed the article's instructions and verified that they work.
This article has been viewed 121,536 times.
Learn more...
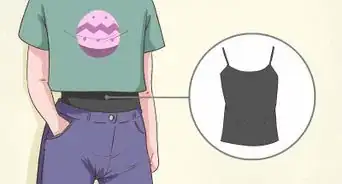
If you have an old t-shirt laying around that could use a fun update, cutting the neckline is a quick and easy way to make it look more flattering. Whether you prefer a scoop neck or a v-neck, you can personalize your shirt to match your style. For a more interesting and unique neckline, you can even make a choker v-neck!
Steps
Making a Scoop Neck or V-Neck
-
1Fold the t-shirt to align the shoulder seams at the neckline. Hold the shirt by the collar with one hand at the front of the collar and one on the tag. When you hold the shirt, it should create a fold down the center of the front and back of the shirt. Then, lay the shoulder down on a flat surface to continue working.[1]
- Try not to stretch out the collar by pulling it as you're holding it. This can warp the fabric and make the cut look uneven.
-
2Flatten the fabric on a table to remove wrinkles and creases. Position the folded shirt so you can easily access the collar with a pair of scissors. Then, press down on the fabric along the collar to make sure the collar and the area you are planning to cut are flat. If you want to make sure the shoulder seams are aligned, lift up the collar to check that they are stacked on top of each other.[2]
- It's important for the seams to be aligned because the new neckline will be crooked if they aren't.
Advertisement -
3Measure 1 in (2.5 cm) or more below the bottom of the collar. Use a ruler to decide where you want your neckline to lay on the crease at the center of the front of the shirt. When you find a suitable spot, mark it with a pin or draw a line with a piece of chalk. This will be the place on the shirt where you start cutting into the fabric for both a scoop neck and a v-neck.[3]
- You can make your neckline as low or as high as you want, depending on your preference. Just make sure you start measuring below the bottom of the collar, rather than the top.
- You'll be cutting different shapes for both a scoop neck and a v-neck, but for both types of necklines, you'll start cutting along the crease at the front of the shirt.
-
4Trim the fabric in a curve following the shape of the collar for a scoop neck. Using a pair of sharp fabric scissors, make long cuts in the fabric in the same general shape as the original neckline. Keep cutting all the way to the back of the shirt where the tag is located, and then pull the collar off of the shirt.[4]
- This will make the neckline wider and looser for a flattering scoop neck shirt.
- As you're cutting, make sure you have both layers of the shirt in the scissors. If you cut one side of the shirt at a time, you run the risk of the neckline being crooked.
- If your cuts are too short, the edge of the fabric can become jagged. Try to make longer cuts as you curve the scissors and keep the fabric flat.
-
5Cut in a straight line up to the shoulder seams to make a v-neck. Position your scissors at the point that you marked and hold the fabric taught. Orient the shirt so that your scissors are directed at the shoulder seams, which is where your v-neck will start. Make long, straight cuts up to the seams and through the collar.[5]
- For a v-neck, make sure your cuts are as long as possible to avoid curves in the neckline.
- It may be helpful to hold a ruler next to the scissors to keep them straight as you cut the fabric.
-
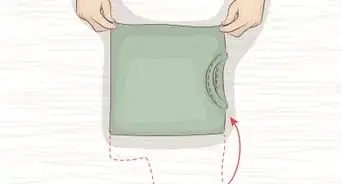
6Pull on the neckline to loosen the fabric and roll the edges. Lift up the shirt by the shoulders and gently stretch the fabric. Hold the neckline in a few different places and pull on it to ensure that the fabric rolls under slightly to hide any jagged edges.[6]
- Be sure not to stretch or rip the shirt by pulling too hard. Just gently tug on the neckline fabric a few times.
- If you still have a few jagged edges after pulling on the fabric, run the shirt through the washer and dryer to soften the fabric and hide the edges.


Creating a Choker V-Neck Shirt
-
1Fold the shirt by lining up the shoulder seams at the collar. Hold the shirt with one hand at the front of the collar and one hand at the back of the collar, near the tag. This should make a crease down the center of the front of the shirt and the center of the back of the shirt. Then, lay the shirt on a flat surface.[7]
- For this type of neckline, you'll only be cutting the front of the shirt up to the shoulder seams, so the back part doesn't need to be perfectly aligned.
-
2Use a piece of chalk to mark where you want the bottom point of your v-neck. Flatten the fabric with your hand and make sure the seams are aligned. Then, pick a point along the crease at the front of the shirt where you want the bottom of your v-neck to hit, and draw a short line with a piece of chalk. Most choker shirts have a 2–3 inches (5.1–7.6 cm) v-neck.[8]
- If you have a logo or design on the front of your shirt, you may want to make sure you aren't going to be cutting off the printing.
-
3Mark a point between the middle of the collar and the shoulder seam. Use your piece of chalk to mark a point between the center of the collar and one of the shoulder seams. Make sure the point is closer to the seam if you want a shallower v-neck, or pick a spot about halfway between the middle of the collar and the seam for a more triangular v-neck.[9]
- Make sure the point is on the bottom part of the collar, since you won't be removing the collar from the shirt.
-
4Cut a straight line from the bottom point to the collar. Use a pair of sharp scissors to make long, straight cuts between the bottom of the v-neck and the point that you marked below the collar. Try to make as few cuts as possible to prevent jagged edges and don't cut into the collar. As you're cutting, make sure you have both layers of the shirt in the scissors.[10]
- If you want to make a more rounded cut-out in the neckline, you can cut a curved line between the two points.
-
5Trim just below the collar to cut out the fabric triangle. Position your scissors along the crease, just below the collar of the shirt. Make long cuts, following the curve of the collar, until you reach the point that you had marked along the collar. Pull the piece of fabric away from the shirt to reveal the cutout.[11]
- If you want to customize the shirt even further, you can make it sleeveless.
-
6Tug on the edges of the triangle gently to roll the edges. Put your fingers inside of the cut-out and gently pull the fabric to either side. Then, hold the collar in place and pull the bottom point of the v-neck down to roll in the edges of the fabric, hiding any jagged edges.[12]
- When you're pulling the fabric, make sure you don't pull too hard and rip the shirt.
- If the fabric won't roll under, run the shirt through the washer and dryer to soften the fabric, making it easier to hide any edges.


Cutting a Cold-Shoulder Shirt
-
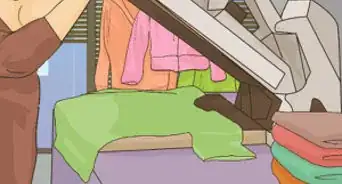
1Lay the shirt flat on its back and smooth the fabric. For a cold-shoulder shirt, position the shirt on a flat surface with the front facing toward you. Use your hands to flatten the fabric around the collar and on the sleeves, which is where you'll be making most of the cuts for the shirt.[13]
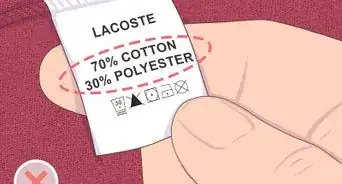
- You can use a long-sleeve or short-sleeve shirt for this. It's best to use a shirt that has shoulder seams, since they'll help guide your cutting.
-
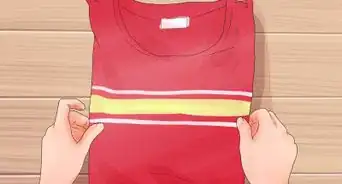
2Make a 2–3 in (5.1–7.6 cm) cut around the collar line on both shoulders. Working with one sleeve at a time, make a cut from the top of the shoulder down about 2 inches (5.1 cm), following the shape of the collar. Cut to about ¼ of the way between the top of the shoulder and the center of the front of the collar, and then do the same to the back side of the shoulder.[14]
- If you want the shoulder holes to be larger, you can cut to about halfway between the top of the shoulder and the middle of the collar on both sides of the shirt.
-
3Mark a spot that is 4 inches (10.2 cm) away from the collar, towards the shoulder. Use chalk or your finger to help you keep track of this spot. It can be helpful to use a ruler to measure 4 inches (10.2 cm) to help make your cut accurate. The marking should be at the very top of your shirt.
- Mark a spot that's further away to create a bigger hole for your shoulder, or if you're working with a larger-sized shirt.
-
4Cut a diagonal line from the marked spot to your first cut at the collar. Place your scissors on the top of the shoulder, and cut in a line to the end point of your first cut on the front part of the collar. Cut the diagonal line out of only the front part of the shirt. Then, cut along the natural shoulder line to cutout a piece of triangle-shaped fabric.[15]
- Once you're done, repeat this process with the back of the shirt on this same sleeve.
- This sleeve of the shirt is finished, but you still have to cut the other cold shoulder. Make sure the fabric stays smooth and flat as you work!
-
5Align the triangle with the cut on the other sleeve and use it as a guide. Place the triangle of fabric so that one point lines up with the end of the cut on the front of the collar and the other lines up with the back. Then, cut along the edges of the fabric to make sure both shoulders have the same sized hole.[16]
- When you're done cutting, you should have 2 triangles of fabric from the shoulders of the shirt, and the collar should still be intact around the neck of the shirt.
-
6Tug on the sides of the shoulder holes to stretch them slightly. Pull on each side of the triangle-shaped hole to make the fabric looser and to roll the edges, hiding any jagged points from the scissors. Do this for both sides of the shirt to make sure the holes are roughly the same size.[17]
- If you want to make the fabric softer and widen the holes, wash and dry the shirt to roll the edges of the hole even further.


Things You’ll Need
- T-shirt
- Fabric scissors
- Chalk or pins
- Ruler


References
- ↑ https://youtu.be/Tu_WY28MLX0?t=14
- ↑ https://youtu.be/oHR8lpxly80?t=53
- ↑ https://youtu.be/Tu_WY28MLX0?t=26
- ↑ https://youtu.be/Tu_WY28MLX0?t=31
- ↑ https://youtu.be/W3Dm8y-cs7w?t=25
- ↑ https://youtu.be/qBQoy9ciTEo?t=119
- ↑ https://youtu.be/7EqgcVE7kWk?t=10
- ↑ https://www.cassiescroggins.com/diy-cut-v-neck-choker-tee-tutorial/
- ↑ https://www.cassiescroggins.com/diy-cut-v-neck-choker-tee-tutorial/
- ↑ https://youtu.be/7EqgcVE7kWk?t=38
- ↑ https://youtu.be/7EqgcVE7kWk?t=44
- ↑ https://www.cassiescroggins.com/diy-cut-v-neck-choker-tee-tutorial/
- ↑ https://youtu.be/IXq4_kkqraw?t=73
- ↑ https://youtu.be/IXq4_kkqraw?t=86
- ↑ https://youtu.be/IXq4_kkqraw?t=93
- ↑ https://youtu.be/IXq4_kkqraw?t=123
- ↑ https://youtu.be/IXq4_kkqraw?t=145
About This Article

To cut a scoop neck into a shirt, first, fold the t-shirt to align the shoulder seams at the neckline. Flatten the fabric on a table to remove any wrinkles and make your cut more accurate. Then, use a ruler to decide where you want your neckline to be. For example, if you want a higher neckline, use a piece of chalk to make a mark at 1 inch. If you want a lower neckline, make a mark at 2 or 3 inches. Once you’ve made your mark, use sharp fabric scissors to cut a curve following the shape of the collar from one end of the shirt to the other. Make sure to cut both layers of the shirt at the same time, or else the neckline might turn out crooked. After it's cut, gently pull on the neckline to help roll the fabric, which will hide any jagged edges. To learn how to make a choker V-neck shirt, read on!