This article was co-authored by Alessio Iadicicco. Alessio Iadicicco is an Apparel Manufacturing Specialist and the CEO and Co-Founder of MarkersValley, an online apparel and manufacturer sourcing platform that connects luxury fashion brands to a network of highly-vetted, truly Italian manufacturers. He holds a Bachelor's degree in Economy and Management of Financial Enterprises from The University of Naples Federico II. MarkersValley has connected fashion brands in over 100 countries and has a network of over 100 independent Italian factories and artisans. MarkersValley has been featured in Forbes, EQ, St. Louis Business Journal, Il Mattino, and Corriere Della Sera.
This article has been viewed 89,473 times.
Especially if you live in warm climates, sleeveless shirts and tank tops are popular summertime garments. People love to take old t-shirts and make them sleeveless for working out or for wearing around the house. There are lots of different ways to do this, including customizing the shirt more, but a few basic methods will get you to the sleeveless shirt you desire.
Steps
Cutting the Sleeves off of a Shirt
-
1Choose which shirt you would like to make sleeveless. Almost any shirt lends itself to becoming sleeveless, but there are some common options.
- T-shirts
- Old blouses
- Long-sleeved shirts
-
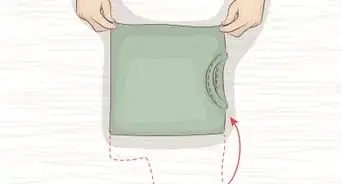
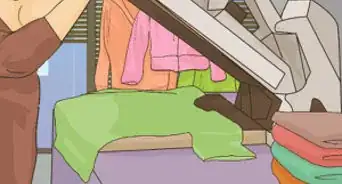
2Turn your shirt inside out and lay it on a flat surface. It is important that the surface is flat so that you cut the shirt evenly.Advertisement
-
3Cut strips into the sleeves, perpendicular to the seam. This is why the shirt needs to be inside out, so you can see the seam more clearly.
- Use sharp scissors to cut many strips into the sleeves, cutting straight up to the shoulder seam and stopping.
- When you are done, the sleeves should look like fringe hanging from the shirt.
- This helps the shirt lose its curve around the shoulder seam so that it lays flatter and allows for a straighter cut.
-
4Trim off the strips that you made in the sleeves. Using your scissors, make your way around the seam cutting off each strip carefully, as close to the edge as possible.
- Avoid cutting into the shoulder seam, because that will cause fraying and may cause the shirt to unravel later.
- Pull the strips tight as you cut, which will help make a clean, straight cut.
-
5Clean up the seams if necessary. If you do have any straggling threads or uneven edges, you'll want to remove those with the scissors in order to avoid fraying and unraveling later.
- Take your scissors carefully along the edge at the shoulder seam, trimming up anything that needs to be cleaned up.
- Your shirt is now sleeveless but still has the seams intact in order to help the shirt last longer. When the seams are cut off, the shirt tends to come apart quickly.

Making a Classic Sleeveless Tank
-
1Select which shirt you would like to turn into a sleeveless tank. An old t-shirt is the best option for this method, as other shirts might have wider necklines that won't lend as well to making a tank.
- The way this method differs from Method 1 is that in the first method, the shirt still came out to the edge of your shoulder and simply had the sleeves removed. In this method, we are removing both the sleeves and the neckline to make a tank.
- Men's style t-shirts are a good option, because they tend to be looser-fitting than women's t-shirts.
-
2Lay your shirt on a flat surface. It is important that the surface is flat so that you cut the shirt evenly.
-
3Cut out the neck of the shirt just below the seam. Be sure to stick close to the seam, because this creates a wider neck opening than it seems.
- Stay within ¼ inch of the seam.
- The cut doesn't have to be perfectly “straight,” especially if you're going for more of a grunge look. This means that the cut doesn't have to maintain the exact same distance from the seam all the way around the neckline.
- Pull the shirt tight while you cut to avoid bunching and to make cutting easier.
-
4Trim off the sleeves starting at the armpit. Unlike with the neckline cut, you will not follow the curve of the sleeve for this cut.
- Start at the armpit and cut with a slight curve up toward the middle of the distance between the neck and the sleeve. You want to leave a good width for the strap of the tank, which should be about an inch-and-a-half or more.
- Pull the sleeves tight while you cut to avoid bunching and to make the cutting easier.
-
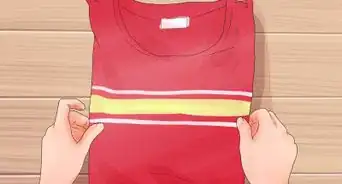
5Hem the new edges of the tank to avoid fraying on those edges. A double-turn hem is a simple and quick way to seal these new edges.
- Fold your new edge to the inside of the shirt ¼ inch and press. Then, fold it in again another ¼ inch and press again. Use your sewing machine and its presser foot, also known as a rolled hem foot, to sew the folds down for the hem.[1]
- Repeat on all edges, including both new armholes and the neckline.
- Hemming is not necessary if you want your tank to have a grunge look.

Making a Muscle Tee
-
1Choose what t-shirt you would like to cut to make a muscle tee. This style of sleeveless shirt is popular with people who workout frequently because it allows for more breathability.
- Loose-fitting t-shirts are the best open for this style, especially if they are a bit big. The idea of this shirt is to have a baggy, open shirt in which to do strenuous activity, like weight lifting or manual labor.
- This is the easiest method of making a sleeveless shirt, because it only requires two simple cuts.
-
2Measure up about six inches from the bottom of the shirt to start your cut. This will allow for a large open side in the shirt.
- This also ensures that you do not cut the side of the shirt completely open.
-
3Cut into the side of the shirt, cutting upward at a slight angle. Remember that you are not making this into a tank, so the width of the shirt at the shoulder should still be a good 3-4 inches wide.
- When you get up to the sleeve at the shoulder, you should have about an inch of fabric still attached to the sleeve as it is cut off. This allows for more fabric to be attached to the neckline, creating a muscle tee.
- Pull the shirt tight as you cut to help keep a mostly straight cut. The new edges of the shirt will likely curl in on themselves a bit, but the cut should still be as straight as you can make it.
-
4Hem the edges, if you would like to keep the shirt from fraying. A simple double-turn hem does the trick with minimal sewing.
- Fold your new edge to the inside of the shirt ¼ inch and press. Then, fold it in again another ¼ inch and press again. Use your sewing machine and its presser foot, also known as a rolled hem foot, to sew the folds down for the hem.[2]
- Repeat on the other armhole.

Sewing a Sleeveless Shirt From a Pattern
-
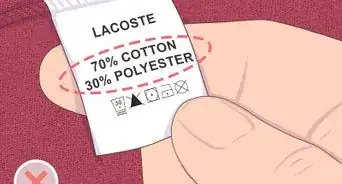
1Find a sewing pattern for a sleeved shirt and a fabric to use. If you like to make your own clothes, this is a method in which you can turn a sleeved pattern into a sleeveless one.
- Almost any pattern of sleeved shirt will work for this.
- Be sure that you are buying a pattern for the style of shirt you want (e.g. men's, women's, baby's, child's, et cetera).
- Buy enough fabric to make the entire shirt so that you can avoid sewing scraps together.
-
2Reduce the width of your pattern at the shoulder by making new marks on it. Remember that a sleeved shirt extends the width of the shoulder all the way to the tip, but sleeveless shirts usually do not.
- Use a pencil to make your new markings.
- How much you shorten the width is up to you, but keep in mind that you will lose an additional 3/8 inch when you finish the seam on the sleeveless arm hole.
- Try to make about the same new angle and curve on both sleeves so that they look the same. You may want to curve the front of the shirt a bit more than the back, simply for aesthetics.
-
3Cut your pattern along the new lines. Before you start cutting your chosen fabric, you need to cut out your new pattern.
- Carefully cut along your new lines, keeping your new curves as much as possible.
- Prepare your pattern to trace onto the fabric.
-
4Trace your pattern onto the fabric.[3] There are a variety of tools you can use to do this, but it is most important to use a tool that will wash out or leave no mark, if possible. If it is a tool that claims to be washable, do a trial run first by marking an old shirt or scrap piece of fabric and washing it.
- Washable pens
- Tracing wheel and dressmaker's carbon
- Hera marker
- Chalk pencil
- Tailor's chalk
- Tailor's tacks
-
5Trim two extra strips of fabric on the bias in order to finish the armholes. This is a type of finish on the armholes that will give them a polished look.
- Measure your armholes and then add 3-4 inches to account for sewing.
- The fabric strips should be about an inch wide.
- These strips are also known as “binding.”
-
6Follow the directions of the pattern to sew most of the shirt together, including the neckline. Stop once you have reached the point of sewing the shoulder and side seams together.
-
7Fold and press your binding to begin the process of finishing the armholes. Lay your strips flat with the patterned side down.
- Fold one edge of the binding ¼ inch over the non-patterned side, and then press it flat.
- Repeat with the second strip of binding.
-
8Pin the binding around the armholes. Start at the side seam.
- Leave at least an inch of excess fabric hanging before inserting the first pin at the side seam.
- Put the unfolded edge of the binding along the edge of the armhole, so that the folded edge is closer to the breast of the shirt.
- The right sides of the shirt and the binding should be together, meaning that the patterned side of the binding should be against the patterned side of the shirt, which should be right side out.
- Continue to pin the binding all the way around the armhole.
-
9Make a small mark on the binding where it meets the side seam. Use a washable pen or other fabric-friendly tool to do this.
- Repeat this on the binding of the other armhole.
- This is where you will sew the two ends together so that they will meet along the side seam.
-
10Pull the bias tape, or the binding, away from the shirt. You may need to remove a couple of pins in order to do this.
- Sew the bias tape, with the patterned sides touching, at the marks you made on the fabric.
- Trim any excess fabric off after sewing (remember that you left at least an inch before pinning).
- Press open the small bit of fabric left after sewing and trimming and pin it to the armhole at the side seam.
-
11Sew all the way around the armhole. Leave 3/8 inch distance between the seam you are making and the edge.
- A sewing machine is recommended for this process, as it will be faster and straighter.
-
12Press the binding away from the shirt at the new seam you just made. You should now have a small “sleeve” sticking out from the armhole and are ready to finish off the armhole.
- Flip the shirt inside out after doing this.
- Fold the binding again along the ¼ inch edge that you made previously, and then fold it again along the seam.
- Pin all the way around the armhole, with the binding folded in twice around it.
-
13Use a sewing machine to stitch the armhole closed around the folded edge. This is the last step in polishing the arm hole on a sleeveless shirt made from scratch.
- Repeat the process on the other armhole.
- Press the new seam around the armhole one more time to give it a crisp edge, and you are done.

Warnings
- Be careful to avoid cutting yourself with scissors when trimming your shirt.⧼thumbs_response⧽
- Be careful to avoid sewing a finger, if using a sewing machine, or pricking your finger with a needle, if hand stitching.⧼thumbs_response⧽


References
About This Article

To make a sleeveless shirt, choose a shirt with sleeves that you want to alter, turn it inside-out so you can see the seams clearly, and place it on a flat surface. Next, use sharp scissors to cut multiple strips into both sleeves, perpendicular to the seams. Be careful not to cut into the shoulder seams! Then, trim off the strips as close to the edge as possible, pulling them tightly as you cut them. Finally, clean up any loose or straggling threads before trying on your new sleeveless shirt! To learn more about making other types of sleeveless shirts, such as a muscle tee, read on!