This article was co-authored by Lucy V. Hay. Lucy V. Hay is an author, script editor and blogger who helps other writers through writing workshops, courses, and her blog Bang2Write. Lucy is the producer of two British thrillers and her debut crime novel, The Other Twin, is currently being adapted for the screen by Free@Last TV, makers of the Emmy-nominated Agatha Raisin.
There are 13 references cited in this article, which can be found at the bottom of the page.
wikiHow marks an article as reader-approved once it receives enough positive feedback. In this case, 87% of readers who voted found the article helpful, earning it our reader-approved status.
This article has been viewed 98,009 times.
eBooks are popular, both with those who have a product to sell and those who have a story to tell. An effective way to drive traffic to your website is to offer an eBook that visitors find useful. Whether it's a short document that explores one idea or a book that's long enough to be printed on paper and shelved at a bookstore. For writers of fiction and nonfiction stories, eBooks are extremely popular. With many eBook publishing platforms, it's now easier than ever to get your story published. Using a service like Amazon's, authors can digitally distribute a book. This can eliminate the need for finding a publisher.
Steps
eBook Help
Using Word Processing Software
-
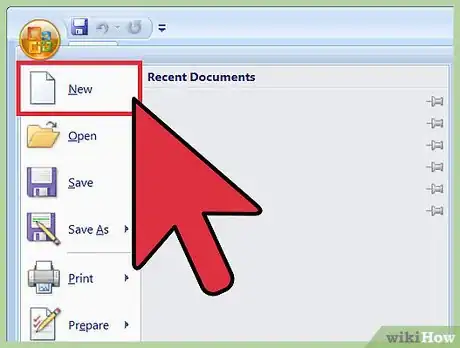
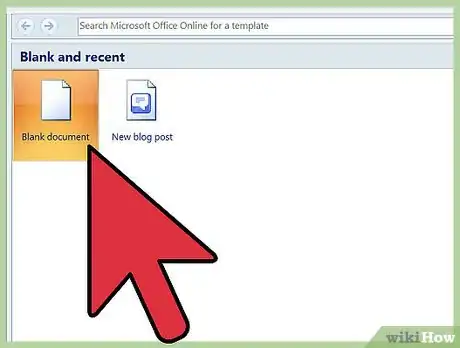
1Choose a writing platform. Write the book in the software you’re most comfortable using. Word processors are most popular, but you can also use software designed to create graphic illustrations, newsletters or slide shows.
- There are many programs that allow you to write your book the way you want. Some people prefer to use Microsoft Word. You can easily add a title page, table of contents, and set the margins and align the text. Microsoft Word is a WYSIWYG (What you see is what you get) editor. This means that the way your type looks on the page is how it will look when exported.
- Some programs offer markdown language editors. This is similar to writing in a code language. Instead of hitting a button to bold or italicize a word, you would wrap the word in specific brackets of text. When exporting, the text converts to a final, view-ready version. [1]
- There are many apps that are aimed at streamlining the setting up and writing process. Many of these are made to be distraction free, so you can get to the important part, writing. [2]
- Apps like Scrivener or Ulysses III are very popular [3] [4] . These apps allow you to write in a markdown or WYSIWYG language. You can add notes, include research, and jump around your text. There’s also features that allow you to only see the page as if you were on a typewriter.
- There’s also an option in Chrome’s apps called Writer that is a browser based minimal writing platform. [5]
-
2Start writing your book. Once you’ve picked the software that best suits you, now it’s time to sit down and do the hard work, actually writing your book.
- If this is your first book, try and keep it relatively simple. eReaders have made shorter, pulpier novels popular again. People can easily download your book and read it in a few hours. Consider keeping your book relatively short, give it a simple plot, and keep the style consistent. [6]
- Focus on building your characters. People typically want to read about the characters and the importance of the situation you put those characters in. Think of your favorite books. Chances are you loved these books because the characters were compelling. Those compelling characters drove the plot forward.
- Trying to throw too much into a plot, especially your first time around can be overwhelming. Don’t try to write the next Game of Thrones right now. Stick to a simple plot that has your personal spin thrown on it.
EXPERT TIPLucy V. Hay is an author, script editor and blogger who helps other writers through writing workshops, courses, and her blog Bang2Write. Lucy is the producer of two British thrillers and her debut crime novel, The Other Twin, is currently being adapted for the screen by Free@Last TV, makers of the Emmy-nominated Agatha Raisin.Professional Writer
 Lucy V. Hay
Professional WriterConsider an outline to help you get started. I think it's a really good idea to outline your book first if you want to be a professional writer. It can seem a little tedious, but it can really help you cut down on any problem areas in terms of your plot. You can also outline however you want—I put post-its on the wall and move them around until I decide on their order, and that's it.
Advertisement -
3Focus on the “Who” you are writing about. Then add the “When” “What” “Where” “Why” and “How”. You want to answer one question at a time.
- Trying to cram too much in at once will make your book hard to understand and follow.
-
4Set daily writing goals. Set a minimum each day for how much you will write. Whether it’s one page or one chapter. Pick a goal you can stick to.
- Trying to accomplish too much can make you feel discouraged or frustrated. The key to actually finishing a book is consistency.
- It’s better to get something on the page every day than to put it off because you’re not in the mood. You can always go back and edit.
-
5Finish your book. Once you have completed your first draft, take some time away from it. Let it breathe so you can come back to it with a fresh pair of eyes.
- Go over your first draft and check to make sure that you’ve hit all the necessary plot points. Make sure your characters are fleshed out. Fix any continuity problems.
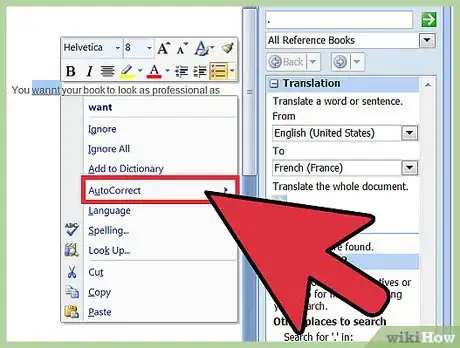
- Then proofread and make sure that there are no spelling or grammatical errors. You want your book to look as professional as possible.
-
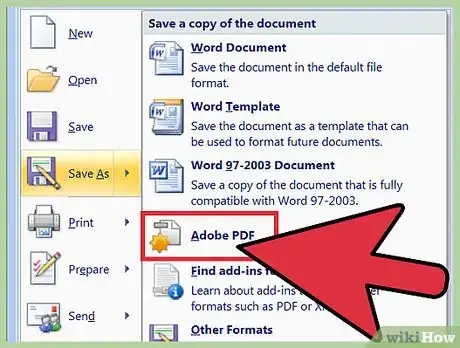
6Convert the document to a PDF, which can be read by both PC and Mac users. Be aware that the full version of Adobe Acrobat offers features that other programs that create PDF files do not, so you may want to pay for the full version.
- Publishing to sites like Amazon will be able to read many different files like HTML, Doc/Docx, and even RTF. However, you shouldn’t be ready to publish your book yet. You need to get it edited.
- Convert your book to a PDF so that you can print it or electronically send it easily to an editor.
Editing Your eBook
-
1Workshop your book. You can do this while your still writing or after you’ve had an editor look at your book. But you should go to workshops. These groups will read your material and give you notes, ideas, and can even drum up some interest in your book. [7]
- You can participate in online workshops or read aloud workshops. The goal is to get your work out there to others in the industry.
- Getting your work seen and critiqued by other writers can be nerve-wracking. But these people will help you frame your story and make valuable revisions.
-
2Edit your book. You can make a pass or two on your own before sending your book to an editor. But you will need an editor. Many people will be tempted to forgo paying a professional editor to save money, or because the author thinks that the book is perfect.
- Not getting an editor to read over your book can make the difference between people loving it and no one downloading it. You should edit your book yourself first, then send it to an editor for a second, professional pair of eyes.
- Edit as much as you need to yourself, but don’t edit if you don’t know what to edit. If you don’t know how to fix a problem area, you’ll chop up your story and have a hard time putting the pieces back in the right spot.
- Over-editing is possible and dangerous. A big reason an editor is so valuable is because you’re too close to your book. You’ve spent a lot of time writing and editing. A second pair of eyes will help you find things you’ve overlooked.
-
3Ask a trusted friend to give your book a read. Get someone you trust to give you notes and feedback. Before you go to an editor who doesn’t know you or your work, consider getting someone who does to read your book.
- Take the notes you’re given. You probably won’t like all the notes someone gives you. So read the notes, decompress, and after some time go back and incorporate the ones which are helpful. Don't use the ones which aren’t.
-
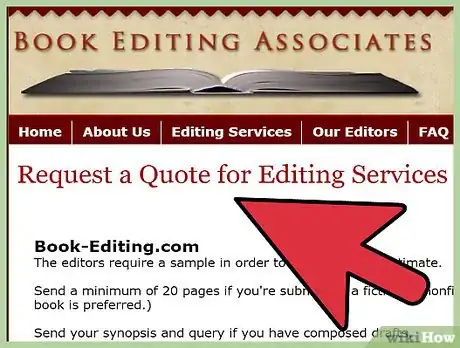
4Hire a professional editor to look over your book. Editing is not the same as writing. You will need someone who knows how to structure a book, find the issues, and sell your book. [8]
- A professional editor is better than spellcheck. The last thing you want is a glaring spelling error in your book after all your hard work. Computers are a good helper, but only a trained pair of eyes can really catch errors you and your computer have missed. [9]
- Your editor will bring a much needed objective eye to your work. Maybe you need to cut three chapters to shorten your story. Perhaps your title is misleading. An editor can help you find the true story underneath all the extra stuff you don’t need.
-
5Create the cover art. Once you’ve gone through several versions and drafts and have edited your book, it’s time to get the cover art.
- Cover art is going to be a big selling point for your book. Even in an online marketplace, people judge books by the cover.
- Consider hiring a professional graphic designer to create your book’s cover. Or, if you or a friend know how to design, you can take a stab at it.
- Your cover should be exciting and related to the theme of your story. Look at the covers of your favorite books for inspiration. Notice what the cover says about the book.
Exporting Your Ebook to Amazon Kindle Direct Publishing
-
1Prepare your eBook for self-publishing online. The biggest opportunity for publishing an eBook is Amazon’s Kindle Direct Publishing. You can easily upload your manuscript to the KDP program and begin to sell copies.
- Kindle Direct Publishing will accept a variety of file formats when uploading. Kindle uses a Mobi format to output the eBook so that eReaders can read it. But when uploading you can upload your manuscript as an HTML, Doc/Docx, RTF, Mobi, or ePub.
- Use can use a program like Calibre to convert your manuscript to Mobi or ePub before uploading if you wish. [10] This sometimes makes the uploading easier and keeps any images or forms in your book intact.
-
2Decide on your format. In addition to the file type that you upload your manuscript in, you’ll also have to decide if you want a standard eBook format or a fixed layout format. [11]
- Standard formats are typically ePub and Mobi files. These formats allow readers to adjust the size of the text in an eReader. Note that in this form, there isn’t a set pagination as the size of the text will adjust how many words appear on a page. This format is good for text-heavy books.
- Fixed layouts are better used in comics, children’s books, and books with a lot of pictures and graphs. This format preserves the qualities of a printed page. It’s more like looking at photos of a page on an eReader than reading “living” text.
-
3Choose how to publish on Amazon. Amazon has a few eBook publishing options. The standard is the KDP service. There’s also KDP Select. This is the “premium” version of Kindle Direct Publishing. Though both are free to upload.
- The standard KDP service allows you to upload your book to Amazon’s service for free. There’s no charge to upload the file. Author’s will receive about 30-35% of royalties while Amazon keeps the rest.
- The KDP Select service gives Amazon an exclusive on your digital book for 90 days, meaning you can’t upload it anywhere else. You do receive closer to 70% of royalties. Amazon will also market your book for you through the Prime member’s lending library. You also have the option to make your book free or discounted for five days. During this time, it will show up on Amazon’s sales pages.
-
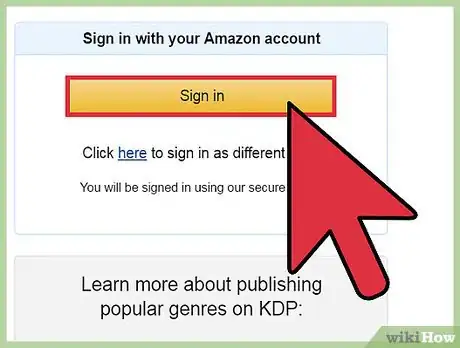
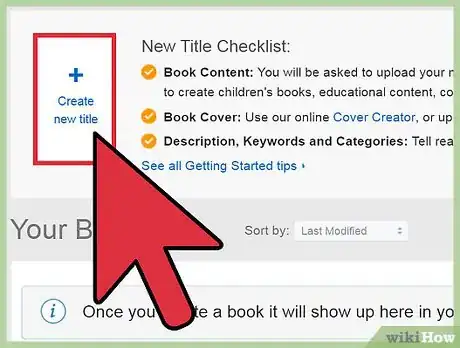
4Enter your book’s information. Once you’ve decided on which option you like best, sign up to publish through the “independently publish with us” link at the bottom of Amazon’s homepage. [12]
- You can sign in with your Amazon account. You will have to read and agree to the terms of service. Once completed you will have a publishing account.
- Follow the uploading steps to add a title and enter your book’s details. The details allow you to specify if the book is part of series, book type, pricing, etc.
- You can add you ISBN code if you have one. But it is not needed with Amazon.
- Select your category. Amazon encourages you to add up to two categories to get better exposure. Search for books like yours and see which categories these books have used. You can also add up to seven keywords to make your book show up better in a search.
- Finally, upload your cover. [13] Then you’re ready to upload.
-
5Upload your book. When you’re ready, click “Browse for book” to find the copy of your manuscript on your computer. Then click “Upload”.
- Amazon allows you to choose if you want to enable digital rights management (DRM) or not. Enabling DRM makes it harder for others to copy and share your work without you earning payment. For example, someone can’t copy the file and download it to another eReader.
- You most likely won’t lose any money or sales for not adding DRM, however.
-
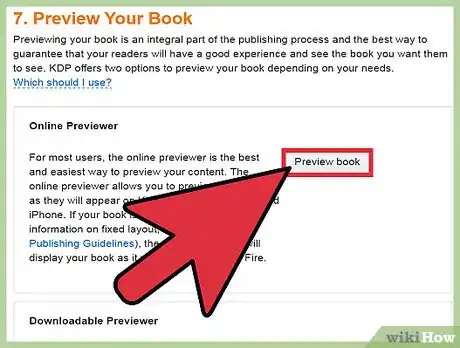
6Preview your book. Once you upload your book will have the option to use the “Online Previewer” link to see how your book will look.
- Amazon does a pretty good job of retaining your book’s formatting, especially if you already had the book in a correct format, like Mobi. You can see how your book will look on a variety of devices from a Kindle to an iPhone to a browser window.
- You should look over your book in all these options to make sure everything is how you want it.
-
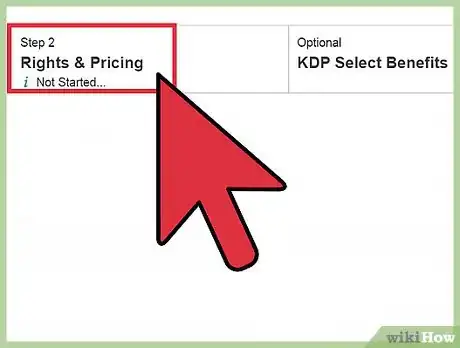
7Set your price. You will now have the option to price your book. Amazon will also give you an option for royalty percentage. Your options are usually 35% or 70%.
- Choosing the 70% makes your book fall under the KDP Select option. You get the marketing benefits and ability to discount your book for a time. But, you aren’t allowed to upload it, or sell it anywhere else for 90 days. If you price your book below $2.99 USD, Amazon will only give you the 35% option.
- Choosing to take the higher royalty also means that Amazon deducts a small “delivery fee”. This fee is usually 15 cents per megabyte. Most books with little to no graphics and roughly 100,000 words don’t go over 1 MB. There’s no charge if you take the smaller royalty.
- Once you pick your royalty options, you are finished and your book is now available! Congratulations, you are a published author.
Community Q&A
-
QuestionWhat if I don't trust editors?
 Community AnswerIf you have people in your life that you trust to read and edit your book, I would go to them. If not, I would suggest submitting your book to multiple editors, and if you really feel like the changes they are making are bad for your book, then don't make those changes. Keep in mind that even the most talented and skilled writers still use editors. You need a second (and perhaps third, fourth, etc.) set of eyes looking at what you've written.
 -
QuestionCan you use other sites beside Microsoft Word?
 Catherine CriscuolaCommunity AnswerYes. Google Docs and Chrome Writer are both free ways to write your story. All you need is a Google account.
References
- ↑ http://markdowntutorial.com/
- ↑ http://lifehacker.com/the-best-apps-for-any-kind-of-writing-1563998071
- ↑ http://www.ulyssesapp.com/
- ↑ http://literatureandlatte.com/scrivener.php
- ↑ https://chrome.google.com/webstore/detail/writer/hlddiopdeghmcmdjjmpdegemnojihpib
- ↑ http://blog.bookbaby.com/2011/12/top-3-tips-for-writing-your-first-novel/
- ↑ http://blog.bookbaby.com/2013/03/how-to-revise-your-novel-through-a-read-aloud-and-critique-workshop/
- ↑ http://www.theguardian.com/books/2012/jun/14/importance-good-book-editing
- ↑ http://blog.bookbaby.com/2012/11/your-book-needs-professional-editing-and-you-shouldnt-be-ashamed/
About This Article
To create an ebook, start by converting your book to a PDF, which can be read by both PC and Mac users. Next, send your book to an editor for an objective opinion. Then, create a compelling and thematically relevant piece of cover art. You may even consider hiring a professional since the cover is what will grab readers' attention. Finally, you can self-publish via Amazon’s Kindle Direct Publishing. To make uploading your ebook easier and to ensure all the formatting and images remain intact, use a program like Calibre. To learn how to set the price for your ebook, keep reading!
