This article was written by Marvin Woo and by wikiHow staff writer, Travis Boylls. Marvin Woo is a licensed electrician and the Owner of Woo's Electrical & Appliance based in East O’ahu. With over two decades of experience, he specializes in troubleshooting issues and maintaining residential electrical systems. Marvin is both licensed and insured to complete electrical work in the state of Hawaii.
wikiHow marks an article as reader-approved once it receives enough positive feedback. This article received 11 testimonials and 100% of readers who voted found it helpful, earning it our reader-approved status.
This article has been viewed 2,577,496 times.
Do you need a power supply for your workbench? Perhaps you are learning electronics. A typical lab power supply can cost $100 or more. A computer ATX power supply can cost around $30, and can be salvaged from an old computer. Save money by converting a cheap ATX power supply that can be found in any discarded computer. This DIY project will give you a power supply that produces a +3.3V, +5V, and +12V current, as well as some practice assembling basic electronics. It won't produce the same power that a standard lab power supply will, but it will be sufficient for testing and running simple electronics. This wikiHow teaches you how to convert an ATX power supply into a lab bench power supply.
Things You Should Know
- Using an ATX power supply can be an inexpensive alternative to using a lab power supply.
- Make sure you let the power supply sit unplugged for a few days to drain any residual electrical charge before working on it.
- Make sure you are not grounded when working on the power supply to prevent electricity from flowing through you.
Steps
Preparing the Power Supply
-
1Aquire an ATX computer power supply. You can |purchase an ATX power supply from your local computer store or an online computer parts distributor. Alternatively, you can dismantle an old computer and remove the power supply from the case. Some older ATX models include an additional -5 V line. Some online websites you can purchase an ATX power supply include the following:
-
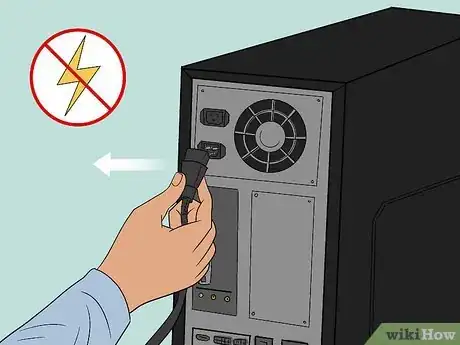
2Unplug the power cable from the power supply and turn it off. Not all power supply units have a power switch, but it is generally found on the back. Also, be sure you are not grounded so that the remaining voltage doesn't flow through you to the ground.
- To avoid receiving an electric shock from the power supply unit, make sure you are wearing shoes with rubber soles, and avoid touching anything metal while handling the electronic components.
Advertisement -
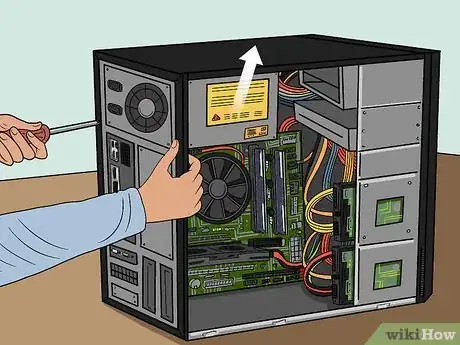
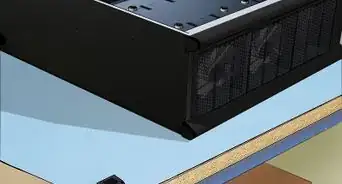
3Remove the power supply from the computer. First, remove the screws that attach the power supply to the computer case. Detach the wires from the motherboard and other computer components. Then remove the power supply.
-
4Discharge the power supply. To do so, simply let the power supply sit unconnected and unplugged for a few days.
- Warning: Some people suggest attaching a 10-ohm resistor between a black and red wire (from the power cables on the output side), however, this is only guaranteed to drain the low voltage capacitors on the output - which really aren't dangerous. It could also leave the high-voltage capacitors charged, resulting in a potentially dangerous—or even lethal—situation.
- Warning: If you suspect the power supply is damaged, do not use it! If it is damaged, the protection circuitry may not work. Normally, a protection circuit will slowly discharge the high voltage capacitors - but if the supply was connected to 240V while set at 120V (for example), the protection circuits have probably been destroyed. If so, the power supply might not shut down when it is overloaded or when it begins to fail.
-
5Gather the parts you need: For this build, you're going to need the following items:
- 6 Binding posts (terminals).
- A power resistor (10-ohms).
- 2 LED (recommended one green and one red).
- 2 dropping resistors (330-ohms).
- An SPST switch.
- A drill
- A Soldering iron
- Wire cutters
- Heat shrink tubing
-
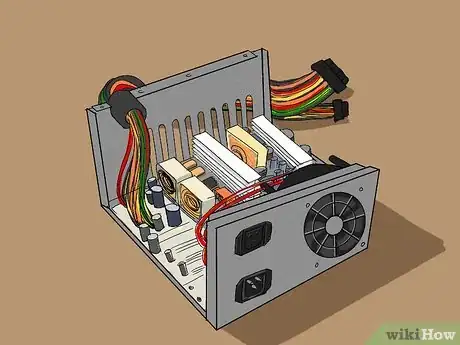
6Open up the power supply unit. Remove the screws connecting the top and the bottom of the PSU case. Then carefully remove the case.
- Warning: Be very careful around the black capacitor caps and all the wires leading to them. They may discharge a strong electric current.
- Warning: This will certainly void any warranty you may have on the power supply unit.
- Warning: Do not remove the circuit board unless you must. The traces and solder on the underside could still have high voltage on them if you didn't let the PSU sit long enough. If you must remove it, use a meter to check for voltage on the pins of the largest capacitors. When you replace the board, make sure that the plastic sheet goes back under the board. Only power supply technicians should attempt this.
- Warning: Anything above 30 milliamps/volts can kill you, or at the very least, give you a painful shock. Make sure that you have removed the power cord before doing the conversion and have discharged the capacitors by letting it rest for a few days. If in doubt, use a multimeter.
-
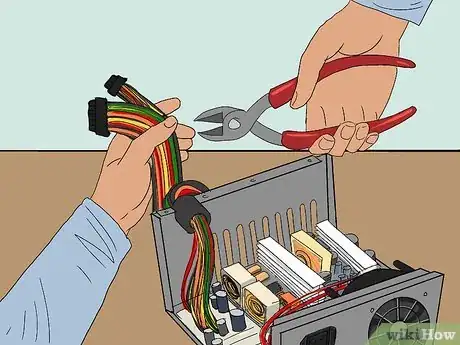
7Cut the connectors off of the wires. The connectors are the plastic parts that connect to the computer's motherboard and other computer components. Leave a few inches of wire on the connectors so that you can use them later on for other projects.
-
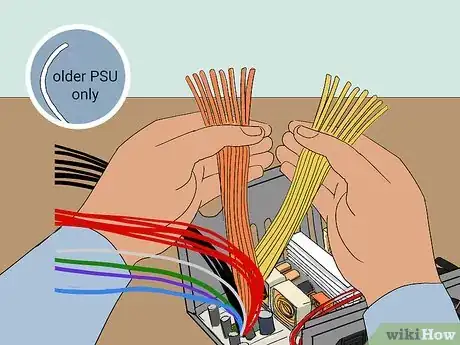
8Bundle wires of the same colors together. Some power supply units may have additional colors, such as brown. The color code for the wires is as follows: [1]
- Red = +5V.
- Yellow = +12V.
- Blue = -12V.
- Orange = +3.3V.
- White = -5V (older power supply units only).
- Purple = +5V Standby.
- Black = Ground (0V),
- Gray = power is on (output).
- Green = PS_ON# (turn DC on by shorting to ground).
-
9Mark where the parts are going to go on the power supply unit casing. Use a permanent marker to mark where all the parts are going to go on the side of the power supply unit that doesn't have any vents, fans, or other components. Mark where you want to put each binding post and what voltage it corresponds to. Also mark where you want to place the LEDs, the switch, and any additional components you want to use.
- To get more room you can mount the fan on the outside of the PSU case or remove it. You can also attach more fans if you are using a high-wattage power supply. If you don't have enough room inside the power supply, you can mount all the components to a separate board outside the power supply unit.
-
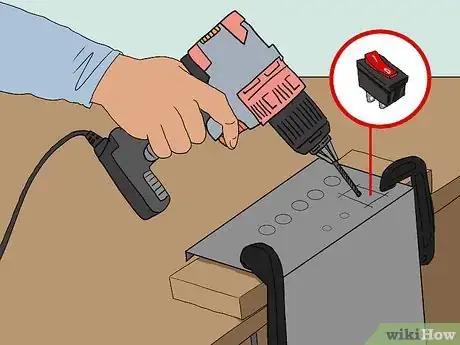
10Drill holes in a free area of the power supply case. Use a Dremel to drill the starting holes followed by a hand reamer to enlarge the holes until they are large enough to fit your binding posts. Also, drill holes for the "Power ON" LED, "Standby" LED, and switch.
- Make sure you don't put any holes where the binding posts will be touching anything on the inside of the power supply.
- Be careful not to leave any metal fillings or debris inside the circuitry of the power supply unit.
-
11Drill holes for the LED lights. Use a drill to drill holes big enough for the LED lights to fit through.
-
12Cut holes for the switch and any additional components. If you don't have the tools to cut a straight line through metal, you can use a drill to drill holes all along the shape of the cut you want to make. Then use wire cutters to cut the space in between each hole. Then you will need to file the edges of the hole down to make them smooth.
Connecting All The Components
-
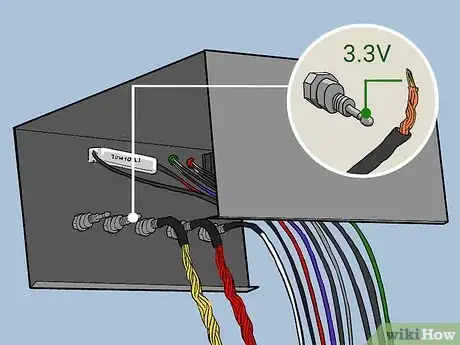
1Attach the binding posts to the holes. Screw the binding posts into their corresponding holes and attach the nut on the back. Make sure they do not touch anything inside the power supply.
-
2Connect the 10-ohm load resistor. Connect one of the red wires to the power resistor and one black wire to the other end of the 10-ohm power resistor. This acts as a load, which the power supply unit needs to function properly. The power resistor will give off a lot of heat and should be mounted on the metal wall for proper cooling (or a heat sink mount). Make sure it doesn't short-circuit anything.
- You can also consider using a lighted 12v switch, which will act as the load necessary to turn on the power supply.
- If you aren't afraid of some soldering, you can replace the 10w power resistor with the cooling fan that was originally inside the PSU, be careful with the polarity though - match the red and black wires to each other.
-
3Connect the switch. Connect one green (PS_ON) wire to one end of the SPST switch. Connect the other end of the switch to a black ground wire.
- Some power supplies need the grey and green to be connected together in order to run.
- If you don't want to use an additional switch, just connect the green and black wires together. The PSU will be controlled by the rear switch, if there is one. You also don't need an LED, just ignore the gray wire. Cut it short and insulate it from the rest.
-
4Connect the Power-On LED. Connect the grey (Power On) wire to the anode (long end) to the red LED. This will be your power-on light.
-
5Connect the Power-On LED to a 330-ohm resistor. Connect the cathode (short end) of the LED to the anode of one of the 330 ohm dropping resistors. Then connect the cathode of the dropping resistor to a black ground wire. Once the LED is connected, you can use hot glue or super glue to mount the LED in its place. You can solder the wires directly to the anodes and cathodes of the LEDs and resistors. Cover the wires with heat shrink tubes. You can cover the resistors with heat shrink tubes too.
-
6Connect the Standby LED. Connect the purple (standby) wire to the anode (long end) to the green LED. This will be your standby light.
- The +5VSB line is +5V standby (so the motherboard's power buttons, Wake on LAN, etc. work). This typically provides 500-1000 mA of current, even when the main DC outputs are "off". It might be useful to drive an LED from this as an indication that the mains are on.
-
7Connect the Standby LED to the 330-ohm resistor. Connect the cathode (short end) of the LED to the anode of one of the 330-ohm dropping resistors. Connect the cathode of the resistor to a black ground wire. Cover the wires with heat shrink tubes. You can cover the resistors with heat shrink tubes too.
-
8Connect the white to the -5V binding post (if present). -5V lines are only used on older ATX power supplies. Connect the white wire to the -5V binding post, if you have one. Make sure the wires are covered with heat shrink tubes (recommended) or electrical tape.
- Look for ATX power supplies with a 20-pin connector, a 20+4-pin connector, or an AT power supply if you need -5V.
-
9Connect the remaining red wires to the +5V binding post. Strip all the red wires so that bare wire is exposed at the ends of the red wires. Then solder them all together and solder them to the +5V binding post. Make sure the wires are covered with heat shrink tubing.
- If you only have three red wires, another wire (sometimes pink) must be connected to them.
-
10Connect the yellow wires to the +12V binding post. Strip all the yellow wires so that bare wire is exposed at the ends of the yellow wires. Then solder them all together and solder them to the +12V binding post. Make sure the wires are covered with heat shrink tubing.
-
11Connect the orange wires to the 3.3V binding post. Strip all the orange wires so that bare wire is exposed at the ends of the orange wires. Then solder them all together and solder them to the +3.3V binding post. Make sure the wires are covered with heat shrink tubing.
- Note that some power supplies may have either a gray or brown wire to represent "power good"/"power ok". (Most PSU's have a smaller orange wire that is used for sensing— 3.3V—and this wire is usually paired at the connector to another orange wire. Make sure this wire is connected to the other orange wires, otherwise your lab power supply won't stay on.) This wire should be connected to either an orange wire (+3.3V) or a red wire (+5V) for the power supply to function. When in doubt, try the lower voltage first (+3.3V).
- Some newer power supplies will have "voltage sense" wires that need to be connected to the actual voltage wires for proper operation. If you only have two or less orange wires, you should also have a brown wire which must be connected with the orange.
-
12Connect the remaining black wires to the ground binding post. Strip all the black wires so that bare wire is exposed at the ends of the black wires. Then solder them all together and solder them to the +3.3V bind post. Make sure the wires are covered with heat shrink tubing.
- Check for loose connections by gently tugging on them. Inspect for bare wires, and cover them to prevent a short circuit.
- If you don't feel like soldering nine wires together to a binding post (as is the case with the ground wires) you can snip them at the PCB. 1-3 wires should be fine. This includes cutting any wires that you don't ever plan on using.
-
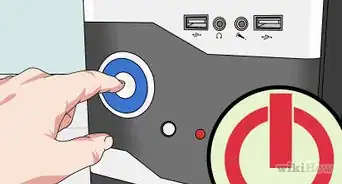
13Test the power supply. Plug the power cable into the back of the power supply and into an AC socket. Flip the main cutoff switch on the PSU if there is one. Check to see if the standby LED light comes on. Then flip to switch and make sure the Power On LED comes on. Use a digital voltmeter to test each of the binding posts. Make sure you do not short any wires out. It should look good and work like a charm!
-
14Reattach the casing. Once everything is working, you can go ahead and reattach the casing with all the binding posts, switch and LEDs to the rest of the power supply unit.
- The voltages that can be output by this unit are 24v (+12, -12), 17v (+5, -12), 12v (+12, GND), 10v (+5, -5), 7v (+12, +5), 5v (+5, GND) which should be sufficient for most electrical testing.
Expert Q&A
-
QuestionI actually want to remove and replace just the plug on one of my power cords—how do I do that?
 Marvin WooMarvin Woo is a licensed electrician and the Owner of Woo's Electrical & Appliance based in East O’ahu. With over two decades of experience, he specializes in troubleshooting issues and maintaining residential electrical systems. Marvin is both licensed and insured to complete electrical work in the state of Hawaii.
Licensed Electrician Disconnect from the power cord from the power supply and cut off the old plug. Strip away any excess length from the bundle sheathing and conductor insulation of your power cord so they'll fit into your replacement plug. Reconnect the wires one at a time to match the original polarity and ground.
 -
QuestionHow do I check the wattage of my AC circuit using a multimeter?
 Marvin WooMarvin Woo is a licensed electrician and the Owner of Woo's Electrical & Appliance based in East O’ahu. With over two decades of experience, he specializes in troubleshooting issues and maintaining residential electrical systems. Marvin is both licensed and insured to complete electrical work in the state of Hawaii.
Licensed Electrician When checking wattage for an AC circuit, I prefer to use a clamp on multimeter. Clamp onto one line of wire and take your reading (which will usually be in amps). Multiply that figure by the voltage of the circuit to determine the wattage.
 -
QuestionCan I convert a computer ATX power supply to use for a ham radio?
 Community AnswerYes, except that your radio may need 13.8 volts which will require a specific power supply but may still function. Check your manual for input voltage range (11.5 - 14v) for example so 12 v will work in this case.
Warnings
- Do not touch any lines leading to capacitors. Capacitors are cylinders, wrapped in a thin plastic sheath, with exposed metal at the top with a + or K usually. Solid-state capacitors are shorter, a little wider in diameter, and do not have a plastic sheath. They retain a charge much like batteries do, but unlike batteries, they can discharge extremely fast. Even if you have discharged the unit, you should avoid touching any points on the board except where necessary. Use a probe to connect anything you might touch to the ground before beginning any work.⧼thumbs_response⧽
- The resulting power supply will provide high-output power. It might happen you create an electric arc at the low voltage outputs or fry the circuit you are working on, if you make any mistake. Lab PSUs have adjustable current limitations for a reason.⧼thumbs_response⧽
- Ensure that you discharge the capacitors. Plug in the power supply, turn on the power (short the Power (green) wire to the ground, then unplug the power supply until the fan stops spinning.⧼thumbs_response⧽
- Make sure you are NOT grounded when working on power supplies so that power doesn't flow through you to the ground.⧼thumbs_response⧽
Things You'll Need
- An ATX power supply of any rating above 150 Watt (can be found from an obsolete computer, online, or at your local computer store). It should NOT be modular.
- Wire cutters
- Needle nose pliers
- Drill
- Reamer
- Soldering Iron & Solder
- Electrical Tape
- Heat Shrink Tubing & a heat gun or hair dryer
- Binding posts
- LED
- Current limiting resistor for the LED (330 ohms)
- Power resistor to load the power supply
- Low Wattage Switch
- Computer Power Cable
References
About This Article
1. Aquire an ATX power supply.
2. Drain the power and open the power supply.
3. Cut connectors off all the wires and separate them by color.
4. Connect a red wire to a 10 ohm power resistor, then connect it to a black ground wire.
5. Connect the green wire to the switch and connect the other end to a black ground wire.
6. Connect the grey wire to the anode of your power-on LED.
7. Connect the purple wire to the anode of your Standby LED.
8. Connect the cathode of both LEDs to a 330 ohm resistor and connect them to a black ground wire.
9. Connect the remaining red wires to the +5V binding post.
10. Connect the yellow wires to the +12 V binding post.
11. Connect the orange wires to the +3.3 V binding post.
12. Connect the remaining black ground wires to the ground binding post.
13. Put it back together and test it.

