This article was co-authored by Jami Yaeger. Jami Yaeger is a Parenting Specialist, Doula, and the Owner of AustinBorn, an online community offering comprehensive and modern education to growing families. With 10 years of experience, Jami specializes in whole family support for pregnancy, birth, postpartum, and parenting. Jami earned her BA in Theatre Performance from San Diego State University and earned her Certification as a Lactation Education Counselor from the University of California, San Diego. She is a Certified Infant and Child CPR Instructor, Birth and Postpartum Doula, and Childbirth Educator.
This article has been viewed 80,467 times.
Bedwetting is a pretty common thing for kids, especially during and after potty training. However, some kids may continue to bedwet for longer. Changing a bedwetting diaper is similar to changing a baby or toddler’s diaper. You’ll have to set up a particular area for diaper changes. Your child may even be able to help with some parts of the process, depending on their age, abilities, and alertness.
Steps
Checking Your Child and Setting up
-
1Determine if your child needs their diaper changed. Some diapers have a strip that changes colors when they are wet, while others will simply feel damp. If your child can tell you their diaper is wet, then this is another way to check.
- Make sure to feel your child’s clothing and sheets to see if you need to change those along with the diaper.
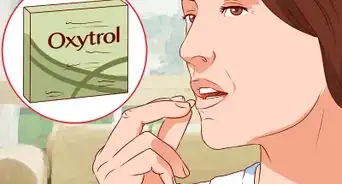
- Reassure your child and avoid scolding them for a wet diaper. Offering reassurance to your child can reduce any stress or frustration they may be feeling after wetting the bed, which may help reduce future bedwetting.[1]
-
2Gather everything you will need before you start the diaper change. Gather the wipes, a clean diaper, ointment or diaper cream, a towel or changing pad, and fresh clothes if you need them. Having everything together before you begin will make the diaper change easier, and you will also not need to leave your child’s side during the change.[2] This is especially important when changing a young child, who might roll off the bed and get hurt.[3]Advertisement
-
3Put down a changing pad or large towel on the changing surface. This is important to protect the changing surface from wetness. You can change your child on their bed or the floor. Just make sure to cover the area with a towel or changing pad first.[4]
- If your child is a toddler, then you may still be able to use their changing table, if you have one. However, a changing table will not be big enough for an older child.
- If your child is awake and alert, you may also allow them to stand for the diaper change, such as in the bathroom or their bedroom.


Removing the Soiled Diaper
-
1Help your child lay down on the changing pad or towel. Have your child lay on their back and ensure that their bottom is over the pad. If your child is incapable of moving to the changing area, you may need to pick them up and place them onto the changing pad.[5]
- You can also do a diaper-change with your child in a standing position. However, this should only be used if the child is still wide-awake when they need their diaper changed.
-
2Remove any clothing that has been soiled. If your child’s diaper leaked, then they may have wet pajamas as well. Remove any wet or damp clothing and place it on the floor or toss it into a nearby hamper.[6]
-
3Unfasten the diaper and tuck it between your child’s legs to remove it. Unfasten the diaper’s tabs and pull the front part of the diaper down and away from your child’s body. Lift your child’s bottom slightly by grasping their ankles, or instruct them to lift their bottom if they are awake and alert. Then, pull the diaper out from under them.[7]
- If your child is standing up, then you can simply let the diaper drop to the floor when you unfasten it or pull it down.
-
4Wipe your child's genital area. Get a baby wipe and wipe your child’s genitals and the surrounding area. Then, wipe your child’s bottom. If the diaper leaked, then wipe any other parts of your child’s body that came into contact with urine.[8]
- For female children, make sure to wipe away from their genitals going from front to back. This is especially important if there is any solid waste.
-
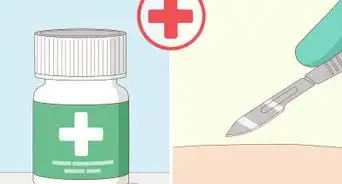
5Apply cream or ointment to protect the skin inside the diaper. After your child is clean, apply a small amount of diaper cream or ointment to your fingertip. Then, rub the ointment onto your child’s genital area, bottom, and in the folds of skin between their legs and crotch.[9]
- Diaper creams with zinc oxide will provide a barrier against moisture.
Tip: A petroleum-based ointment will help to soothe your child’s skin if it is irritated.[10]


Putting on a New Diaper
-
1Slide a new diaper under your child’s bottom if it’s a tab-style diaper. If the bedwetting diaper fastens with tabs in the front, open it up completely and slip it under your child’s bottom. Bring the diaper's front up between your child’s legs and fasten the tabs in the front of the diaper.
- Make sure that the back of the diaper is under their bottom. This side should be marked on the diaper or have tabs on it.
-
2Help your child slip into their new bedwetting diaper if it is a pull-up. Put your hands on both of the insides of the diaper so that you can help your child slip the diaper on without much fuss. Get them to insert their legs one-at-a-time into each of the leg holes. Pay attention to the diaper's side inserted into, to ensure the diaper goes on properly.[11]
Tip: If you’re changing a boy’s diaper, make sure that their penis is pointing downwards before you fasten the diaper. This will help to ensure that the diaper won’t leak.[12]
-
3Put new clothing on if their clothes were soiled. Put on a new pair of pajamas, a clean shirt clean, socks, or any other clean items needed if you had to remove soiled items. If your child is getting up for the day, then put them into their daytime clothing.[13]
- If your child can dress themselves, gently instruct them to do so, such as by saying, “Here are some nice, clean pajamas. Go ahead and put these on so you will be more comfortable.”
- If you have not done so already, make sure to check your child’s sheets and change them if they are wet.
-
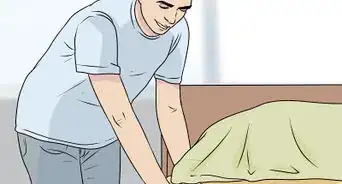
4Get your child back into bed if it’s still night time. If you are doing a diaper change in the middle of the night, get your child back into their bed after changing their diaper and clothing. Guide your child gently back into bed or place them into bed if they cannot climb into bed independently.
- If you use a bedwetting alarm, then make sure to reset it when you get your child back into bed.
-
5Clean up the mess from the changing surface. Throw the soiled diaper and wipes into a diaper pail or a garbage can with a tight-fitting lid. Then, place any soiled clothing, bedsheets, and blankets into a hamper or put them right into a washing machine. Fold or roll up the changing pad to use again the next time you need to do a diaper change.[14]
-
6Wash your hands after you finish cleaning up. Hold your hands under warm, running water and apply about 1 teaspoon (5 mL) of hand soap. Rub the soap between your hands and fingers for about 20 seconds. Then, rinse the soap off and dry your hands with a clean, dry towel.[15]
- To time yourself while you wash your hands, try humming the happy birthday song 2 times. This should take about 20 seconds.


Things You'll Need
- Disposable bedwetting diaper
- Trash can
- Baby wipes
- Diaper rash ointment or cream
- Clean clothes (if clothing is soiled)
- Clean sheets and blankets (if the bedding is soiled)


References
- ↑ https://www.mayoclinic.org/diseases-conditions/bed-wetting/diagnosis-treatment/drc-20366711
- ↑ Jami Yaeger. Parenting Specialist. Expert Interview. 29 September 2020.
- ↑ https://www.cdc.gov/healthywater/hygiene/diapering/childcare.html
- ↑ https://americanpregnancy.org/first-year-of-life/changing-a-diaper/
- ↑ https://americanpregnancy.org/first-year-of-life/changing-a-diaper/
- ↑ https://americanpregnancy.org/first-year-of-life/changing-a-diaper/
- ↑ https://americanpregnancy.org/first-year-of-life/changing-a-diaper/
- ↑ https://americanpregnancy.org/first-year-of-life/changing-a-diaper/
- ↑ https://americanpregnancy.org/first-year-of-life/changing-a-diaper/
- ↑ https://kidshealth.org/en/parents/diapering.html
- ↑ https://americanpregnancy.org/first-year-of-life/changing-a-diaper/
- ↑ https://kidshealth.org/en/parents/diapering.html
- ↑ https://americanpregnancy.org/first-year-of-life/changing-a-diaper/
- ↑ https://www.cdc.gov/healthywater/hygiene/diapering/childcare.html
- ↑ https://www.cdc.gov/healthywater/hygiene/diapering/childcare.html
About This Article