wikiHow is a “wiki,” similar to Wikipedia, which means that many of our articles are co-written by multiple authors. To create this article, 20 people, some anonymous, worked to edit and improve it over time.
The wikiHow Tech Team also followed the article's instructions and verified that they work.
This article has been viewed 238,700 times.
Learn more...
There are many reasons why a person would want to change his or her IP address. This tutorial will show you how to change the IP address of a wired or wireless computer, not the IP address of an internet connection. (To do this, you need to contact your service provider.) Read on to find out how to change your IP address on both a Windows and Mac computer.
Steps
Changing Your IP Address on Windows
-
1Disable your internet connection. Are you ready to get your geek on? Follow these steps to easily disable your internet:
- Press the Windows key and R to get to the Run dialog.
- Then press Command and Enter.
- Finally, type in "ipconfig /release" and press Enter.
-
2Open the Control Panel. Go to Network And Internet → Network and Sharing Center → Change adapter settings.Advertisement
-
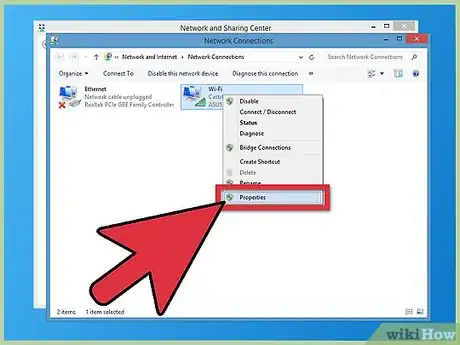
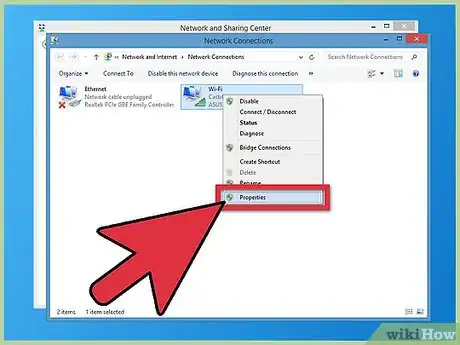
3Right click on the internet connection that you are using. (Your internet connection may be called "Local Area Connection" or "Wireless Internet Connection.") Click properties. If prompted, type in an admin code to continue.
-
4Find the Networking tab. Open it, and click on the Internet Protocol Version 4 (TCP/IPv4). Press the Properties button.
-
5In the general tab, click "Use the following IP address" (if it isn't highlighted already). Type in a string of ones, so that your new IP address says 111-111-111-111.
-
6Press the tab key on your keypad to fill the Subnet Mask area with automatically-generated numbers. Click "ok" twice to bring you back to the "Local Area Connection" screen.
-
7Understand that a dialog box may pop up. A dialog box saying "Since this connection is currently active, some settings will not take effect until the next time you dial it" may pop up. This is normal. Click "ok."Image:Change Your IP Address Step 7.jpg
-
8Right-click again on your local connection, selecting "Properties."
-
9Under the Networking tab, click on the Internet Protocol Version 4 (TCP/IPv4). Press the Properties button.
-
10Check the box "Obtain an IP address automatically." Close the 2 properties box again and connect to the web. Your computer should have a new IP address.
Changing Your IP Address on Mac OS
-
1Open your Safari browser.
-
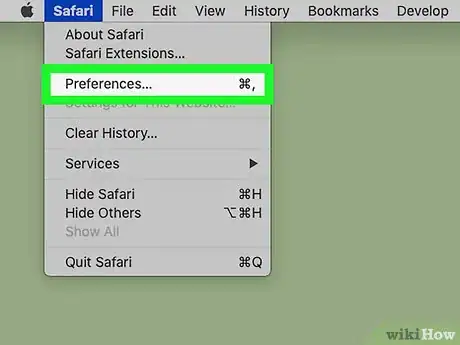
2Under the Safari dropdown menu, select Preferences.
-
3Navigate to the Advanced tab.
-
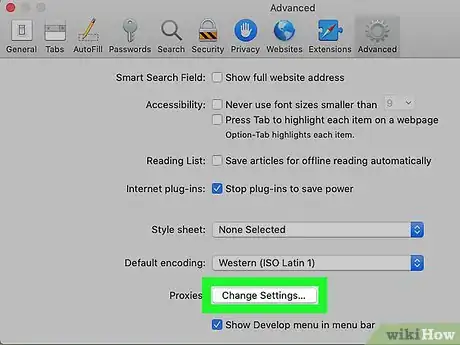
4Locate the Proxies category and click on "Change Settings...." This will open up your network preferences.
-
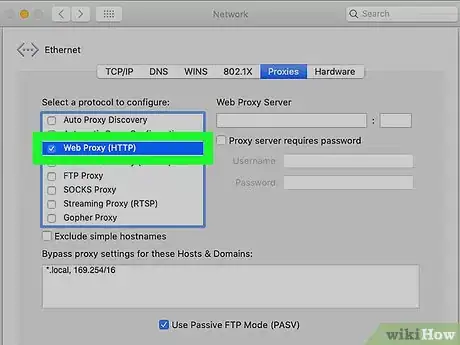
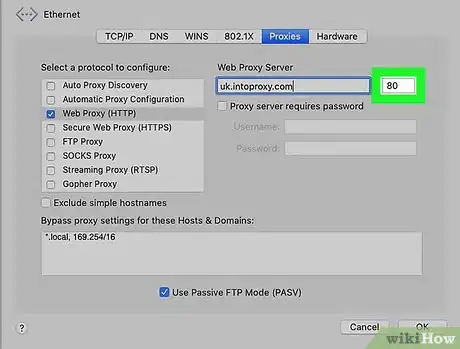
5Check the box Web Proxy (HTTP).
-
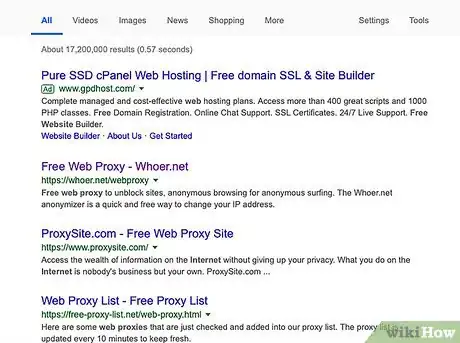
6Find an appropriate IP address that will serve as your Web Proxy server. You can do this a number of ways. Perhaps the most efficient way is to find a website that offers free proxy server.
-
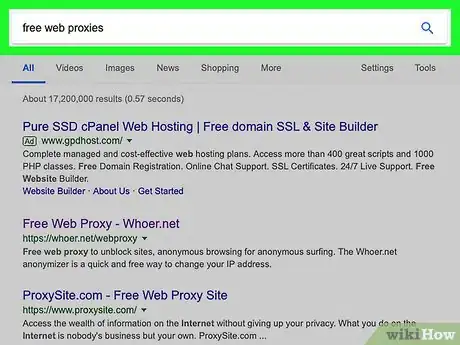
7Type in "free web proxies" into a search engine and navigate to a reputable site. This site should offer free web proxies, clearly indicating several different factors:
- Country
- Speed
- Connection time
- Type
-
8Find an appropriate web proxy and type in the proxy IP address into the Web Proxy Server box in your network preferences.
-
9Type in the port number. This should also be displayed on your free web proxy website, along with the IP address. Make sure the two correspond.
-
10Click "ok" and the "apply" to enact the changes you made. Begin browsing. You may be redirected to a webpage for several seconds before you are allowed to proceed. Enjoy!
Community Q&A
-
QuestionHow can I change my e-mail address?
 Community AnswerYou can check out the website's "Help" or "Support" section to find out how your e-mail provider handles this process.
Warnings
- Sometimes, if they're really lucky (or you're really unlucky and got a bad IP address) they might even pinpoint your district!⧼thumbs_response⧽
- For Windows 7 only. Other OS users such as Mac and Linux try another website.⧼thumbs_response⧽
- Sadly, however many times you change your IP address, websites can still pinpoint your country and (if lucky) your city.⧼thumbs_response⧽
- It might not work every time. This is why you need to check using the website shown at Tips.⧼thumbs_response⧽
References
About This Article
1. Disable your internet connection.
2. Open Control Panel.
3. Open Network and Sharing Center.
4. Right-click the connection and select Properties.
5. Open TCP/IP IPv4 properties.
6. Specify 111.111.111.111 as the IP.
7. Press the Tab key and then click OK.
8. Re-open TCP/IP IPv4 properties.
9. Select "Obtain an IP address automatically."
10. Click OK.









-Step-23-Version-2.webp)



-Step-23-Version-2.webp)
