This article was co-authored by Ed Kuoha and by wikiHow staff writer, Jessica Gibson. Ed Kuoha is a Chef and the Owner of Kuoha Culinary based in Aiea, Hawaii. He has more than 20 years of experience in various culinary kitchens and settings such as Morimoto Waikiki, where he received hands-on training from Iron Chef Morimoto. Chef Ed specializes in small catering events and private chef requests. He holds an Associate’s degree from The Culinary Institute of the Pacific at Kapiolani Community College.
There are 9 references cited in this article, which can be found at the bottom of the page.
This article has been viewed 18,886 times.
Have you been frying food in the same oil for a while? If you're not sure when you changed your deep fryer oil last, take a minute to check the oil quality. It's pretty easy to tell when oil is old and needs to be replaced. As long as you dispose of the old oil properly, there's really nothing tricky about cleaning out the fryer and filling it with fresh oil. Read on to learn how often you should change deep fryer oil–and the telltale signs that you've waited too long!
Steps
Checking the Oil Quality
-
1Sniff the oil to tell if it smells rancid instead of neutral. If you open the lid to your deep fryer and catch a whiff of acrid, nasty smelling oil, it's definitely time to change it! Usable oil should smell neutral so it doesn't add an unpleasant flavor to your food.[1]
- If you're frying food and it smells like the oil is burning, it might be because there are too many food particles in the oil that are burning.
-
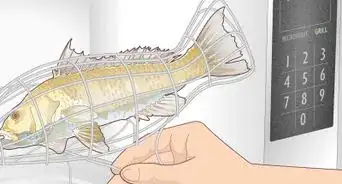
2Pay attention to a burnt flavor in your fried food. Your fries, wings, or donuts should taste delicious, not stale or burnt! If your fried food starts tasting off or stale, switch out the oil and fry a new batch. You'll probably be surprised at the difference.[2]Advertisement
-
3Replace the oil when it looks cloudy or your fried food looks darker than usual. Scoop out some of the oil in a clear glass so you can see it easily. If the oil looks cloudy, dark, has foam on top, or you see dark bits at the bottom, it's probably old. Don't forget to pay attention to the color of your fried food. If you're noticing foods are looking darker, particles in the oil might be burning as you fry.[3]
- Still not sure if you should keep the oil? Hold up a fresh bottle of oil and compare the colors. If your oil is considerably darker, change it.
-
4Change the oil more often if you frequently fry breaded food. When you fry breaded things like fish sticks or chicken tenders, bits of the breading fall off and break down in the oil. Plan on changing the oil after 3 or 4 uses if you mainly fry breaded things.[4]
- Battered foods like onion rings also leave behind particles, but they're not as big so you can get away with about a dozen uses before changing the oil.
-
5Replace oil every 1 to 2 months regardless of how it looks or smells. It's easy to spot signs that your oil needs replacing if you fry with it a lot. However, if you don't fry very often, the oil might not look bad even though it might be turning rancid. Plan on changing the oil at least every 2 months so you know you're frying in the best-tasting oil.[5]
- Make a note when you change the oil so you know the next time you need to replace it.


Changing the Oil
-
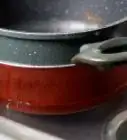
1Unplug the fryer and let the oil cool completely. It's really easy to burn yourself with oil that's still hot, so turn off the fryer and unplug it. Leave the oil alone for at least 2 hours or until it's at room temperature.[6]
- Cooling the oil gives the deep fryer a chance to cool down too.
-
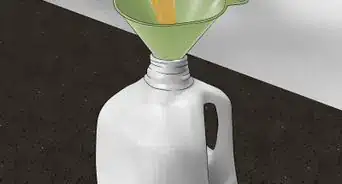
2Set a funnel in a sturdy disposable container. If you kept the original oil containers, great! You can fill them back up with the old oil. Don't worry if you didn't hang on to them—use any sturdy container with a screw-on lid. Open your container and set a funnel in it to minimize the mess.[7]
- For example, use an empty plastic milk jug or soda bottle. If you're draining a commercial deep fryer, you'll probably want to drain the oil into a large disposable bucket.
- Oil is a liquid, but that doesn't mean it's safe for your pipes! If you pour oil in the sink or flush it down the toilet, it will coat the pipes and can lead to serious clogs so never pour it down the drain.
-
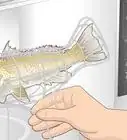
3Drain the old oil into the disposable container and seal it closed. Remove the fryer basket and set it aside. Then, lift the removable pot that holds the oil and slowly pour it through the funnel into the container. It might help to have someone hold the funnel in place while you pour.[8]
- Some home or commercial deep fryers have a spout in the side that you open to let the oil drain out. If yours has a spout, just put your container right under it to catch the flowing oil.
-
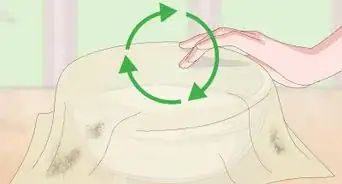
4Strain the oil through cheesecloth if you plan on using it again. If you're planning to reuse the oil, place a fine-mesh strainer into a large bowl and line the strainer with cheesecloth. Pour the oil through the cheesecloth and then transfer your purified oil to a clean storage container.[9]
- Store the oil in the fridge until you're ready to fry again and plan on using the oil within 3 months.
-
5Check for used oil drop spots in your community. Don't want to throw away all that oil? Check your city's waste management website to find out if recycling sites accept used oil. Sometimes, the oil can be used to make biodiesel fuel. Your community might accept the oil at specific sites or at hazardous waste collection events.[10]
- If you're not finding much info on your community's site, run a search on a recycling website like www.earth911.com.
-
6Throw the container of used oil in the trash if you can't recycle it. Once you screw the lid on the container, just stick it into your regular trash for pick up. Most liquid cooking oils won't harden so don't wait or try to chill your container of oil before you put it in the trash.[11]
- Are you cleaning a commercial deep fryer? Check your restaurant's grease disposal policies before you throw oil in the trash since many restaurants pay for grease removal and recycling.
-
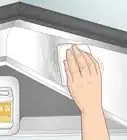
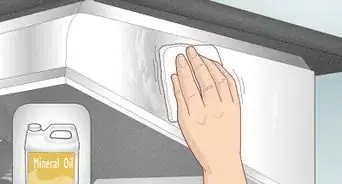
7Read your owner's manual to find out which parts of the fryer to wash. The manual tells you which parts are safe to stick in the dishwasher or which ones you should wash by hand. Don't forget to clean the fryer basket too. Then, thoroughly dry all the parts of the deep fryer before you put it back together.[12]
- Never use harsh cleansers like oven cleaner on your deep fryer since you can damage it.
-
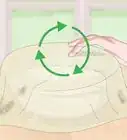
8Scrub the inside of the fryer if you're cleaning a commercial fryer. Since commercial deep fryers have different cleaning guidelines, read the manual for your model. You'll probably need to scrub away built-on grease with a wire brush and fill the fryer half full of hot water. Then, toss in a fryer boil-out puck or 1 cup (240 ml) of degreaser and bring the liquid to a boil for 15 minutes. Don't forget to rinse and dry the fryer thoroughly before you add fresh oil.[13]
- You can drain the rinsed solution directly into your restaurant's floor drain if it's near the fryer. If it isn't, drain it into a bucket and pour it out.
- It's a good idea to wear gloves and eye protection when you work with degreaser since it can splatter onto your skin while you're working.
-
9Pour new cooking oil into your deep fryer when you're ready to use it again. You can leave oil in the deep fryer in between uses, but it will turn rancid faster since it's exposed to more oxygen. Instead, wait until you're ready to fry something before you fill the fryer with fresh cooking oil.
- Remember to use an oil with a high smoke point. Fry with corn, canola, or peanut oil, for instance.


Warnings
- Never pour oil down the drain since it can clog your drains and cause environmental damage if it gets into the nearby ecosystem.[14]⧼thumbs_response⧽
Things You'll Need
- Sturdy disposable container
- Funnel
- Scrub brush
- Decreaser or boil-out puck, optional
- Fine-mesh strainer, optional
- Cheesecloth, optional


References
- ↑ https://www.fsis.usda.gov/wps/wcm/connect/65f762d0-e4d0-4278-b5cb-2836854a3eda/Deep_Fat_Frying.pdf?MOD=AJPERES
- ↑ https://www.epicurious.com/expert-advice/you-can-reuse-frying-oil-article
- ↑ https://www.epicurious.com/expert-advice/you-can-reuse-frying-oil-article
- ↑ https://www.seriouseats.com/2013/09/ask-the-food-lab-how-many-times-can-i-reuse-fry-oil.html
- ↑ https://www.epicurious.com/expert-advice/you-can-reuse-frying-oil-article
- ↑ https://www.fsis.usda.gov/wps/portal/fsis/topics/food-safety-education/get-answers/food-safety-fact-sheets/safe-food-handling/deep-fat-frying-and-food-safety/ct_index
- ↑ https://www.bobvila.com/articles/how-to-dispose-cooking-oil/
- ↑ https://youtu.be/9KywJLt26RM?t=133
- ↑ https://www.fsis.usda.gov/wps/portal/fsis/topics/food-safety-education/get-answers/food-safety-fact-sheets/safe-food-handling/deep-fat-frying-and-food-safety/ct_index
- ↑ https://search.earth911.com/?what=Cooking+Oil
- ↑ https://www.fsis.usda.gov/wps/portal/fsis/topics/food-safety-education/get-answers/food-safety-fact-sheets/safe-food-handling/deep-fat-frying-and-food-safety/ct_index
- ↑ https://youtu.be/4VVPepv9X1g?t=50
- ↑ https://youtu.be/d9sY5Q7Q6rA?t=316
- ↑ https://www.fsis.usda.gov/wps/wcm/connect/65f762d0-e4d0-4278-b5cb-2836854a3eda/Deep_Fat_Frying.pdf?MOD=AJPERES
About This Article