This article was co-authored by Jen Webber. Jen Webber is a Knitting Specialist and the Manager of The Quarter Stitch, a crafting store based in the French Quarter of New Orleans, Louisiana. With over 17 years of knitting and crafting experience, Jen helps educate customers and the public on best knitting practices for their DIY projects.
wikiHow marks an article as reader-approved once it receives enough positive feedback. This article received 20 testimonials and 83% of readers who voted found it helpful, earning it our reader-approved status.
This article has been viewed 1,629,948 times.
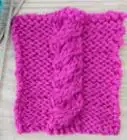
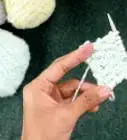
When you're finished knitting, you need to cast off (also referred to as binding off) your last row of stitches to make an edge that won't unravel. Depending on your project, there are a few different ways that you can cast off. You can do a standard straight edge cast off, a stretchy cast off, an I-cord cast off, or a picot cast off.
Steps
Using the Standard Cast Off
-
1Knit the first two stitches. Start by knitting the first two stitches moving from the left needle onto the right needle.[1]
-
2Insert the left needle into the first stitch. Push the tip of the left needle into the first stitch that you made on the right needle.[2]Advertisement
-
3Lift the first stitch over the second stitch. To bind off the first stitch, use the needle to lift the first stitch up and over the second stitch and then drop it off the right needle. Knit another stitch from the left needle and do the same thing again.[3]
-
4Repeat the process. Do this with each stitch until there are no stitches on the left needle and just one stitch remains on the right needle.
-
5Cut the yarn, leaving a 6 inch (15.2 cm) end. With your fingers, gently pull on the last stitch to make it a little bit bigger. Then pull the end of the yarn all the way through the loop, take the needle out and pull the yarn tight. Sew a few inches of that yarn through the stitches to anchor it.
Using the Stretchy Cast Off
-
1Knit two together. The stretchy cast off is a nice way to give your finished edge a little more stretch than the standard cast off method does. Start by knitting the first two stitches together. Slip the working needle behind the one that has all of your stitches on it and then loop the yarn over the needle and pull it through both stitches.[4]
-
2Slip the new stitch back onto the left needle. You should now have one new stitch on your right needle. Slip this stitch back onto the left needle.[5]
-
3Repeat the process. To continue the stretchy cast off, repeat the process. Knit two together again and then slip the new stitch back to the other needle again. Keep going until you reach the end of your project.[6]
Using the I-Cord Cast Off
-
1
-
2Knit two. Knit the first two stitches individually by inserting the needle into the back loop, yarning over, and pulling through the loop as you let it slide off the needle.[8]
-
3Knit two together. You will need to knit the next two stitches together for this cast off method. Insert the needle through the back of both loops and yarn over. Then, pull through both loops and let them slip off the needle as you transfer the new loop to the opposite needle.[9]
-
4Slip stitches back onto left needle. At this point, you should have three stitches on your right needle. Transfer these back over to the left needle to continue the I-cord cast off.[10]
-
5Repeat to the end. Cast on three stitches again and repeat the rest of the process as you did before. Keep repeating this sequence to the end of the project.[11]
Using the Picot Cast Off
-
1
-
2Knit two stitches. Knit the first two stitches normally. Insert the needle behind the loop, yarn over, and pull the new loop through as you let the old stitch slip off.[13]
-
3Loop the first stitch over the second stitch. Next, you will be binding off with the two new stitches you just made. Take the first stitch in your row and loop it over the second stitch in the row. Slide the first stitch off the needle as you loop it over the second stitch.[14]
-
4Knit one and pass the first stitch over the second stitch. To create the picots, knit one and then pass the stitch in front of it over the new stitch. Do this a total of three times to create the picots.[15]
-
5Repeat the process. After your third picot, cast on two stitches again and repeat the process. Keep going until you reach the end of your project.[16]
Expert Q&A
-
QuestionWhat are the things you should do when you finish a knitting project?
 Jen WebberJen Webber is a Knitting Specialist and the Manager of The Quarter Stitch, a crafting store based in the French Quarter of New Orleans, Louisiana. With over 17 years of knitting and crafting experience, Jen helps educate customers and the public on best knitting practices for their DIY projects.
Knitting Specialist After knitting, you should soak or steam the item and let it dry to even out the stitches. It is known as blocking. Besides this, when you sew the pieces, your sewing should match the tension of the knitted pieces.
 -
QuestionHow do you choose a yarn for knitting?
 Jen WebberJen Webber is a Knitting Specialist and the Manager of The Quarter Stitch, a crafting store based in the French Quarter of New Orleans, Louisiana. With over 17 years of knitting and crafting experience, Jen helps educate customers and the public on best knitting practices for their DIY projects.
Knitting Specialist You can check the label on the yarn. It will tell you the length and weight of the skein. It will also let you know the material of the knitting yarn and suggest needle sizes.
 -
QuestionHow do you become great at knitting?
 Community AnswerPractice. Just keep practicing by knitting plenty of things and you'll soon get the knack of it. Soon doing it will be second nature.
Things You'll Need
- Finished knitting project
- Knitting needles
- Scissors
- Yarn needle
References
- ↑ https://www.youtube.com/watch
- ↑ https://www.youtube.com/watch
- ↑ https://www.youtube.com/watch
- ↑ http://www.interweave.com/article/knitting/a-stretchier-bind-off/
- ↑ http://www.interweave.com/article/knitting/a-stretchier-bind-off/
- ↑ http://www.interweave.com/article/knitting/a-stretchier-bind-off/
- ↑ http://newstitchaday.com/how-to-knit-the-i-cord-bind-off/
- ↑ http://newstitchaday.com/how-to-knit-the-i-cord-bind-off/
- ↑ http://newstitchaday.com/how-to-knit-the-i-cord-bind-off/
- ↑ http://newstitchaday.com/how-to-knit-the-i-cord-bind-off/
- ↑ http://newstitchaday.com/how-to-knit-the-i-cord-bind-off/
- ↑ http://newstitchaday.com/how-to-knit-the-picot-bind-off/
- ↑ http://newstitchaday.com/how-to-knit-the-picot-bind-off/
- ↑ http://newstitchaday.com/how-to-knit-the-picot-bind-off/
- ↑ http://newstitchaday.com/how-to-knit-the-picot-bind-off/
- ↑ http://newstitchaday.com/how-to-knit-the-picot-bind-off/
- Videojug:How to Cast Off - Source of information. Used with permission
About This Article
To cast off when you’ve finished knitting, start with the needle that’s holding the project in your left hand and the other needle in your right hand. Then, knit one regular stitch from the left needle onto the right needle. Repeat one more time so there are 2 regular stitches on the right needle. Now, insert the tip of the left needle into the first stitch on the right needle, and lift the first stitch up over the top of the second stitch. Next, knit another regular stitch onto the right needle. Insert the tip of the left needle into the first stitch on the right needle, and lift it up over the second stitch like you did before. Continue the process until you’ve cast off all of the stitches on the left needle. There should be one loop left on the right needle when you’re finished. Cut the working end of the yarn with scissors so you’re left with about a 6-inch (15-centimeter) tail. Finally, pull the tail through the last stitch with the right needle. To learn how to do cast off variations, scroll down!


