X
wikiHow is a “wiki,” similar to Wikipedia, which means that many of our articles are co-written by multiple authors. To create this article, 13 people, some anonymous, worked to edit and improve it over time.
This article has been viewed 57,317 times.
Learn more...
Want to learn how to build a simple but powerful laser with electronics you already have in your house? We'll show you how to use parts from a desktop computer with a DVD drive to create a fully-functioning red burning laser.
Steps
-
1Lay the desktop computer on its side and open the cover. This should be relatively easily done by unscrewing the screws running alongside of the cover.
-
2Remove the cover. Extract two of the main components, the PSU and the DVD burner.
- The PSU should come right out, and the DVD burner might be anchored down with two small screws. Undo those and it should come right out of place.
Advertisement -
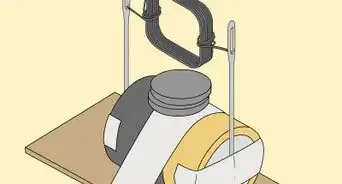
3Extract the heat sinks. After extracting the first two main components, you need to extract the heat sinks; they will easily pop out with no effort and are usually located on the motherboard. The picture above is what the heat sinks look like. The second heat sink will be a smaller version of the one shown, it will be placed directly on top of the motherboard, so when you open the computer and take our components out will see a tiny heat sink sitting on top o what looks like a giant microchip, just pull it out.
-
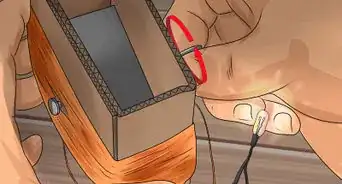
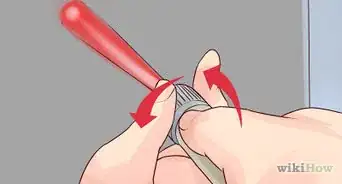
4Open the DVD burner and extract the sled. After extracting the sled, you will need to remove the laser diode located in the sled.
- The sled should be relatively easy to remove, as it is located on the upper face of the burner.
-
5Unscrew the diode head. Once you remove the sled, and file down the soldered metal to make a smooth shape around the base. You should end up with a lense diode that is captured in the picture above. Most DVD burners will have the same set-up. However, if your burner is different, your diode will still look like the one in the picture.
-
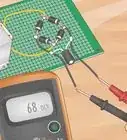
6Press the laser diode into an AIXIS module. These can be purchased on eBay for around $3-8 each, and can be easily assembled and re-assembled.
-
7Ensure you've squeezed the diode into the module. Make sure that you attach long wires into the diode following this schematic.
- Your positive IN will show a thick circle around the attachment point so will your PD (unused). However, your negative will show a thinner circle around its entry point, and they will be arranged in the same order as this schematic. Solder your wires into the proper points and your end product should look like figure two above.
-
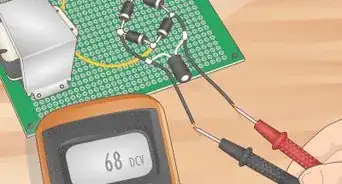
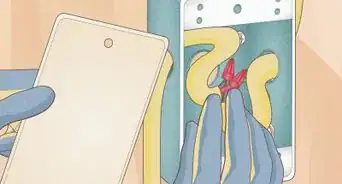
8Do not reverse the polarity. In this step, you will need to be very careful as to not reverse the polarity when soldering wires; make sure you clearly marked your (+) and (-) wires on your laser diode. Solder the positive output wire to the 3 ohm resistor, then continue by soldering the second end of the resistor to the output tongue of your lm 371 module(3). As for your diode's negative wire, solder that directly into the ground tongue of your module(2) and create a wire for running to a negative wire. From your input tongue on your module(1), solder the positive running wire. When soldering it is suggested that use a plastic card is used as a separator all between elements to avoid run off of the liquid metal. If you are new to using a soldering iron, practice on some spare wires first.
-
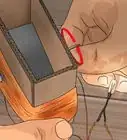
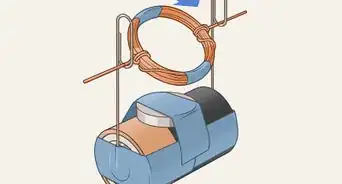
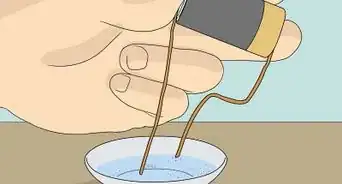
9Drill a ½ inch hole horizontally into your heat sink. After that, clean the whole form (all metal debris), and insert your laser diode assembly into it, making sure the side with the lens sits flush against the edge of the heat sink. After carefully positioning the diode assembly, use thermal glue to permanently affix it into place. Allow ample time for the finished product to dry. (During this time you will start working on the PSU.)
-
10Start working on the PSU. The PSU can be slightly tricky. Break it down into the following steps:
- Clip off all of the white plastic wire connectors.
- Sort the wires by colors; this will make the job way easier.
- Find the black and green wires, clip them, and then tie them together (make sure you cover the exposed area with electric tape)
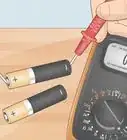
- The yellow wire will be your (+), the red wire your (-).
- Solder the wires to your module wires as directed in step eight.
- You may want to glue the second heat sink to the module chip, since this chip might get really hot.
-
11Make sure all of your wire connections are properly insulated and soldered. Since you're working with a 110V power supply all naked wires must be covered to make sure no exposed wires are rubbing on each other.
-
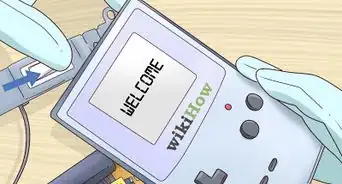
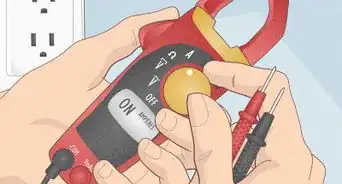
12Put on safety goggles. While wearing safety goggles, make sure that the diode is facing a wall of a hard surface, and plug the PSU into a power outlet. Turn on the power button and enjoy your new laser.
- The laser can run for prolonged periods of time without getting hot since the heat sinks will help dissipate the heat from both the diode and the module.


Advertisement
Community Q&A
-
QuestionWhat is the heat sink for?
 Community AnswerThe laser becomes very hot, and with electronics, heat is bad. With too much heat, components wear out or fail completely.
 -
QuestionWhat’s the most that this laser can burn?
 Phoenix lasersCommunity AnswerThis is a 100mw laser diode, so it could light a match, burn the surface of wood, and possibly cut electrical tape.
 -
QuestionHow do this work?Phoenix lasersCommunity AnswerIt works by using a driver to regulate the power coming from the laser, and from there the power flows into the diode, lighting it up and producing a lot of light, which can be focused into a single point. The heat sink is to make sure that the diode does not overheat, but you still should not run it for a long time, because it still heats up.
Advertisement
Warnings
- Always wear eye protection while operating the laser.⧼thumbs_response⧽
- Make sure you perform the experiment in a controlled environment away from all flammable materials.⧼thumbs_response⧽
- Make sure all of your electrical connections are proper and insulated to avoid any electrical shock or fires.⧼thumbs_response⧽
- This laser will burn through surfaces, so avoid contact with humans, animals, or flammable surfaces and materials.⧼thumbs_response⧽
- Always make sure you have a fire extinguisher and first aid kit on hand.⧼thumbs_response⧽
- Do not perform this experiment unless an adult is present.⧼thumbs_response⧽
- Harm and damage can be done by you or to anyone performing this experiment.⧼thumbs_response⧽
Advertisement
Things You'll Need
-
A desktop computer equipped with a DVD R/RW drive out of which you will extract:
- PSU
- DVD burner
- Heat sinks (2)
- An AIXIZ module
- Soldering iron
- Heat-resistant thermal glue
- Drill with ½ inch metal drill bit
- LM37 drive with 3ohm resistor (can be bought on eBay for around $4)
- safety goggles
- electric tape


.webp)
References
- www.computerhope.com
- www.wisegeek.com
- www.loneoceans.com
- laserpointerforums.com
- hightechdealz.com
About This Article
Advertisement