This article was co-authored by wikiHow staff writer, Danielle Blinka, MA, MPA. Danielle Blinka is a Writer, Editor, Podcaster, Improv Performer, and Artist currently living in Houston, TX. She also has experience teaching English and writing to others. Danielle holds a Bachelor of Arts in English, Bachelor of Arts in Political Science, Master of Arts in English with a concentration in writing, and Master of Public Administration from Lamar University.
There are 7 references cited in this article, which can be found at the bottom of the page.
The wikiHow Video Team also followed the article's instructions and verified that they work.
This article has been viewed 18,572 times.
Learn more...
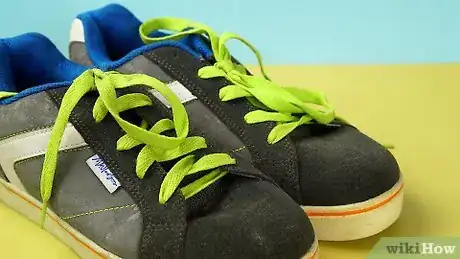
Your new skate shoes look awesome, but they also need to feel good when you land your next ollie! Luckily, you can whip those stiff shoes into shape pretty fast with a few tricks. To prevent blisters as you're breaking in your shoes, dab your heels and any other places where the shoes rub too hard with a little petroleum jelly.
Steps
Wearing Your Shoes
-
1Put on thick socks to help you stretch out the stiff shoes. New shoes can be brutal on your feet, so pull on your thickest winter socks to protect yourself from discomfort and blisters. If you don’t have thick socks, just layer 2 pairs of socks instead.[1]
- You’ll probably have to wear thick socks for a few days after you get your new shoes.
-
2Put on your shoes and lace them loosely so they'll stretch right. Tying your laces tightly might seem like a good idea, but unless you normally lace up your skate shoes super tight, don't do it! To break in your shoes in all the right places, you need to lace them like you normally would.[2]
- Don't worry about this if your skate shoes are slip-ons.
Advertisement -
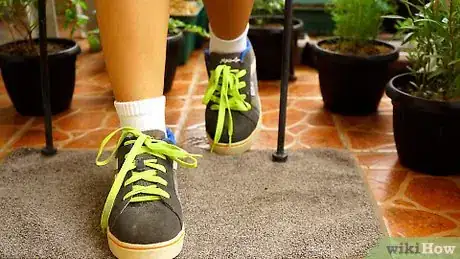
3Walk around in your shoes for 1-2 hours at a time. The thick socks make it possible for you to wear your shoes for 1-2 hours at a time without them hurting you too much. Just put the shoes on and go about your normal business. You don't need to do anything except walk and move around in your shoes at this point.[3]
- If you have stairs, make it a point to go up and down them a few times during each wearing.[4]
- It’s best to do this at the end of the day because your feet naturally swell a little over the course of your day.
-
4Switch to normal socks and wear your shoes for short intervals. Once the shoes start to feel pretty good with the thick socks, change to normal socks. Put on your shoes, lace them loosely, and do your thing. Start with short bursts, like walking in them for 15-20 minutes at a time, and increase as they get more comfortable. Do this 1-2 times a day if you can.
- Take off the shoes immediately if they start hurting or rubbing.
-
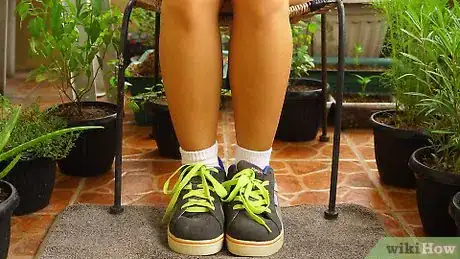
5Wear your shoes while you’re sitting to help them mold to your feet. If you work at an office and mostly sit at a desk, try wearing your skate shoes all day while you're sitting down. Otherwise, pop on your shoes when you're sitting around at home, watching TV, or surfing the web. Even though you aren't walking around, the shoes will still start conforming to your feet.[5]
- For example, put on your shoes before sitting down to watch a movie.
-
6Smear petroleum jelly on your heels and ankles to prevent blisters. Once you start wearing your shoes out and about, you may experience some rubbing at first. To prevent blisters, dab a small amount on key spots, like the back of your heel and at the ankle line, before putting on your shoes.[6]
- Low-tops usually rub the most at the heel and ankle line. Mid- and high-tops provide a little more cushioning.[7]
-
7Skate in your shoes for a few hours if they don't hurt or feel stiff. Most good skate shoes are stiff and need to be broken in slowly. However, if your new kicks don't hurt your feet much when you first get them, you can probably hit your skateboard deck right away and break them in like that![8]
- For example, shoes with vulcanized soles are more flexible than the cup sole variety. They might be fine to take straight to the skate park.[9]
- If the shoes start rubbing or hurting, stop skating and take them off. Try the gradual approach instead.
Using Heat
-
1Wear thick socks so your feet and ankles don’t get burned. You probably don’t need to worry about serious burns from a hairdryer, but there's no harm in playing it safe. Put on your thick winter socks or layer 2 pairs of socks to protect your feet and ankles from the heat.[10]
- The socks will also help stretch out your shoes since thicker socks add more bulk to your foot.
-
2Put on your shoes and tie the laces loosely. Don't tie your laces super tight for this! Lace up your shoes loosely or as your normally would so you'll break in your shoes in the right places.[11]
-
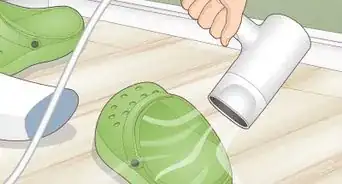
3Blast the tightest spots with your hairdryer until they get warm and soft. Set your hair dryer on medium or high heat. Aim the nozzle at your shoes and hit the tightest spots, like the heels and ankle lines. Once the shoes feel warm and soft, switch off the hair dryer and stand up.[12]
- Pay special attention to any areas on the shoes that feel painful to you.
-
4Walk around in your shoes until they cool off. Wiggle your toes and shift your feet as you walk to help break in the shoes. Continue walking around until your shoes feel cool again.
-
5Heat the shoes and walk around again if they're still not comfortable. If your shoes still feel tight, heat them again using your hairdryer. Then, walk around some more to stretch them out. Do this 2-3 times to make your shoes more comfortable.[13]
- You may need to work on 1 shoe or 1 specific area at a time if they aren't loosening up as fast as you'd like.
-
6Put your shoes in the microwave for 20 seconds as a last resort. Doing this is risky, but some DIYers have had luck with it. Take out the insoles and place your shoes in the microwave. If necessary, do 1 shoe at a time. Zap it for about 20 seconds, then put on the shoes and walk around until they cool off.[14]
- If your shoes have any metal on them, don't heat them in your microwave! If you put shoes with metal components in the microwave, they may spark or cause a fire.
Freezing Your Shoes
-
1Remove the insoles to protect them. This technique could damage or flatten the insoles of your brand-new shoes, which you definitely don't want to do! Take the insoles out of each shoe before proceeding.[15]
-
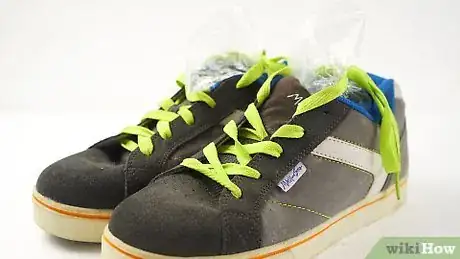
2Fill 2 plastic freezer bags 3/4 of the way with water and seal each one. Run tap water into the freezer bag until it’s almost full. Seal the bag most of the way, then squeeze out the air from the corner before closing the seal tightly. Repeat the process with another bag so you have 1 for each shoe.[16]
- If you’re worried about leaking, place a second bag around the first one before you fill up the inner bag.
-
3Loosen the laces and place a bag of water inside each shoe. Untie the shoes and pull the laces out a little to loosen them. Lower a freezer bag into the first shoe, making sure it goes down into the toe area. Leave the zipper part of the bag sticking out of the top of the shoes.[17]
- Repeat this process with the other shoe.
-
4Tie the laces of each shoe loosely around the water bag. Lace up both shoes just like you normally would to wear them. Don't tie them super tight! Make the laces about as tight as they'd be if you were wearing them on your feet.[18]
- Be careful not to accidentally burst or puncture the bag of water.
-
5Place the shoes in the freezer and leave them overnight. Set your shoes on a flat surface inside your freezer and close the door. Leave them for about 8 hours. The water expand as it freezes, stretching out your shoes in the process.[19]
- Let the ice thaw before you pull the bags out of your shoes.[20]
Warnings
- Avoid canvas shoes if you do lots of tricks since canvas fabric rips and tears if you force them to move like that. Go with suede instead! If you mostly cruise on your board, canvas shoes are fine.[25]⧼thumbs_response⧽
References
- ↑ https://www.vans.co.uk/news/how-to-break-in-your-vans.html
- ↑ https://www.vans.co.uk/news/how-to-break-in-your-vans.html
- ↑ https://www.vans.co.uk/news/how-to-break-in-your-vans.html
- ↑ https://flitanddrift.com/how-to-break-in-skate-shoes-and-other-skate-shoes-guide/
- ↑ https://flitanddrift.com/how-to-break-in-skate-shoes-and-other-skate-shoes-guide/
- ↑ https://www.vans.co.uk/news/how-to-break-in-your-vans.html
- ↑ https://www.skatedeluxe.com/blog/en/everything-about-skate-shoes/
- ↑ https://www.skateboardershq.com/how-to-choose-skateboard-shoes/
- ↑ https://www.skatedeluxe.com/blog/en/everything-about-skate-shoes/
- ↑ https://www.vans.co.uk/news/how-to-break-in-your-vans.html
- ↑ https://www.vans.co.uk/news/how-to-break-in-your-vans.html
- ↑ https://www.vans.co.uk/news/how-to-break-in-your-vans.html
- ↑ https://www.whowhatwear.com/how-to-break-in-shoes/slide4
- ↑ https://www.youtube.com/watch?v=BI61bFDtaDk&feature=youtu.be&t=29
- ↑ https://flitanddrift.com/how-to-break-in-skate-shoes-and-other-skate-shoes-guide/
- ↑ https://flitanddrift.com/how-to-break-in-skate-shoes-and-other-skate-shoes-guide/
- ↑ https://flitanddrift.com/how-to-break-in-skate-shoes-and-other-skate-shoes-guide/
- ↑ https://flitanddrift.com/how-to-break-in-skate-shoes-and-other-skate-shoes-guide/
- ↑ https://flitanddrift.com/how-to-break-in-skate-shoes-and-other-skate-shoes-guide/
- ↑ https://www.glamourmagazine.co.uk/gallery/how-to-break-in-shoes
- ↑ https://www.skatedeluxe.com/blog/en/everything-about-skate-shoes/
- ↑ https://www.skatedeluxe.com/blog/en/everything-about-skate-shoes/
- ↑ https://www.skateboardershq.com/how-to-choose-skateboard-shoes/
- ↑ https://www.skateboardershq.com/how-to-choose-skateboard-shoes/
- ↑ https://www.skateboardershq.com/how-to-choose-skateboard-shoes/

